
Painting with a roller can save loads of time compared to painting the same large, flat surface with a brush. The downside to using a roller is that if you use the wrong roller cover, it can make your paint job a mess, leaving behind marks or bits of fuzz that permanently adhere to the surface once the paint dries. A quality roller cover with the ideal nap thickness results in a nice paint finish that stands the test of time.
Here's everything you never thought you needed to know about paint rollers — including nap types, roller frame size, and how to paint with a roller like a professional.
Video of the Day
Video of the Day
What Is the Nap on a Roller Brush?
The thickness of a roller brush cover is called the nap, and the nap thickness affects the final paint job. The thicker the nap, the more paint can be loaded onto the roller. While thick nap may seem like a way to paint faster since you won't need to load paint as often, it can leave behind an unwanted texture when painting a smooth surface. Thick-nap rollers can also be quite heavy when loaded with paint, leading to fatigue. Generally speaking, the smoother the surface, the thinner the nap required. Here are the different nap thicknesses:
- 3/16-inch to 1/4-inch nap: This is well suited for an extremely smooth surface such as a metal cabinet.
- 3/8-inch to 1/2-inch nap: This is the best choice for standard smooth walls, ceilings, wood, paneling, or acoustical tile.
- 3/4-inch to 1-inch nap: This works best on highly textured surfaces, such as concrete block, stucco, textured plaster, decks and brick.
Like carpets, the materials used to make a roller cover vary from one to the next, as does the depth of the fiber pile. The following are the different types of roller cover materials:
- Natural material: These covers are typically constructed from mohair or lamb's wool, and they work well for oil-based paints. Do not use them with latex (water-based) paints, which will cause the cover material to swell up, resulting in an uneven paint job.
- Synthetic materials: These are a good choice for latex paint. They usually use nylon or polyester fibers. Good synthetic roller covers will have tightly bound fibers that don't pull off when you tug at them. Avoid cheap covers that shed lint.
- Blended materials: These combine natural and synthetic fibers, work with all types of paint — latex or oil-based.
Tip
No matter which material you select, look for a quality shed-resistant product.
Choosing a Roller Frame
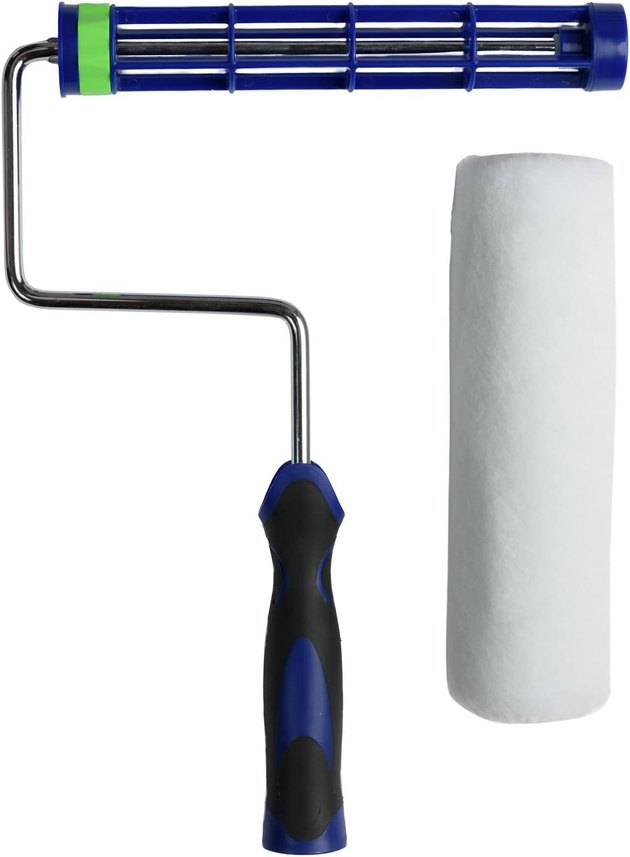
Choosing a quality paint roller — sometimes called a roller frame or roller handle — matters, especially if you plan to paint a large project or keep the roller for years.
The typical size has a nine-inch roller area, designed for a cover of the same size. Use this size for painting interior walls or any large surface. A smaller four-inch size is also common, used for painting furniture or small project pieces. Extra large and intermediate sizes are also available, but it may be difficult to find roller covers that fit.
Choose a roller that feels good in your hand — the handle should be somewhat ergonomic or at least feel sturdy and comfy enough to use for a large project. Also look for a roller that has a threaded socket in the handle; this way you can attach it to any other threaded long handle, such as one from a shop broom. Extending the handle is ideal for projects such as walls.
Give the roller a spin; look for a roller frame that spins easily and smoothly.
Prepping and Priming the Surface
A successful paint job is dependent on the prep work you do beforehand. Here are some tips to prep your room before you paint with a roller:
- Mask off any areas you don't wish to paint. If painting a wall, for instance, place a drop cloth on the floor in front of the wall.
- Cover baseboards and trim with painter's tape or newspaper taped in place. While a skillful painter might be able to paint with a brush without masking off adjoining edges, rollers invariably spray small droplets that you might not even see until they are dry.
- If you wish, you can also mask off the perimeter of the ceiling to protect it while cutting in the paint.
- Make sure surfaces are clean and dust-free before painting or priming. Priming the project isn't always necessary. For instance, if painting walls with a similar color, you can skip the primer.
- For fresh or patched drywall, or when painting over a previous glossy paint color or a drastically different shade, primer is worth the expense. Some paints, often sold as "one-coat" or "primer included," do not require primer at all.
Cutting In With a Brush
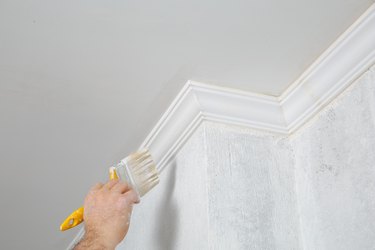
Even if using the absolute best roller cover and handle for the job, you'll still need a paintbrush in most cases to deal with areas you can't quite reach with the roller. For instance, when painting the walls of a room, the inside corners and the areas along the ceiling or window trim are notoriously difficult to reach with a roller. Cutting in refers to the process of painting these out-of-roller-reach areas with a brush. An angled sash brush is the best tool for the job in this case.
How to Cut In With a Paint Brush
- Using overlapping strokes, paint a band along the edge of the ceiling, the edge of window and door trim, and any other area the roller can't quite reach.
- This paint band should extend at least 2 to 3 inches, which will allow you to roll the paint quickly and efficiently in the next stage.
How to Load a Paint Roller
Once all cutting in work is done, the fun part arrives. Here's how to correctly load a paint roller:
- Stir the paint and pour enough into the paint tray that it fills the deeper well portion but without covering the angled, shallow area.
- To load the roller, submerge it about halfway into the well, then distribute the paint over the roller cover by rolling it back and forth on the tray's ramp.
- Continue dipping and rolling several more times, until the entire roller cover is coated in paint.
- Use the angled portion of the tray to squeeze out excess paint from the roller; too much paint on the roller will lead to drips and splatters when you paint.
- You should not see any dripping paint when you lift the roller out of the tray.
Tip
If working out of a 5-gallon bucket instead of a paint tray, you can insert a roller screen into the bucket first. This serves the same purpose as the angled portion of a paint tray, removing excess paint from the roller.
How to Apply Paint With a Roller
It is best to roll an entire wall in one session. This will prevent edges from drying and producing lap marks.
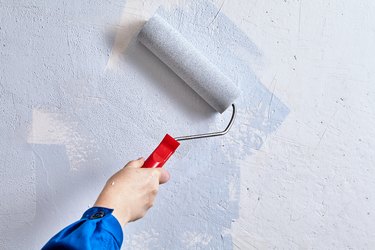
- Load the paint onto the wall by rolling it in a W shape near the top of the project surface. The lines of the W should be about 2 feet long.
- Distribute the paint over this area with additional W patterns, adjusting the roller to a slightly different angle each time. Painting this way, instead of in parallel overlapping rows or columns, provides the best coverage without lines or marks. Slow, even strokes will prevent paint from spraying and splattering off the roller. Continue working the paint until the roller needs more paint.
- Apply more paint to the roller, then continue painting where you left off, again working the roller at random angles, overlapping the paint strokes slightly each time. Let the weight of the roller do the work as you paint; don't apply extra pressure, as this may make the paint run.
- As is also true with brushing, the best technique is to "keep a wet edge"—which means to paint in a manner that edges of the roller strokes are not allowed to dry out fully before you overlap them with the next pass of paint.
- Once the surface is entirely covered, inspect the surface from various angles to look for thin spots or missed areas; cover these with additional paint.
- Allow the paint to dry completely. If necessary apply a second coat.
Tip
If you need to interrupt your work, wrap the paint roller in plastic and store in the refrigerator; the roller can be stored this way for several hours, or even overnight, without drying out.
How to Clean Paint Rollers
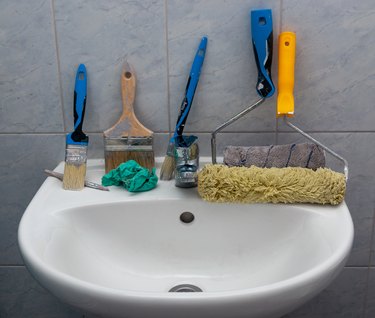
Cleaning a roller coves takes a lot of water or solvent, and out of environmental concerns, many people choose to simply discard them after each use rather than wasting many gallons of water trying to clean them. But good roller covers can be cleaned and reused many times — and this is probably the best strategy with high-quality mohair or lamb's wool covers. Cleaned thoroughly after each use, a good roller cover can last for years. As with brushes, clean paint rollers and covers immediately after use, before the paint dries.
The methods for cleaning your roller will depend on what type of paint you applied while using them.
How to Clean Latex Paint Off a Roller
- Remove the cover from the roller assembly while wearing rubber gloves.
- Run the roller cover under warm water in a washtub or outside. Rinse away the bulk of the excess paint.
- Apply a bit of dish soap to help loosen the paint from the fibers, and work the soap deep into the fibers with your hands.
- Rinse the roller cover in a bucket of clear water or under a tap as you work out the soap and paint residue. Continue rinsing until the water squeezed out for the roller cover is clear.
- Squeeze out excess water, then hang the covers from loops of wire or twine, tying them to a clothesline. Do not set them down, even on edge, as it may affect the fibers.
How to Clean Oil-Based Paints Off a Roller
For oil-based paints, discarding the roller cover is often the best strategy, since solvents are expensive and messy to work with. If you do want to clean the roller cover, read the paint can for recommendations on the best solvent to use. Mineral spirits or paint thinner is the usual recommendation. Here's how to clean oil-based paints off a roller:
- Soak the roller cover in a plastic tub of the solvent; the paint will gradually settle to the bottom of the tub. It may take several batches of fresh solvent to remove all the paint.
- Avoid touching the solvent or breathing its fumes, as they may be harmful.
- Allow the roller cover to dry in the air in a well-ventilated location once the solvent has removed all the paint.
- After the roller cover is clean, also clean the roller frame. Scrub off any paint residue from the handle and moving parts. Unless you clean it after each use, the roller frame may quickly get crusted with dried paint.
- Also clean your roller tray. If you've used a plastic liner, this can be discarded. Otherwise, make sure to scrub off all paint traces from the tray.
Tip
Oil-based paint will eventually settle out of a container of solvent. Pour off the clarified solvent and store it in a closed container for the next use. The remaining paint pigment can be disposed of as household trash.