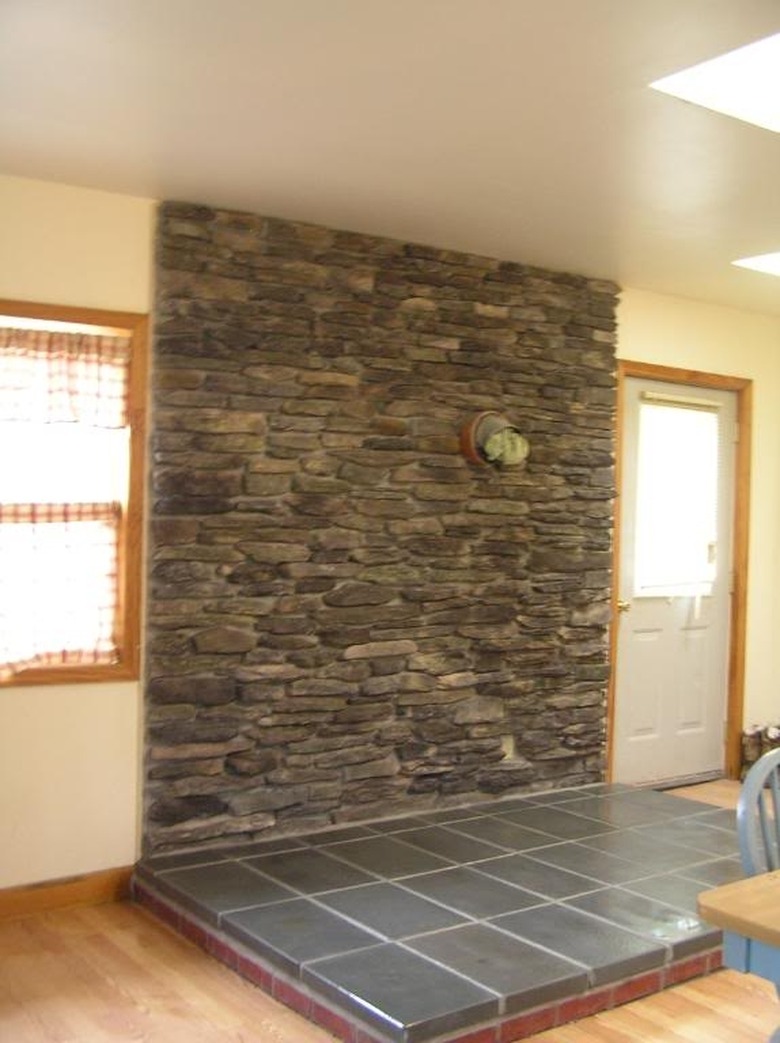
How To Build A Stone Veneer Wood Stove Backing
Things Needed
-
Gloves
-
Stud finder
-
Measuring tape
-
Marker or masking tape
-
Hammer
-
Tin snips
-
Drill and screwdriver bits
-
Thin sheet metal
-
Metal wall ties and screws
-
1-inch non-conductive wall spacers
-
Quick drying concrete
-
Plastic drop cloth
-
Bucket
-
Trowel
-
Natural flat stone to build back wall
Tip
If the stove ventilation pipe will run through the stone veneer wall, measure the size for the hole. Build the wall high enough to cradle the piping, then finish constructing the wall around it. Once the pipe is in position, seal it to the stone wall using a flexible stove pipe sealant.
Purchase natural flat stones from a home improvement center or a stone yard. Give them the dimensions and they will be able to tell you exactly how much stone you will need for the project.
It will be easier to build a level wall if you keep your materials organized.
Warning
Wear gloves when using concrete to avoid chemical burns to the skin.
Contact the manufacturer of your wood stove regarding the appropriate distance between any combustible items and walls. Install a heat shield for your stove before building the stone veneer back wall. Heat shields are model-specific and attached to the rear of the stove with screws. Do NOT use a heat shield that is not manufactured for your particular stove.
Wood stoves can be a cost effective source of household heat in the winter. A stone veneer back wall can offer all of the lasting beauty and elegance of a fireplace, as well as hide an all important safety feature. A 1-inch air ventilation space is necessary to avoid a buildup of dangerous levels of heat that can cause a devastating fire. A small amount of natural flat stone and quick drying cement will save you money and quite possibly your home.
Step 1
Check with the wood stove manufacturer to determine the recommended distance between the back wall and the stove.
Step 2
Locate the wall studs along the back wall using a stud finder. Mark them with a marker or masking tape.
Step 3
Attach one-inch non-conductive ceramic spacers 6 inches apart along the vertical length of each side of the area where you will be building the stone veneer wall. Anchor the spacers into wall studs.
Step 4
Measure a thin strip of sheet metal to serve as the foundation of the stone veneer wall. Trim with tin snips and secure to the floor using galvanized nails.
Step 5
Spread out a plastic drop cloth and make separate piles for the various sizes of flat stone. Mix a batch of quick set concrete for the project. The concrete should have the consistency of a thick soup.
Step 6
Apply a thin layer of concrete with the trowel and begin layering the stones. Carefully construct each layer as even as possible. Every 1 ½ feet to 2 feet place a metal wall tie over the stones and bend the end up against the wall. Screw them into the wall stud using a drill with a screwdriver bit.
Step 7
Spread a thin layer of concrete over the stones and the end of the wall tie resting on the stone. Cover with the next layer of stones. This will anchor and stabilize the stonewall. Provide an inch of ventilation space between the top of the stone wall and the ceiling.
