How To Glue Acrylic To Wood
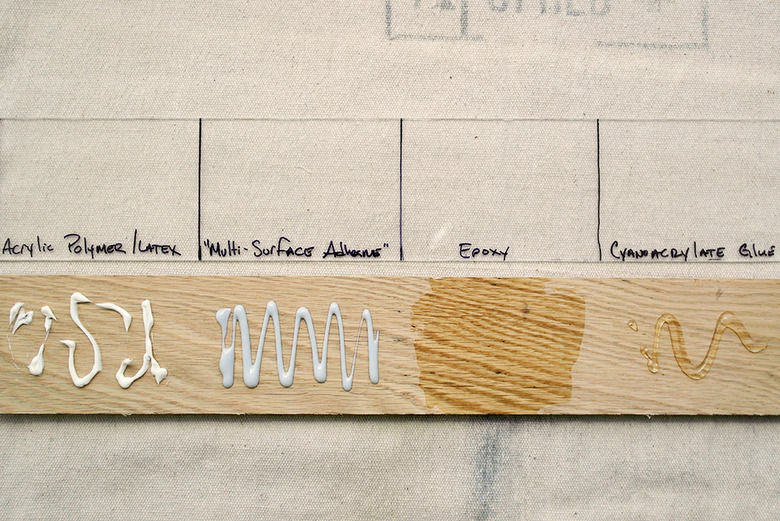
Pictured above are four glues which can be used to adhere acrylic to wood – Acrylic Polymer, multi-surface adhesive, epoxy and Cyanoacrylate glue (a.k.a. Super Glue). While you're certainly not going to use four glues on your project, understanding how each glue reacts with the two substrates will help you choose the best adhesive for your next project.
Before you start, you'll want to gather the necessary materials. Some glues, particularly those in 10-ounce tubes, require the use of a caulk gun. These construction-grade adhesives are sold in sealed tubes and require the pressure from a caulk gun to dispense properly. Blue painter's tape can be used to mask off any area where you don't want glue. It's also a good idea to work on a canvas drop cloth in case of spills or drips.
Things Needed
-
Gloves
-
Safety Glasses
-
Drop Cloth
-
Caulk Gun (optional)
-
Tape (optional)
-
Sandpaper (optional)
-
Acrylic
-
Wood
Tip
If the wood you're working with has any finish on it, you'll want to sand that off or use sandpaper to rough up the surface for proper adhesion.
Acrylic Polymer/Latex Adhesive
Acrylic Polymer/Latex Adhesive
Commonly sold in larger 10-ounce tubes, these adhesives are perfect for large applications.
To use these types of adhesives:
- Cut the tip of the tube to desired thickness
- Puncture the seal on the top of the tube
- Using a caulk gun, dispense the adhesive in an even and consistent pattern
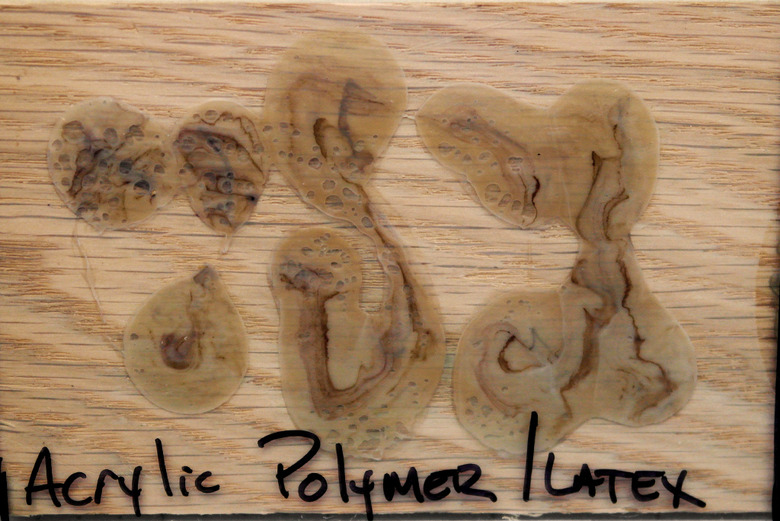
Latex adhesives are typically thicker and can even be applied on vertical surfaces without dripping. Buying adhesives in larger tubes might not be wise for a smaller job, but for larger applications, this is the preferred method. Below you'll see how acrylic polymer/latex adhesives dries once it's fully cured.
Multi-Surface Adhesives
Multi-Surface Adhesives
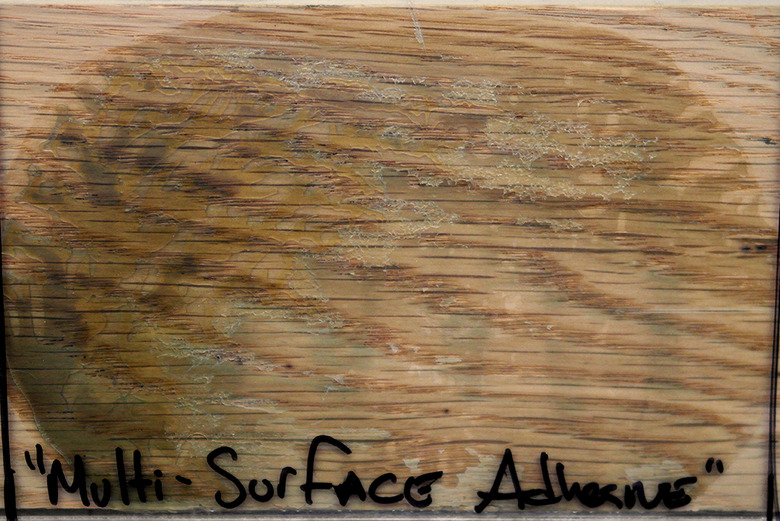
Coming in a wide variety of colors, bottle shapes and brands, these adhesives are more for a general use and are readily available in most hardware and craft stores. These adhesives work well on many surfaces and can be great for multi-media projects. Using a zig zag pattern for even distribution, applying these glues is slightly more difficult as they are thinner and will spread out once pressure is applied to them. Shown below is a multi-surface adhesive once fully cured.
Two-Part Epoxies
Two-Part Epoxies
As the name implies, these adhesives are comprised of two parts, a resin and a hardener. Epoxies are commonly purchased in a dual-ended syringe and squeezed out using a tandem plunger. To use a two part epoxy you'll need to dispense the two parts onto a surface and then mix them by hand using a popsicle stick or dowel rod.
Tip
Epoxy sets up quickly. Read the packaging to determine how fast your epoxy will set up and work quickly.
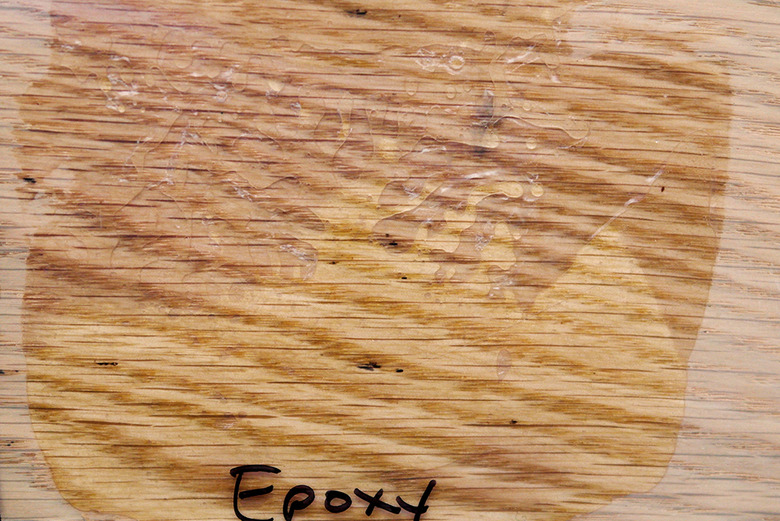
After applying epoxy to the wood surface, be sure to spread it out evenly to ensure proper adhesion. Once the two materials are joined together do not move either materials until the epoxy is fully cured (as shown below). Once cured, epoxies will dry crystal clear and won't yellow over time.
Tip
For best results when using two part epoxy, be sure you're in an environment that is approximately 71°-75°. If you need more working time with the epoxy, put it in the refrigerator for a few minutes prior to use — it'll slow the reaction time.
Cyanoacrylate Glue
Cyanoacrylate Glue
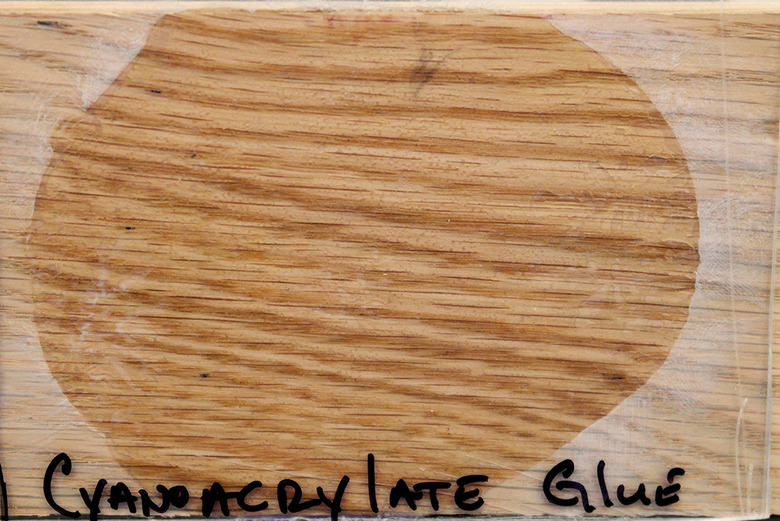
Commonly referred to as "Super Glue," cyanoacrylate (CA) glue is a common, all purpose adhesive. Available in liquid and gel forms, cyanoacrylate glue is ideal for adhering many kinds of materials together. For horizontal surfaces, the liquid form will work best since it will spread evenly. For vertical situations, the gel form will not drip and provide quick adhesion.
Warning
Cyanoacrylate glue will create a white haze around the glued area.
If you can hide the glued area, the acrylic polymer glue is going to give you the strongest bond. If the glued area will be visible, however, the two part epoxy will yield a crystal clear glued area.
