How To Find A Bad Connection In House Wiring
Things Needed
-
Screwdriver
-
Voltage tester
When the lights suddenly go out or an outlet stops working, you have a bad connection in the circuit. It doesn't have to be a cause for alarm, because 90 percent of the time the problem is easily traceable and fixable. In the small number of cases where there is a short in the wall where you can't see it, following a logical diagnostic investigation helps you zero in on the exact location of the problem so you don't have to take apart your walls looking for it.
Step 1
Look for a tripped breaker in the main panel. If you don't find one, look around the house for tripped Ground Fault Interrupting (GFI) outlets. If there is a tripped GFI on the circuit experiencing the outage, it interrupts power to every element installed after it in the circuit. An outdoor GFI trips if an outdoor appliance is plugged into it when the sprinkler comes on. Reset a tripped GFI by pushing the reset button. You should unplug whatever is plugged into it for it to reset.
Step 2
Reset the breaker if you find one that is tripped in the panel. If it stays on, try the problem outlet or light again. If the breaker trips again, the circuit may be overloaded or there may be a problem with the wiring in the light or outlet.
Step 3
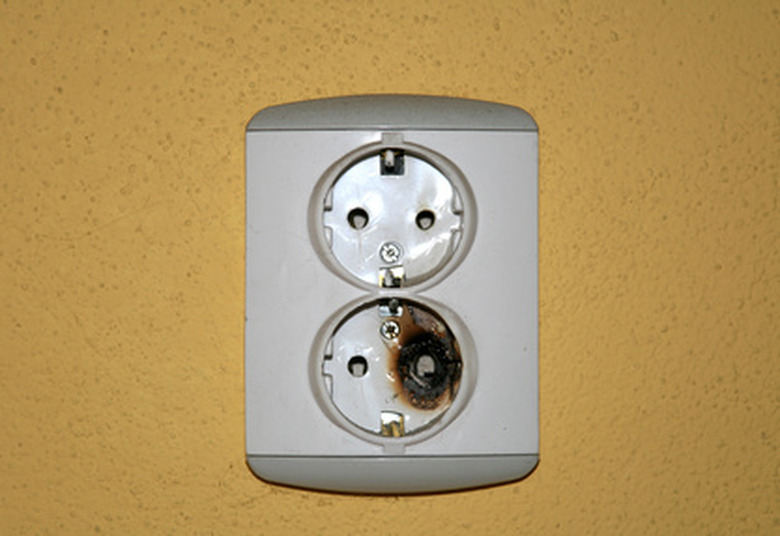
Unplug all the appliances and turn off all the lights on the circuit, then turn on the breaker and try the problem fixture again. If the breaker stays on, the circuit is probably overloaded. Transfer some appliances to a different circuit. If the breaker trips, look for signs of shorting in the light fixture or outlet. You may see black marks on the wall, or smell smoke. Remove the outlet and replace it. If it is a light fixture, you can either replace it of have it inspected for faulty wiring.
Step 4
Look for a short circuit or disconnected wires if no breaker was tripped, you can't find any tripped GFIs, and there is no power to an outlet or light. Inspect the fixture first. Unscrew the cover plate of an outlet with a screwdriver and look at the terminals with a flashlight. If you see a loose wire, reconnect it after first turning off the breaker that controls the circuit. If a light won't go on, try replacing the bulb. Remove the switch cover and look for loose wiring. Finally, remove the light fixture and inspect the wiring. Be sure the switch is off when you do this.
Step 5
Test the wires connected to the dead fixture with a voltage tester. If the tester shows power, the fixture itself is faulty.
Step 6
Try nearby outlets or lights if you can find no loose wiring in the problem fixture. If there is a problem in the wall, you can probably find other nonfunctioning fixtures. Check the label on the panel to find the circuit to which the problem fixture is attached. Work your way back toward the panel from the dead fixture, trying lights and outlets, until you find one that is working.
Step 7
Plug a light into a dead outlet on the circuit, and turn it on. Have someone watch the light while you remove the cover of the live outlet or switch and wiggle it with a wooden stick. If the light flickers, there is probably a loose connection in the outlet or switch. If you get no response, tap the wall between the working outlet and the dead one. If wires in the wall are loose, you may momentarily make a connection, and the light will flicker. If it does, stop there and mark the wall for excavation and repairs.
Step 8
Check the continuity of the circuit breaker if the circuit is dead but it hasn't tripped. Place one lead of a voltage tester on the neutral bus bar of the panel and the other on the terminal screw of the breaker. If you get no reading, replace the breaker.
Tip
Sometimes rodents partially chew through wires inside the walls. If they are still intermittently connected, electricity can arc between them. You should be able to smell smoke if this happens.
Warning
Address faulty wiring issues immediately. If you have a partially open circuit in a wall, it can start a fire.
