How To Build A Laundry Drying Cabinet
We may receive a commission on purchases made from links.
Laundry day is not the time to find that the clothes dryer isn't working. When placed in a drying cabinet, laundry that might otherwise take days to dry and harbor mold and mildew is quickly dried with little more effort than hanging it up and flipping a switch. A homemade laundry drying cabinet can be as simple as plastic sheeting hung around a drying rack with a fan to circulate the air. You can also create an elaborately heated unit that dries the clothes nearly as quickly as a standard clothes dryer.
Prepare a Temporary Clothes Drying Cabinet
Prepare a Temporary Clothes Drying Cabinet
A temporary solution to drying clothes inside a house or garage includes a drying or clothing rack, plastic sheeting, and a fan. Set up the rack and then staple plastic sheeting to the ceiling to make an enclosure. Leave at least 12 inches of clearance between the plastic and rack for air circulation. Set up a fan inside the enclosure to circulate the air through the wet clothing.
Instead of a drying rack, you might consider hanging an old crib spring, a ladder from ceiling hooks, or a few 1x2 boards screwed directly into the ceiling joists. Add a surround made from plastic sheeting or even old bed sheets. Hang the clothes on hangers and then add a fan to circulate the air around the wet clothes.
Build a Laundry Drying Cabinet
Build a Laundry Drying Cabinet
Using 2x4 boards and wood screws, build a tall box to fit the available space. If you're placing it where the dryer would normally be installed, 30 to 36 inches wide and at least 18 inches deep and 6 feet tall is generally large enough to hold a load of laundry. Cover the outside of the frame (three sides and the top) with 3/4-inch plywood cut to size and screwed to the 2x4 frame. Add a simple louver-type door with a latch or a rod for a plastic curtain.
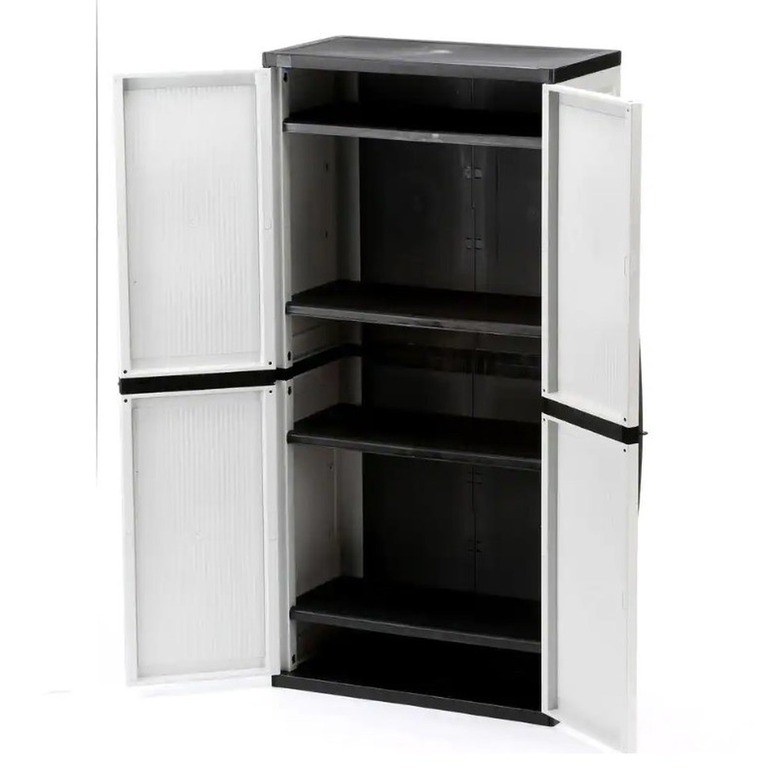
Alternatively, purchase a storage cabinet or freestanding garage cabinet that fits the space and your décor. Inside the cabinet, depending on your needs, you can install a dowel for hangers, vinyl coated wire racks for drying sweaters and swimsuits flat, or a shoe rack to dry wet sneakers.
If desired, you can add a 4-inch hole in the back to accommodate a dryer hose that can be attached to the dryer vent. A 4-inch exhaust fan can pull the moist air out of the unit and push it out of the dryer vent. If a vent is not an option, consider using a moisture absorber in a bucket or plastic container to reduce moisture in the air. You can also add a small fan to circulate the air around the clothing.
Consider a Dryer Closet
Consider a Dryer Closet
A spare closet can easily be converted into a dryer closet using a dehumidifier and fan. An electric dehumidifier generates a small amount of heat while pulling moisture from the air and your laundry. Wire mesh or a rack installed 6 to 8 inches above the unit will prevent clothing from accidentally touching the unit. Adding a fan moves the air around your clothing to increase the effectiveness of the dehumidifier.
Add a door vent or change the door to a louvered type to allow extra air circulation through the closet. If the closet is on an outside wall, consider adding a small exhaust fan to pull moist air out of the space. To protect the interior of the closet and prevent mold growth, consider painting it with Kilz, Perma-White or other moisture- and mold-resistant paint. Remove the carpet and paint the subfloor as well or cover the carpet with plastic to protect it from your damp laundry.
Use Caution With Heating Units
Use Caution With Heating Units
While adding a heating unit will speed drying inside your dryer cabinet or closet, avoid using a small space heater. If the heating element comes into contact with plastic, wood, or fabric, there is a chance of overheating and fire. In general, a space heater should be located at least 3 feet from any combustible items, including your wet laundry. In addition, be sure that your smoke detectors are up to date and equipped with fresh batteries.
