How To Replace A Sunken Tub
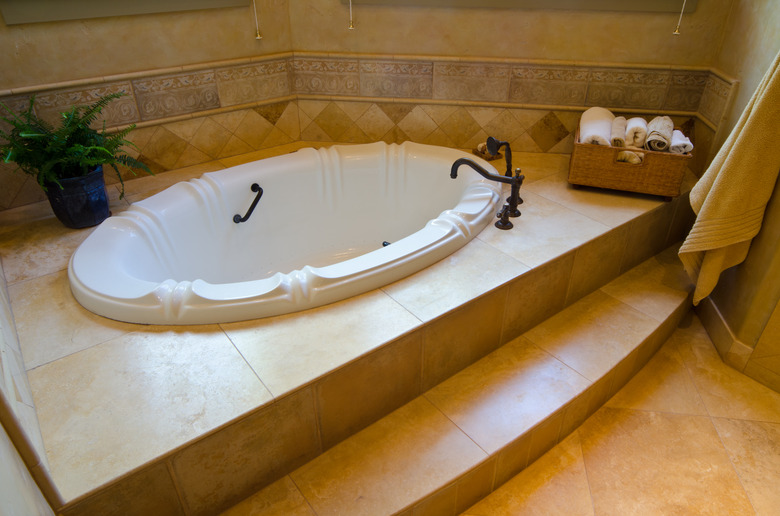
Sunken tubs provide a luxurious, romantic feel to your bathing. In the 1970s it was popular to simply drop a tub in, with or without shag carpeting, below the bathroom floor. Bathers had only to step — or sometimes stumble, if they weren't careful — into the tub. Modern versions of sunken tubs are often mounted a little higher in the floor, sometimes even inside a platform, instead of flush with the floor. With age and misuse or even just to update your bathroom's look, removal and replacement become necessary.
Prepare for Removal
1. Shut Off the Water Supply
Turn off the water leading to the bathroom or to the tub specifically. The shut-off may be with the tub plumbing, at the water heater or at the water meter. Open the tub faucet and allow remaining water and pressure to drain.
2. Locate the Plumbing Access Panel
Locate and access the bathtub plumbing, both water controls and drain assembly. Each installation is different. If the tub is sunken completely below the floor, the plumbing is likely to run underneath the tub in the basement. Bathtubs built into a platform will have plumbing access either in the wall or in the platform.
Look at the tub faucet and drain to get an idea of the general area and remove any decking from the platform, if necessary. Generally you can pry the sheathing or cut carefully with a knife or saw to get to plumbing without an access panel.
3. Remove the Faucet and Spout
Remove the tub faucets and spout. These may simply screw off or come unattached by removing a small screw under the fixture. Unscrew the overflow cover plate likewise. Save the fixtures for reinstallation if desired.
Remove the Existing Sunken Tub
1. Disconnect Supply and Drain Pipes
Unhook the bathtub P-trap and drain pipe, either pulling free or turning with a drain pipe wrench. Remove the water supply lines as well.
2. Remove Floor Covering Around Tub
Remove floor covering, such as ceramic tile, to expose the rim of the tub where it enters the floor or platform. Score the tile or other material with a utility knife or cut away carefully with a reciprocating saw. Work in a way that makes installing the replacement material easier, cutting back to a joint or seam and avoiding damage to the underlayment.
3. Break the Rim Free
Slide a utility knife underneath the sunken tub rim, where it meets the floor or platform. Dig any caulk or adhesive away, breaking the rim free. Pry the edges up with a crowbar, working around the edges like a bottle cap.
Pull Out the Old Tub
1. Lift Old Tub Out
Lever the tub up and out once the tub seal is broken. Slide 2x4s underneath the tub rim to help hold it out. Lift the tub out for removal; this may take several people to accomplish. Alternatively, score the tub surface with a reciprocating saw to cut through the material. Divide the tub into thirds and cut accordingly.
2. Remove Old Mortar
Chip away any mortar present after tub removal. Used to level the tub and provide support, it conforms to the old tub and cannot be reused. Use hammers and crowbars.
Prepare to Install New Tub
1. Read Manufacturer's Specifications and Instructions
Read the tub manufacturer's instructions carefully before installing a new tub. Exact specifications and procedures may vary; always follow the tub directions to avoid voiding the warranty.
2. Measure and Amend Existing Space
Measure the replacement tub height to ensure a good fit. The sunken tub lip usually touches the platform or floor or has a small gap easily filled with silicone caulk. Compare the tub measurement with the floor or platform opening.
If the opening is too large, fill in the bottom with a sheet of plywood or a layer of thin-set mortar to make up the difference. If the opening is too small, raise the platform or create a thicker floor surround and cover it with a waterproof underlayment, topped with flooring or other material as desired.
Install New Sunken Tub
1. Fill Space With Mortar
Mix a batch of thin-set mortar or concrete according to the tub manufacturer's instructions. Pour about 50 pounds of mortar in the middle of the tub installation opening, making a mound rather than spreading it out.
2. Set and Level New Tub
Set the new tub in place while the mortar is still fresh. Wet mortar will easily level out under the weight of the tub, creating a level and solid support. Lay a carpenter's level on top, running side-to-side and front-to-back, to ensure the tub is level. Place a 2x4 on top and tap firmly with a hammer to adjust slightly, until the tub is level. Allow the installation to dry 24 hours minimum.
Attach Preexisting Plumbing
1. Attach Supply and Drain Pipes
Reattach the plumbing, using a wrench to tighten water lines and the drain pipe. Slip the P-trap into position. Install the faucets, spout and overflow plate according to manufacturer's instructions. Turn on the water to ensure proper operation.
2. Reinstall Floor or Wall Material
Reinstall any flooring or wall material cut away either to reveal the old tub lip or to access the plumbing. Create a new access panel from a sheet of plywood, drywall or similar material, for plumbing without one; screw into a platform stud, floor joist or wall stud to attach. Refinish the walls, platform or floor as appropriate.
3. Seal Seams With Silicone Caulk
Spread a bead of silicone caulk along any seams formed during installation, including the entire rim of the tub. Ensure that the caulk completely fills every gap.
