How To Compost In A 5-Gallon Bucket
We may receive a commission on purchases made from links.
There's no need for a gigantic compost bin or a spendy store-bought system to give composting a go. A 5-gallon bucket is an ideal vessel for starting a simple composting setup. Once you get the hang of how it works, you may want to move up to a larger composting container, such as a trash can, or make a few more bucket composters to handle more materials at once. The bucket method is ideal for regular layered composting rather than worm composting, as a full 5-gallon bucket is too deep for the worms.
Making the Compost Bucket
Making the Compost Bucket
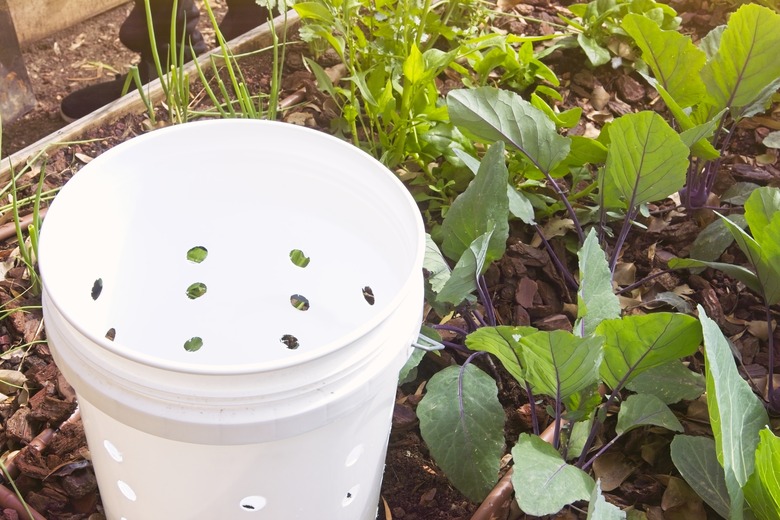
Find a clean 5-gallon bucket with a tight-fitting lid, as the lid helps keep animals out of the composting materials. A lid that locks in place also makes it easier to mix the compost by rolling the bucket a few times. Drill 1/2-inch holes every few inches around the perimeter of the bucket near the bottom. Move up several inches and repeat with another ring of holes around the bucket and then do the same near the top. Anywhere from 15 to 20 holes is enough.
Repeat the process with holes every several inches around the bucket lid and the bottom of the bucket for about 15 to 20 holes each. These holes allow for ample airflow, as oxygen is necessary to break down the organic matter into compost. The holes in and near the bottom of the bucket prevent water from collecting in the bottom of your DIY compost bin. Pull off and discard any bits of plastic stuck to any of the drilled holes, as you don't want the plastic to end up in your compost.
Composting Greens and Browns
Composting Greens and Browns
Organic matter used to make compost breaks down naturally on its own over time. Layering proportions of compostable green and brown matter helps it break down more efficiently. Green matter is high in nitrogen and includes fresh, organic material, such as grass clippings, wilted lettuce, and produce scraps from the kitchen or garden. Coffee grounds and used tea bags are also considered green for composting purposes due to their nitrogen content.
Brown matter is high in carbon and generally drier than green matter. Dried leaves, dead branches, plain cardboard, and paper grocery bags are all brown matter. Straw, sawdust, and wood chips are also brown matter. Scrap plain paper is also safe to use as a brown element in the compost bucket.
Using Your Homemade Compost Bucket
Using Your Homemade Compost Bucket
Find a location outdoors for your compost bucket that's out of direct sunlight and then place a handful of twigs inside the bottom of the bucket to help prevent the compost material from clogging the holes. If you wish, prop up the bucket on a few bricks or stones to allow some airflow through the bottom. Leaving it on the ground also works, though, provided excess moisture can drain out.
Layer brown and green compost materials using about triple the amount of browns as greens. For instance, put in 3 inches of brown matter, 1 inch of green matter, and then repeat. The top layer should be brown, or you could add a thin layer of potting soil or topsoil to the top to help prevent odors. Pour some water over the top so all the layers are wet and then place the lid on the bucket. Roll the bucket around to help mix the green and brown materials.
Let the bucket sit for two days and then remove the lid and add more green and brown matter if the bucket isn't very full. Add water if the mix seems completely dry and then replace the lid and roll or shake it again. Wait two more days and repeat the process but stop adding more material when the bucket is 3/4 full. At that point, stop adding more matter and instead stir or roll the bucket every other day. In around six weeks, the material should look dark and rich, like soil. At this point, it's ready to mix into your garden soil.
