How To Paint A Ceramic Tile Floor
We may receive a commission on purchases made from links.
Painting a ceramic tile floor is possible, and it can greatly improve the look of outdated flooring. It's also a lot less expensive than ripping out and replacing old tiles. If you do decide to paint, it's important to do the job correctly, especially in high-traffic areas and those where moisture is present, like your kitchen or bathroom floor.
If you get it right, you can change the color of your tiles, and your floor will look amazing. But if you get it wrong, you may find yourself living with chipping, peeling, or bubbling paint. Here's what you need to know about giving your floor a successful makeover with paint.
Best Paint for Tile
Best Paint for Tile
A lot of sources will suggest using regular wall paint, such as acrylic latex or acrylic enamel paint, to paint a tile floor. Some recommend starting with a primer to improve the bond between the paint and the tile. This is good advice in general because it helps standard paint stick to slick surfaces like tile or metal, but it doesn't make the topcoat of paint itself any stronger. Wall paint simply can't handle the wear and tear — and dirt — of foot traffic.
Another option for painting tile floors is two-part epoxy paint. This is a tough material that is typically used for painting concrete garage floors or even pool decks or patios. Some of these products may be suitable for tile floors, but epoxy paint usually comes in unappealing colors and has an industrial look (think: matte battleship gray), so it's probably not a great fit for your tile makeover, whether you're painting your laundry room, kitchen, or bathroom floor.
Happily, there is a better option that makes painting a ceramic tile floor an ideal DIY project. Rust-Oleum makes a special floor coating system (buy it online or at your local home improvement store) that requires a lot less prep work and makes the job much easier. This easier method is the one we recommend for DIYers and is the process we will explain here. The system includes a colored base paint and a clear protective topcoat. The base colors include black and a modest range of grays, blues, greens, browns, and tans.
Things Needed
-
Vacuum cleaner
-
Scrub brush
-
Mop and bucket
How to Paint a Ceramic Tile Floor: A DIY Tutorial
How to Paint a Ceramic Tile Floor: A DIY Tutorial
1. Clean the Floor
Before applying floor tile paint, empty the room and vacuum up any loose dirt or debris. After that, you need to scrub the floor like you've never scrubbed it before. This job is going to take more than just your ordinary floor cleaner. Working in sections, use a tough cleanser and degreaser, like Krud Kutter or trisodium phosphate (TSP), and a stiff scrub brush to clean the floor. Rinse the floor in small sections as you clean, using a mop and clean water. Let the entire floor dry completely.
2. Make Repairs
Now that your floor is nice and clean, take a hard look at it. If you see any cracked or broken tiles, repair or replace them before you paint the floor. Painting over cracks and chips will really make them stand out and will detract from your paint job. Clean up any dirt or residue from your repair before moving on.
Tip
After you've cleaned and fixed the floor, the dirty jobs should be finished. You may wish to take off your shoes at this point and work in your socks. Doing so will ensure that dirt from your shoes doesn't get tracked onto the clean floor as you work.
3. Tape Off the Baseboards
Apply a strip of painter's tape along your baseboards. This will prevent you from accidentally getting paint on them as you paint the edges of your floor. If your baseboards are also in need of some love, you can remove them and then repaint and/or replace them after you paint your floor.
4. Apply the Base Coat
Begin applying the first coat, or base coat, of your floor painting system by cutting in around the edges of the room with a paintbrush. You can then finish the base coat by rolling it onto the floor with a long-handled paint roller and a 3/8-inch-nap roller cover. As when painting walls, keep a wet edge to prevent an uneven finish, and make sure you don't paint yourself into a corner. Paint the tiles and all of the grout lines evenly for a consistent, monochromatic finish. Allow the base coat to dry for at least six hours.
5. Apply the Topcoat
After the base coat has dried, apply the topcoat to your floor. Use the same process as before, cutting in around the edges of the floor with a brush and then rolling out the rest of the floor. Use a 1/4-inch-nap roller with the topcoat. Allow the painted surface to dry for 24 hours before walking on the floor and allow 72 hours before putting your furniture back in the room to avoid unsightly scuff marks on your new floor.
Tip
Don't worry if your topcoat looks milky in the can or when first rolled onto the floor. It will dry clear.
Painted Tile Floor Maintenance
Painted Tile Floor Maintenance
Once properly sealed and painted, you will care for your new and improved floor the same way you did before. You'll want to sweep or vacuum the floor when you notice dirt, dust, or debris. The best way to mop the floor is with a nonabrasive mop or sponge along with a mild cleanser. Always use liquid cleaners as opposed to powders, which can be abrasive enough to scratch the finish.
Never use bleach on your painted floor, and promptly rinse away any cleaning agents you do use. Even a mild cleanser can damage the floor if it's allowed to sit for an extended period of time. Ideally, you should sweep or vacuum your tile floor once a week. You should do a deeper cleaning with a mop once a week in the bathroom or once every two weeks in the kitchen. Wait at least seven days after painting your floor to mop it for the first time.
Stenciling a Tiled Floor
Stenciling a Tiled Floor
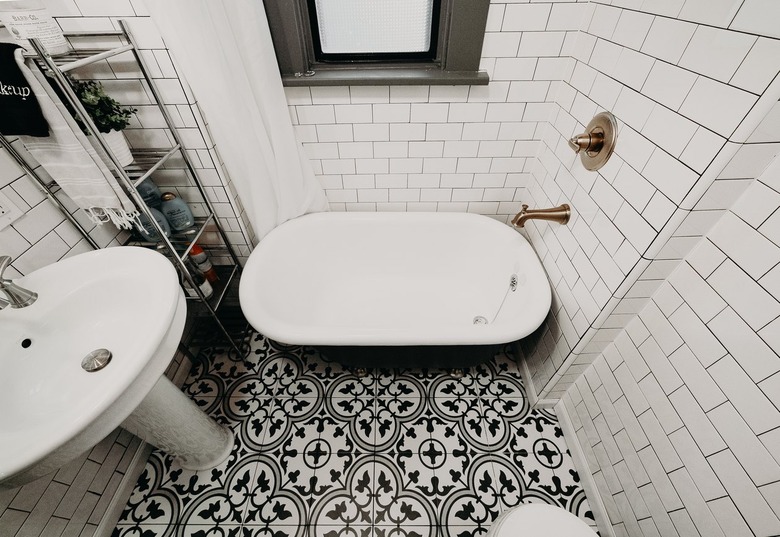
A coat of paint can drastically improve the look of your ceramic tile floor, but you may want to take things a bit further. If you prefer a design over a solid paint color, you can stencil a pattern onto your floor. If you do, you'll want to do your stenciling after applying the base coat and before adding the clear topcoat.
To make the job much easier, choose a stencil that is the same size as your floor tiles. Tape the stencil to the floor and lightly load your stencil brush with paint. Too much paint will seep out around the stencil and give you fuzzy edges, so definitely take a less-is-more approach with the stencil paint. For best results, tap your brush onto a paper towel after you reload it with paint and before you stencil the floor. Leave the stencil in place until the paint dries and then lift the stencil away.
If this is your first time or you haven't stenciled in a while, consider practicing your technique on a paper plate or a piece of cardboard. This will help you hone your technique and prevent mistakes when you paint on your floor. It's also a good idea to start your stencil around the edges of the room or in inconspicuous places, like behind the toilet.
Tip
Waiting for your stencil to dry in between tiles can add time to a stenciling job. To speed the process, buy several stencils. This will allow you to move on to the next tile while you're waiting for the first one to dry.


