How To Compact Soil For A Concrete Slab
We may receive a commission on purchases made from links.
Are you dreaming of all the quiet cups of coffee or late-night cocktails with friends you'll enjoy on your new patio? Or maybe you're planning a concrete slab for a backyard basketball court or as the foundation of a garden shed. Whatever the purpose of your concrete slab, proper site preparation, including compacting the soil, is essential for getting lasting results.
Importance of Site Preparation
Importance of Site Preparation
You're excited to get your DIY concrete pad poured but don't skimp on the preparation. If you want your slab to last, you need to spend a lot more time on the slab preparation than the concrete pouring. You need a level, compacted, solid base to create a level slab that lasts. Without proper soil compacting and preparation, the slab can sink, shift, or crack. A poorly prepared concrete slab won't be able to support sheds or other structures.
Basic Concrete Slab Preparation
Basic Concrete Slab Preparation
Concrete slabs require you to dig down into the soil to make room for all of the material. Most projects call for a 3- to 4-inch bed of gravel at the bottom followed by the concrete. The general steps for pouring a concrete slab are:
- Mark the outline of the concrete slab.
- Excavate the area to the required depth based on your plans.
- Level and grade the area as needed. Patios and other slabs near your home typically need to slope away from the house to help water run off.
- Build the concrete forms for the slab.
- Compact the soil.
- Pour your gravel base into the hole.
- Compact the gravel base.
- Pour the concrete.
- Screed the freshly poured concrete to smooth it.
- Use a concrete float to smooth the surface after it loses its sheen.
- Run a stiff broom over it to create a nonslip surface if applicable.
Tools for Compacting Soil
Tools for Compacting Soil
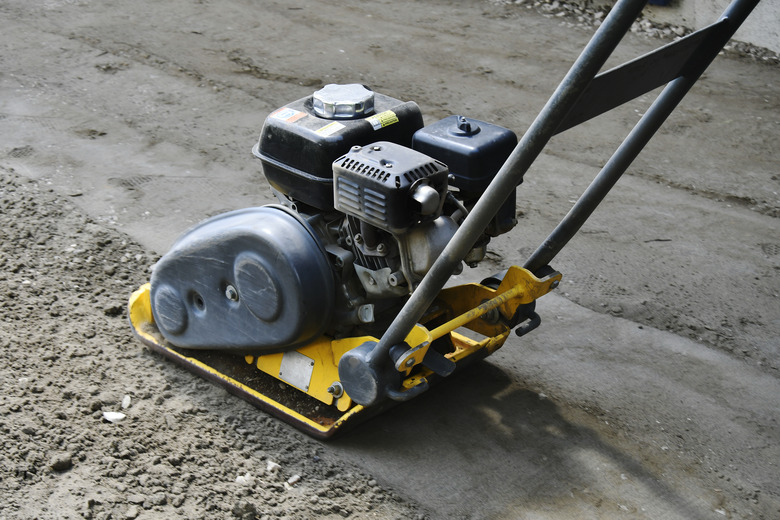
Several compacting machines are available, but many are only used on large commercial projects. Those include rammers or jumping jacks, which use high-impact blows from a rectangular metal plate, and rolling compactors with large, smooth drums. For DIYers, an easy and effective option is a plate compactor, which you can usually rent. These small machines compact the ground using vibrations or pounding movements.
They vary in size and in how much force they can exert. Single-plate compactors with up to 5,000 pounds of force are ideal for smaller areas and work on both dirt and gravel. Reversible compactors have up to 9,000 pounds of force, making them better for deeper compaction. If you have clay soil, you might need a heavy-duty plate compactor since clay soil requires more force for compaction.
Compacting Soil for Concrete
Compacting Soil for Concrete
When renting a plate compactor, ask for a demonstration to ensure you know how to use it safely. Follow all instructions and safety guidelines to protect yourself and get the best results for your concrete patio or other slab areas. It's a good idea to cover as much of your body as possible with closed-toe shoes or steel-toe boots and protective gear, including ear protection, safety glasses, and a mask.
After excavating the area, follow these steps:
- Rake the soil to make it smooth.
- Start the plate compactor based on the operating instructions.
- Move the compactor in a straight line, starting in one corner. Continue making parallel passes to compact the entire area.
- Go over the entire area again, this time making perpendicular passes.
- Add the gravel in the area and spread it out evenly.
- Go over the gravel with the compactor the same way you did over the dirt, first in one direction and then perpendicular to the first passes.
When the soil is well compacted, you shouldn't see footprints on the soil. You can also test it by poking something sharp into the soil. It should be difficult to penetrate.
