How To Propagate A Puakenikeni Tree From A Branch
We may receive a commission on purchases made from links.
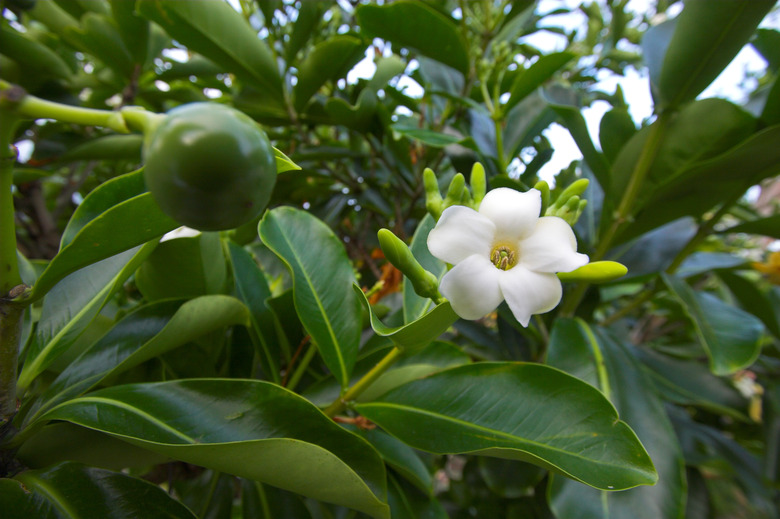
The name puakenikeni (Fagraea berteroana) translates to "ten-cent-flower," the price of one of the white, trumpet-shaped blooms when the tree was imported into Hawaii in the 1930s. Now added to Hawaiian leis, those highly fragrant flowers originated in northern Australia and the South Pacific islands. Epiphytic, meaning that it can grow on other trees as well as in the ground, puakenikeni only grows in the warm climates of U.S. Department of Agriculture plant hardiness zones 11 through 13. You can use an effective technique known as air layering to propagate a puakenikeni tree from a branch.
Air Layering Puakenikeni
Air Layering Puakenikeni
To air layer means to root a cutting while it is still on the tree, without the use of soil. You can easily propagate a puakenikeni tree from a branch using this simple air layering technique.
Making the Cuts
1. Clean Your Knife
Clean and sanitize a sharp knife with a mix of 1 part rubbing alcohol and 1 part water, allowing it to dry before you begin cutting.
2. Select the Branch
Choose a young branch about 1/2 to 3/4 inches in diameter, which is shaded by other branches and at least 12 to 18 inches long.
3. Girdle the Branch
Beginning 6 inches above where it attaches to the trunk, girdle the branch with a shallow cut which goes through the bark and cambium only. The cambium is the thin layer of tissue between the bark and the wood.
4. Make the Second and Third Cuts
Make another such cut 1 1/2 inches above the first one. Finally, draw a vertical cut between the two horizontal ones which will allow you to peel off the 1 1/2 inch section of bark and cambium between them.
Binding Up Wounds
1. Glove Up and Apply Rooting Hormone
Wearing waterproof gloves to protect your hands, soak the band of inner wood now revealed with indole-3-butyric acid liquid rooting hormone in a concentration of 5,000 to 10,000 parts per million of indole-3-butyric acid, determining the proper dilution from the directions on the bottle. For one popular rooting hormone, that would mean either adding 1 part of water to 1 part of concentrate or using the concentrate straight from the bottle.
2. Pack the Cut
Pack the cut and soaked area with a handful or two of damp sphagnum moss. Squeeze the excess water from the moss so it's not soggy.
3. Wrap and Tape
Wrap that moss snugly against the branch with a 6- by 12-inch piece of transparent polyethylene. Fold the long edge of the plastic over on itself several times before attaching the ends of the bundle to the branch with grafting tape or electrician's tape. Make sure tape seals tightly on those ends, with no moss protruding, to prevent rainwater from seeping into that moss.
If you find the location isn't as shady as you'd thought, wrap the bundle with aluminum foil to protect it from the sun.
Uncovering the Roots
1. Check for Signs of Rooting
Check the bundle for signs of roots peeking through the moss after six to eight weeks.
2. Remove the Cutting
Cut the branch off below the roots with sterilized pruning shears once it has produced roots.
3. Pot the Rooted Cutting
Take the cutting to a shady place to unwrap the plastic. Fill a 1-gallon pot with potting soil. You can leave the moss entangled in the roots when you pot up the new plant.
4. Move the Puakenikeni Tree to a Shady Spot
Keep the pot in a partially shaded area for at least two months, after which you may gradually expose the plant to more and more sun until it is ready to be transplanted into the ground when it is at least 18 inches tall.
Expecting the Best From Your Puakenikeni Tree
Expecting the Best From Your Puakenikeni Tree
Puakenikeni can grow to 50 feet in the wild. When you propagate a puakenikeni tree from a tree branch, you'll probably want to restrict its height to about 15 feet in a garden, to keep its flowers within reach. Those blooms appear in clusters of up to 25 flowers at the ends of the tree's branches throughout the year, each flower having five rounded petals 3/4 to 1 1/2 inches long at the end of a 1 1/2- to 4 1/2-inch tube.
White upon opening, each bloom darkens to a cream color its second day and gradually ages to yellow or light orange. Encasing tiny black seeds, the tree's pulpy 3/4- to 2-inch-long berries also change color as they age, from green through yellow to orange. Puakenikeni's evergreen thick and glossy leaves vary in length from 3 1/2 to 8 1/2 inches, broadening at their tips.
References
- Agroforestry: Fagraea Berteroana (Pua Kenikeni)
- ZipcodeZoo.com: Fagraea Berteroana
- Cooks Island Biodiversity & Natural Heritage: Pua
- Rutgers University Gentian Research Network: Fagraea Images
- Sharon's Plants: Puakenikeni
- Texas A&M AgriLife Extension: Air Layering for Difficult-to-Root Plants
- USDA Agricultural Research Service: USDA Plant Hardiness Zone Map
- University of Florida IFAS Extension: Disinfecting Pruning Tools
