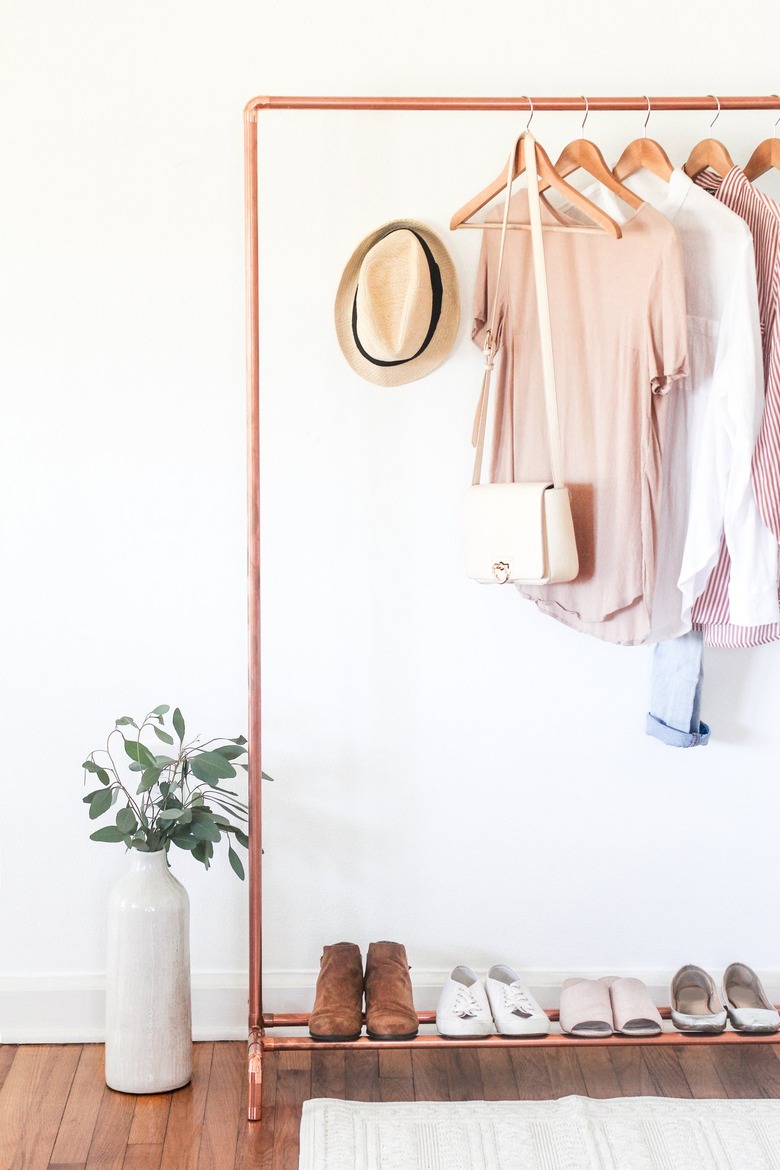
A DIY Copper Clothing Stand To Complement Your Minimalist Decor

Minimalism captures the zeitgeist of millennial culture — both in lifestyle and design. From capsule wardrobes to streamlined spaces, there's something very appealing about editing things down to the bare necessities and ditching all the rest. Take, for instance, this DIY clothing rack, which is sleek and sparse in form and simplifies the art of getting dressed each day. Not to mention the open closet concept paired with the ultra-stylish metallic trend are the things that Instagram dreams are made of — #OOTD, anyone?
Things Needed
-
¾-inch-by-10-feet copper pipes ( 3 )
-
¾-inch-by-¾-inch 90-degree copper elbow fittings ( 6 )
-
¾-inch-by-¾-inch-by-¾-inch copper tee fittings ( 6 )
-
¾-inch copper pipe caps ( 4 )
-
Copper pipe cutter
-
Industrial-strength glue
 Trisha Sprouse for Hunker
Step 1
Step 1
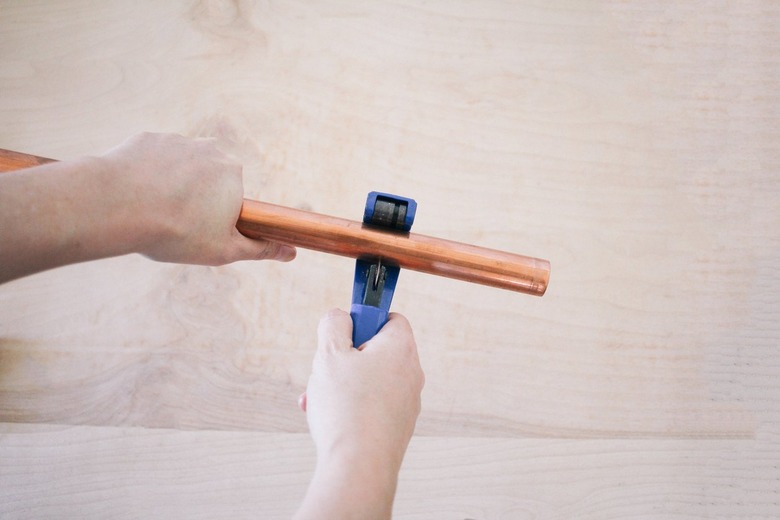
Use the pipe cutter to cut your pipes to the following sizes:
- 5-feet pipes ( 2 )
- 4-feet pipes ( 3 )
- 3-inch pipes ( 8 )
- 2-inch pipes ( 4 )
 Trisha Sprouse for Hunker
Tip: The trick to cutting a copper pipe without bending or crushing it is to fit the pipe inside the pipe cutter so that it's slightly snug and then twist the pipe a couple of times. Next, tighten the pipe cutter a tiny bit more, twist the pipe a couple more times, tighten a little more, twist, and so on until it cuts the pipe off cleanly.
 Trisha Sprouse for Hunker
Step 2
Step 2
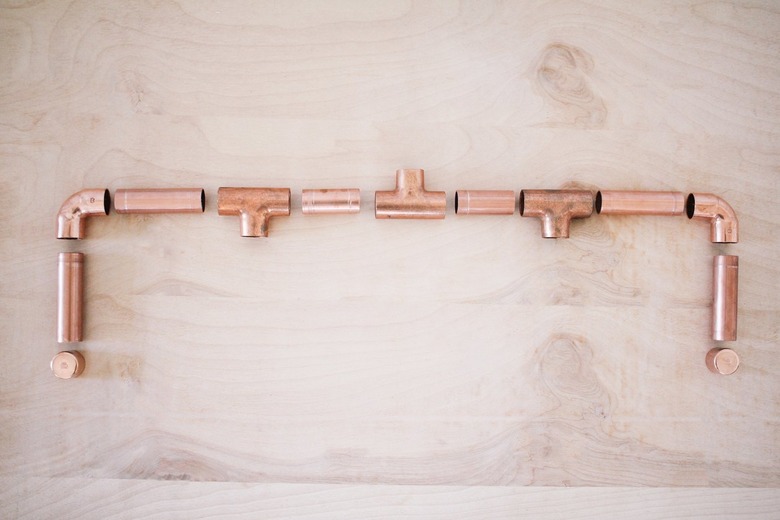
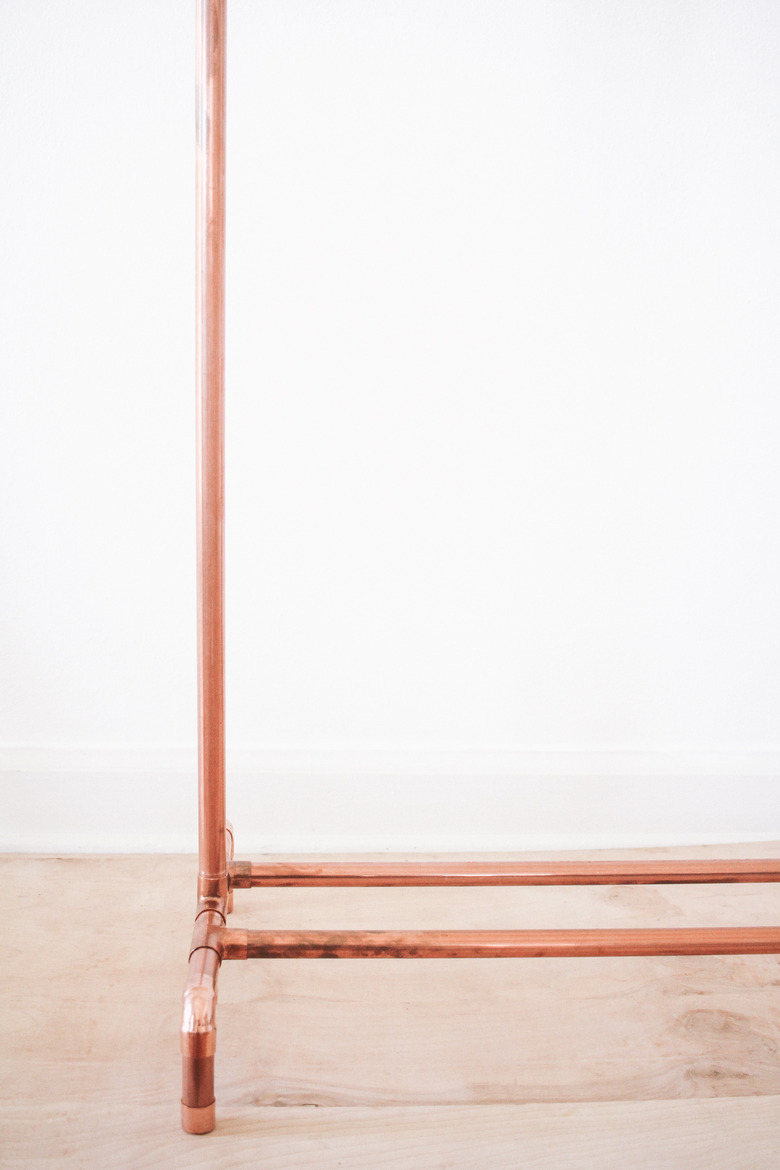
It's easiest to assemble the base of the clothing stand first. Begin by laying out the pieces for each "leg" as shown. You'll start with a tee fitting in the center and place a 2-inch pipe on each side of the tee. Next, place a tee fitting next to each of the 2-inch pipes. Now, place a 3-inch pipe next to each of the tees, and then a 90-degree elbow fitting next to the 3-inch pipes. Finally, place a 3-inch pipe vertically below each elbow fitting and caps below the 3-inch pipes.
 Trisha Sprouse for Hunker
Step 3
Step 3
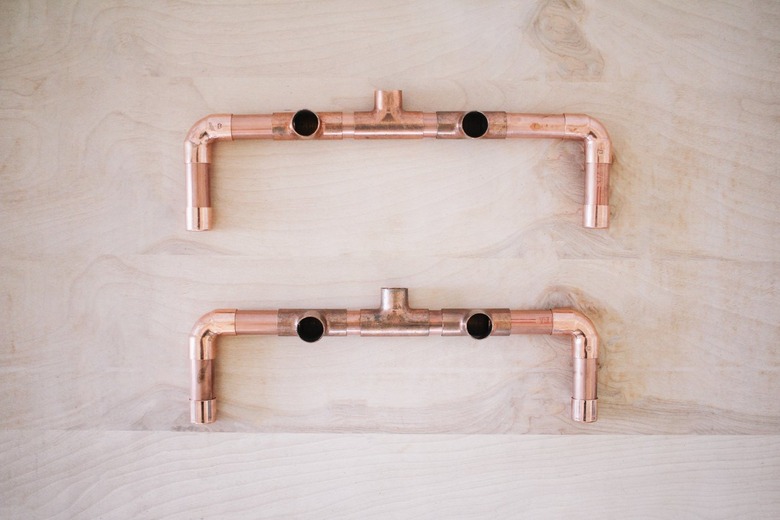
Dry fit the pieces of each leg together first. Once you've checked that everything fits together nicely, glue the pieces together with an industrial-strength adhesive to ensure your base is sturdy enough to support the weight of your clothes.
 Trisha Sprouse for Hunker
Step 4
Step 4
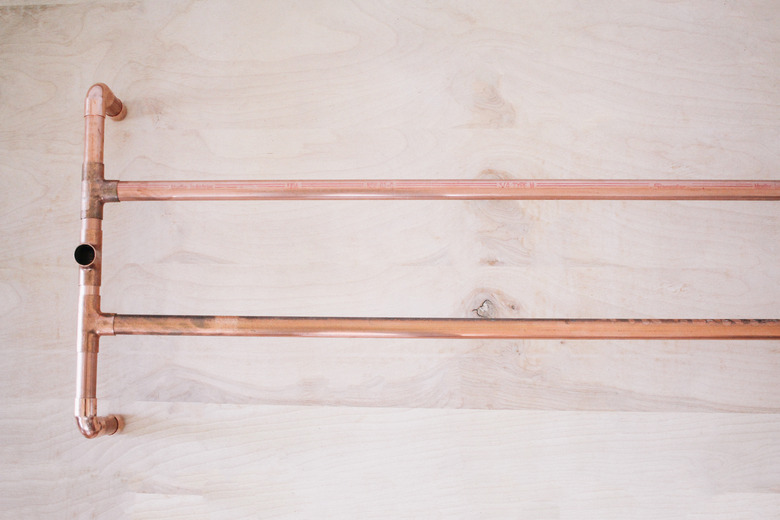
Now that the legs are assembled, let's build the shoe rack. Stand the legs upright so that the caps are resting on the floor, and insert two of the 4-foot copper pipes horizontally into the tee fittings on each of the legs.
 Trisha Sprouse
Step 5
Step 5
Insert the 5-foot copper pipes vertically into the tee fittings on each of the legs.
 Trisha Sprouse
Step 6
Step 6
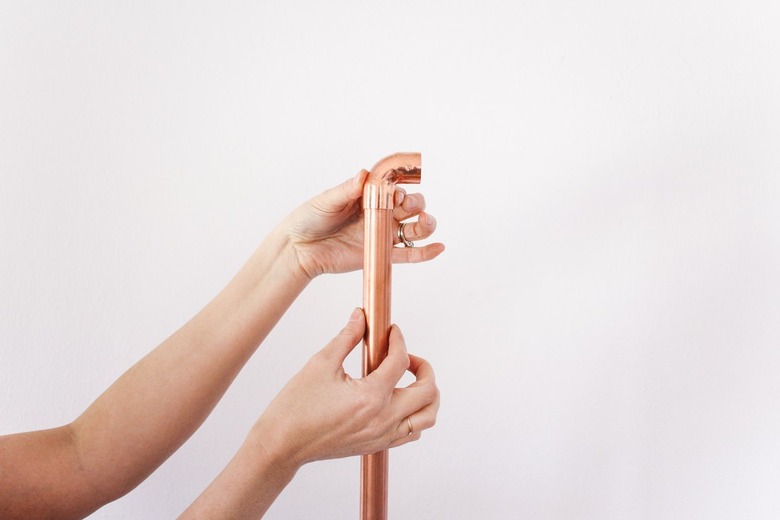
Insert a 90-degree elbow fitting onto the top of each 5-foot pipe with the 90-degree angle facing inward toward each other.
 Trisha Sprouse for Hunker
Step 7
Step 7
Finish by inserting the remaining 4-foot copper pipe horizontally into the ends of each 90-degree elbow — to form the hanging rod.
Tip: As long as the "legs" of the base are glued together, you don't necessarily have to glue the rest of the pipes together. Not gluing them gives you the flexibility to take the clothing stand apart to store or move elsewhere.
 Trisha Sprouse
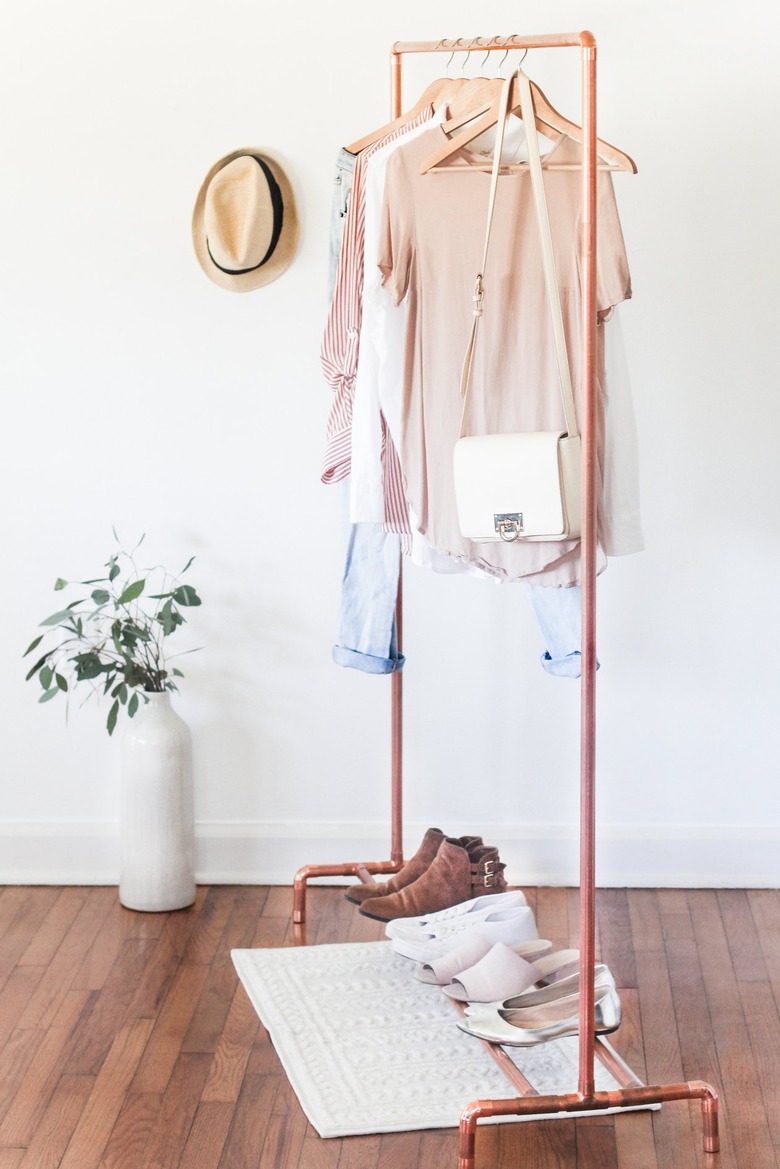
Pull your style choices you plan to wear for the week and put them on display. Don't forget shoes and accessories.
 Trisha Sprouse for Hunker
Seeing everything laid out in plain sight helps you visualize your outfits with a more editorial eye. Getting dressed each day will be a breeze.
 Trisha Sprouse for Hunker