Can I Open Up My Wall To Install A Patio Door?
In all but a very few cases, the answer to the question: "Can I install a patio door in this wall?" is yes. The next question: "How much will it cost?" isn't as easy to answer. Not every exterior wall is load-bearing, but many are, and when you cut out a chunk of a bearing wall to create a door opening, you have to figure out a way to support the weight the wall was holding. If you don't do this properly, the door header will bow inwards, making the door impossible to use, and eventually, the wall and roof will sag and could possibly even crumble. The costs associated with having a patio door installed can therefore vary, depending on the nature of the wall you are opening up.
This is one reason why you must file a plan with the building department and get a permit whenever you are planning a project that will modify a load-bearing wall. You need to consult with an architect or structural engineer to make your plan, and that raises the cost of the project. Other characteristics of the house, including siding material and interior wall covering, also affect the cost of installation.
Identifying a Load-Bearing Wall
Identifying a Load-Bearing Wall
The crucial determination of whether a wall is load-bearing should be made by a structural engineer or another competent professional. If you're in the early planning stages, however, you can make a quick determination yourself by looking at the structure of the house, particularly the roof. Here are some things to look for when determining if a wall is load-bearing.
Roof Style
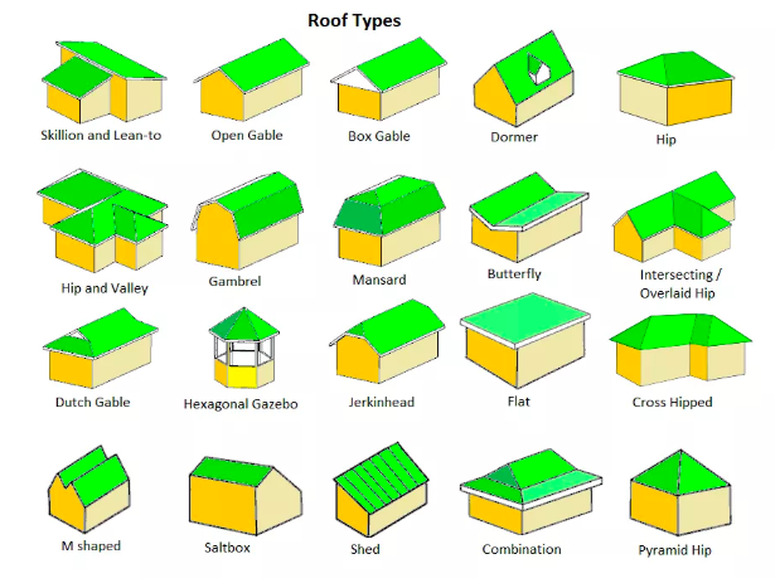
If your house is essentially rectangular and it has a gable roof, the walls that support the eaves are load-bearing walls, while those on the gable ends usually aren't. However, that assumes the gable walls don't support balconies or other ancillary structures. The same is true for gambrel, mansard and shed roofs. If your house has a flat, hip or combination roof, on the other hand, all the exterior walls are probably supporting some part of the roof.
Roof Trusses
If you have access to the attic, look inside and note the direction that the roof trusses or the attic floor joists run. Load-bearing walls are those that run perpendicular to these framing members. The walls parallel to these members usually aren't load-bearing.
Dormers and Other Roof Structures
Any wall located under a dormer is probably a load-bearing wall, no matter which direction it runs relative to the roof trusses.
If you suspect a wall is load-bearing, the next step in your planning process should be to call in a pro. Many large contracting companies have structural engineers on staff, and you'll need one to determine how much weight is being supported by the section of wall you want to remove. This will allow you to properly size the header that will span the door opening. The engineer or the contracting company will help you draw up a plan for the installation and file it with the building department to secure the necessary permit.
Even if you think a wall isn't a load-bearing wall, it's a good idea to double-check with an engineer or someone with similar qualifications before you start doing any work. The stakes are too high to risk making a mistake.
The Importance of Header Size
The Importance of Header Size
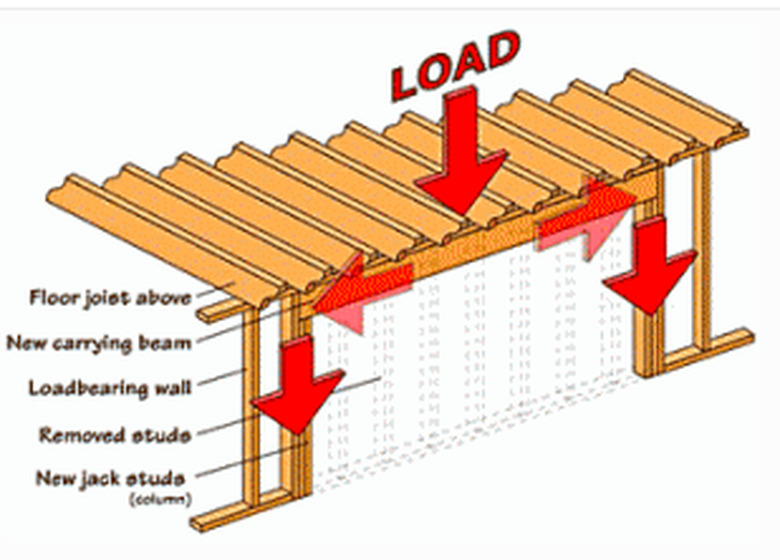
The process of installing a door in an exterior wall always requires that you remove the existing framing inside the door opening and replace it with a horizontal header, or beam, that will hold the weight that was previously supported by the removed wall studs. The size of the header depends on the weight it has to support, as well as the horizontal span of the opening. On a simple passage door in a non-loadbearing wall, a header made from a pair of 2 x 4s installed on edge is usually sufficient, while a typical double patio door in a non-load-bearing wall might require a 4 x 6 header or a 4 x 8 header. Very large patio doors might require even larger headers, depending on the load being carried. In some cases, it might even require a metal beam.
The minimum header size for a 5-foot-wide opening is 4 x 8 inches; for a 6-foot opening, the minimum header size is 4 x 10 inches. A 4 x 12 header may be required if the wall is supporting weight. Few installations call for a header larger than this, but it's possible, depending on the amount of weight being supported. A patio door is typically 80 inches in height. If you add the width of a 12-inch header and the door trim, you're only a few inches shy of the height of a standard 8-foot wall. There means there is very little wiggle room, and if an even larger header is required, the builder may opt for a metal beam or a manufactured laminate beam that has a greater load-bearing capacity than a header made from 2 x lumber.
Construction carpenters often build these headers from pairs of 2 x dimension boards sandwiched together. Another option is to use a laminated beam made from layers of plywood or another manufactured sheet good. These manufactured beams have excellent load-bearing strength and are available in many different dimensions to match different uses.
Because of the extra weight the header must support once the studs are removed, the ends of the header must rest on sturdy posts, which in non-loadbearing walls are usually formed by simply doubling up the studs on each side of the opening. However, where the load is quite heavy, as is the case in load-bearing walls, the sides of the opening may require sturdy 4 x 4 or 4 x 6 solid posts. Again, a building engineer or competent professional can tell you precisely how big the posts need to be.
The Installation Procedure
The Installation Procedure
The basic procedure carepenters will use to install a patio door is as follows:
- Measure and cut a hole in both sides of the wall large enough for the header and the posts that support it. If your house has brick, stucco or stone siding, this part of the job will be more costly than for sidings that are wood, vinyl, aluminum or other such easy-cut-cut materials.
- Remove the studs and frame in the header. If the wall is load-bearing, you will have to construct a temporary wall to support weight before you can install the header. This is an extra step that adds to the cost, and it will probably have to be included in the plans you file to get the permit.
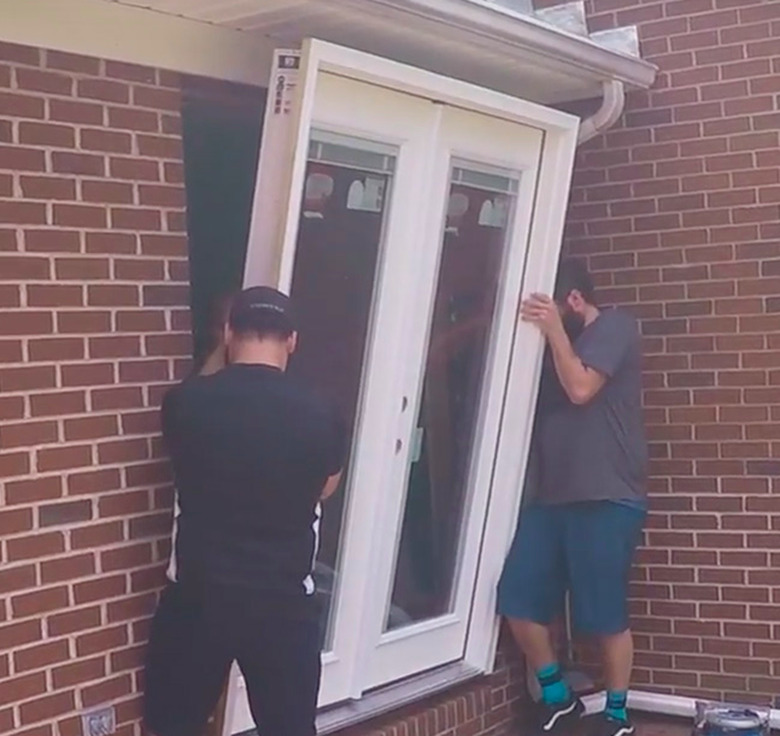
- Install the door. Once the framing is done, the next step is to install the door jambs and hang the doors. Some doors come pre-hung, which allows you to install the doors and jambs as a unit.
- Cover the walls and install trim. If the opening has been cut accurately, you usually don't have to put much effort into installing new drywall except to hide the header. The door casing hides most gaps on the sides of the door.
Don't Forget to Insulate
Don't Forget to Insulate
Failure to insulate a patio door properly can cause all sorts of problems, from cold drafts in the winter to condensation and mold in the summer when you're using the air conditioner. To avoid having to use emergency insulation measures, such as placing rolled-up blankets at the bottom of the door, make sure you install adequate weather stripping and that you caulk the trim on both sides of the door. Before installing the trim, it's a good idea to spray foam insulation in the gap between the door jamb and the framing for extra weather protection.


