Good Bones: A Historic Claw-Foot Tub Is Restored To Its Former Glory — And Then Some
At Hunker, we love a good comeback story. We've teamed up with Bona to bring you Good Bones, a series chronicling four different homes where restoration projects brought new life to something old.
Ashley Harrison grew up in a home built in the 1890s. That's how, when, and where she fell in love with rich millwork, trim, old wooden windows, and other architectural flourishes of homes that are more than 100 years old. Once she married, she and her husband Nate built a new-construction home outside St. Louis, in the suburbs, and then another. But in each, something, she says, was always missing: The connection to the artistry and architecture of the past that an old home — and the restoration thereof — can provide.
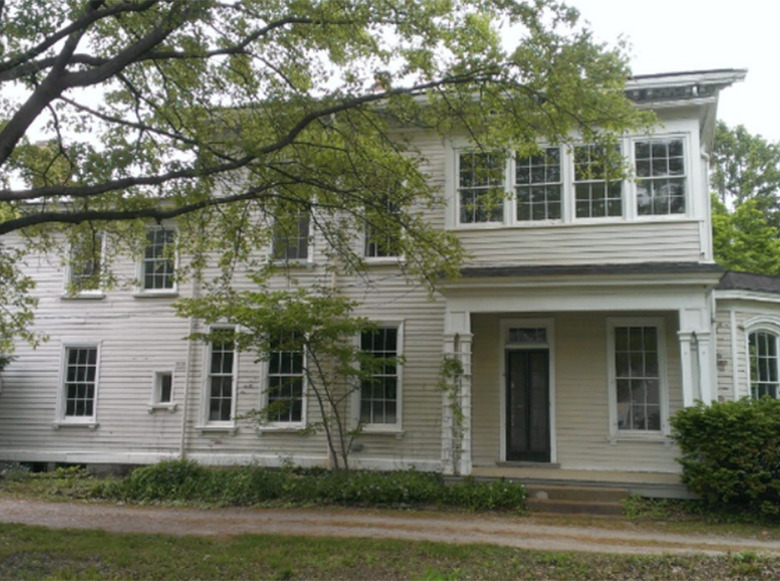
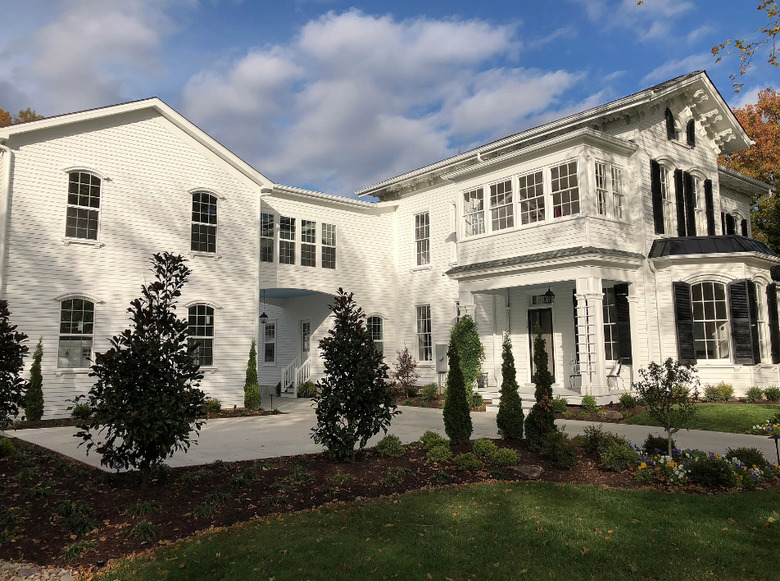
The missing piece, it turns out, came in the form of an 1858 Victorian Italianate home — and the long, loving restoration that accompanied it. Located on an acre and a quarter in the middle of the Jefferson-Argonne Historic District in the small town of Kirkwood, Missouri, the house had sat vacant for seven years before the Harrisons first saw it. Known as the Gill House, it had a long history in the town. As it sat and sat, she explains, everyone wanted to save it. It was under contract with a developer who planned to demo it and subdivide the lot — but the deal fell through. And, in 2015, the Harrisons gamely stepped in.
"I have a real connection to the house," she says. "This house makes me feel something when I'm here."
And since then, Ashley has been documenting the dramatic restoration on her Instagram and blog. "To be honest with you, we had zero experience in restoring an old home," she says. "I've learned more than I ever imagined I would."
Self-taught, Harrison pursued the restoration with a dedication to salvaging and reusing as much of the original home as possible, hewing to the bones and architectural detailing, while bringing in antique, vintage, and thrift elements that reflect her casual chic taste.
"This one has evolved," she explains. "I have a tendency toward French design and decor, so it's a little of that, but more traditional." And there are decidedly modern elements as well.
Early in the 18-month transformation of the house, the Harrisons found, in the basement, a tub.
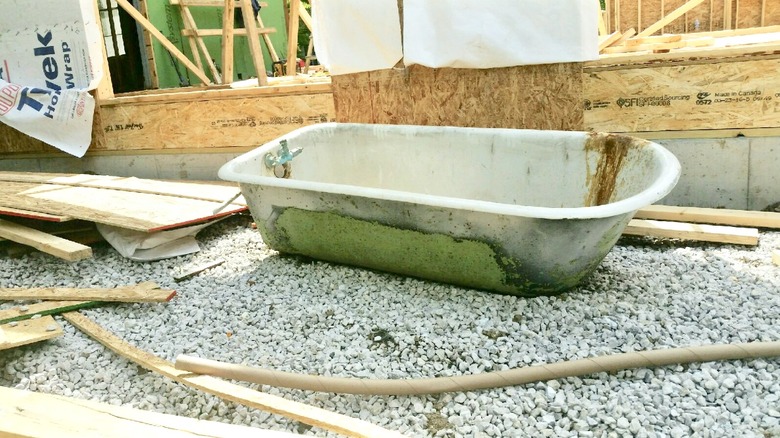
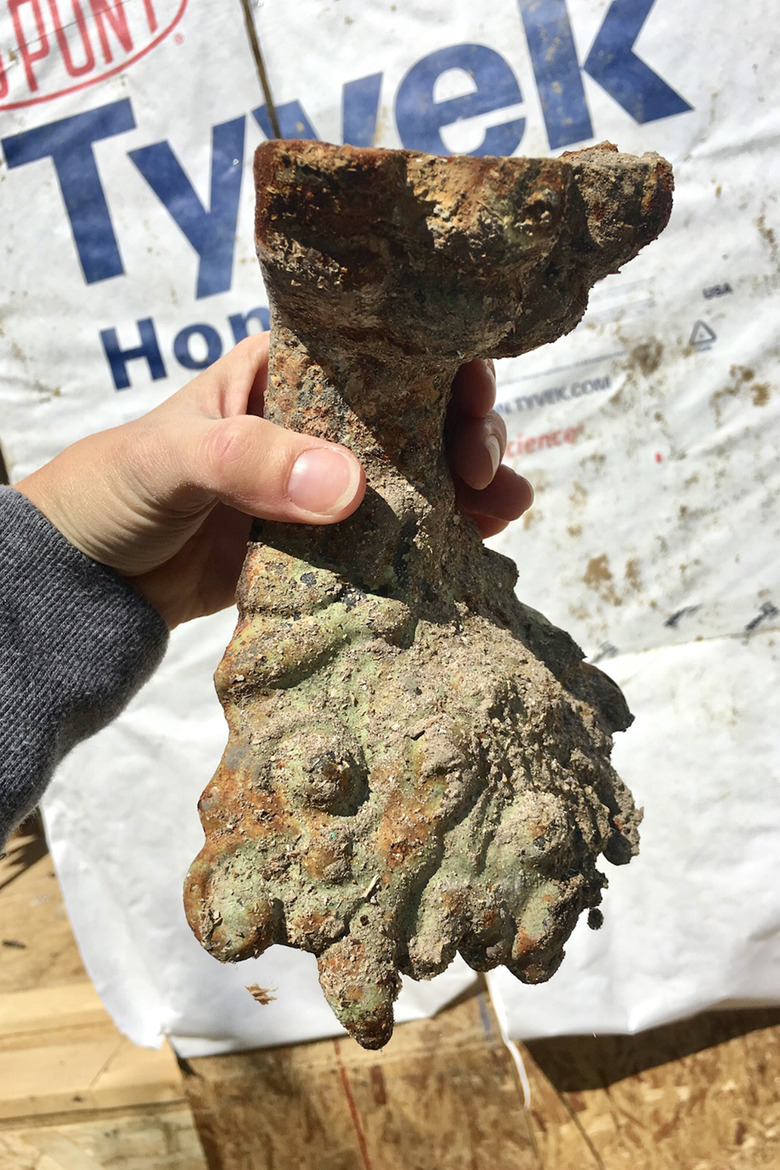
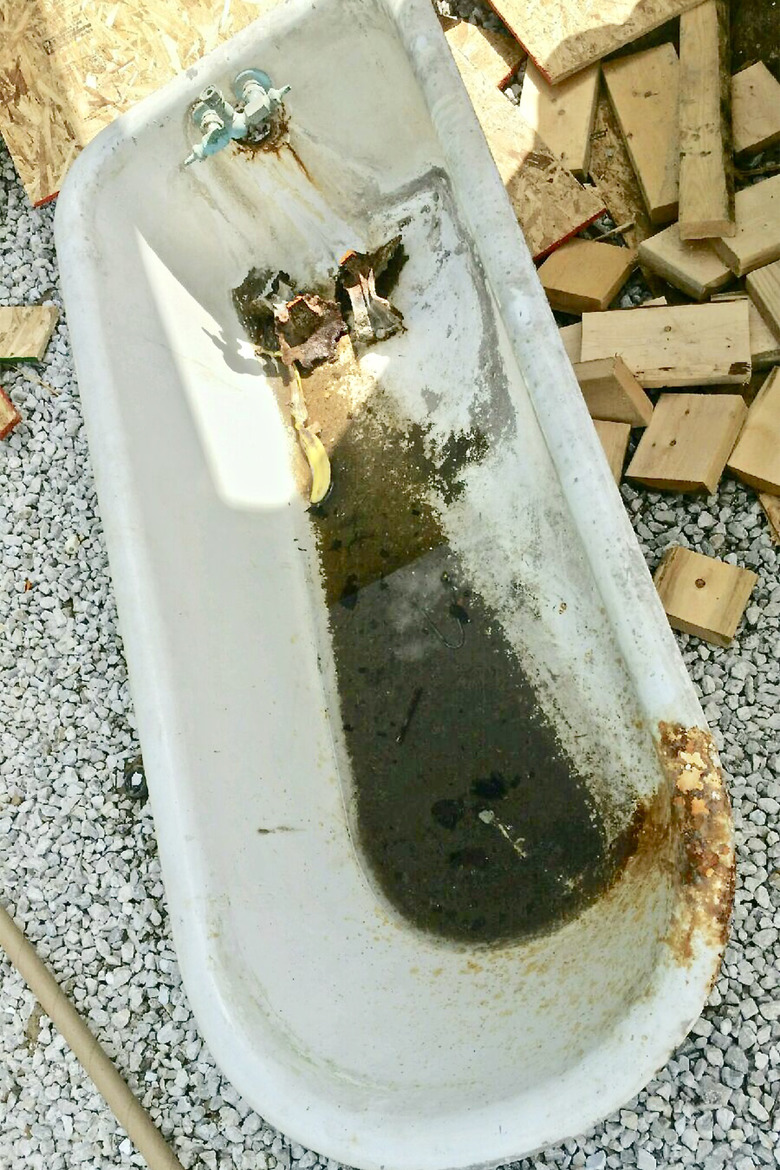
"The first time we looked at the house we saw that there was a bathroom in the basement, but it was the scariest, most dilapidated basement you've ever seen," says Ashley. There was an old box-top toilet with a chain handle, which likely hadn't been used in the 60 years the previous owners had lived there. The cellar-like room was half stone and rock — "not a place anyone would spend much time," says Ashley. It was there that Ashley saw a rusted-out claw-foot tub, painted lime green, its feet cemented into the floor. "It must have been sitting in the dirt at one point," she says.
The general contractor at the time thought she was insane to try to salvage it. But, says Ashley, they were adamant that they would try to save everything in the house that they could. She first researched claw-foot tub restoration and quickly realized the scale of the project.
"I didn't know enough about the products I should use, did not own the tools necessary to complete the job — like stripping tools, a spray machine — and I didn't have the dedicated workshop space to do it all in a controlled environment," she says. "It was just too far beyond our skill level to handle on our own."
And part of successful restorations is knowing when a project is simply too complex to DIY.
The Harrisons were turned down by several companies who thought the tub was in too much disrepair to save — further confirming Harrison's initial take. But they still had to move it out. There were no basement stairs at the time, and the tub was so heavy, they eventually had to crane it out. "It took three guys to move it short distances," she says.
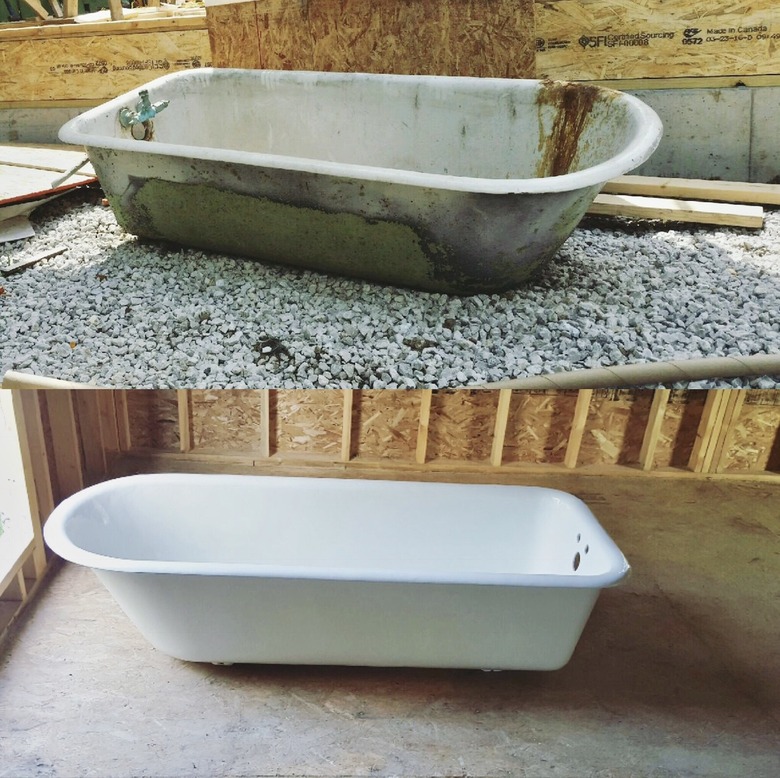
Once they found a company to refinish the tub — who, in fact, deemed it would be no problem — they discovered a stamp dating back to 1902.
"In 1902 it was a considered a status symbol to have indoor plumbing," she wrote on Instagram, when she posted the striking before and after.
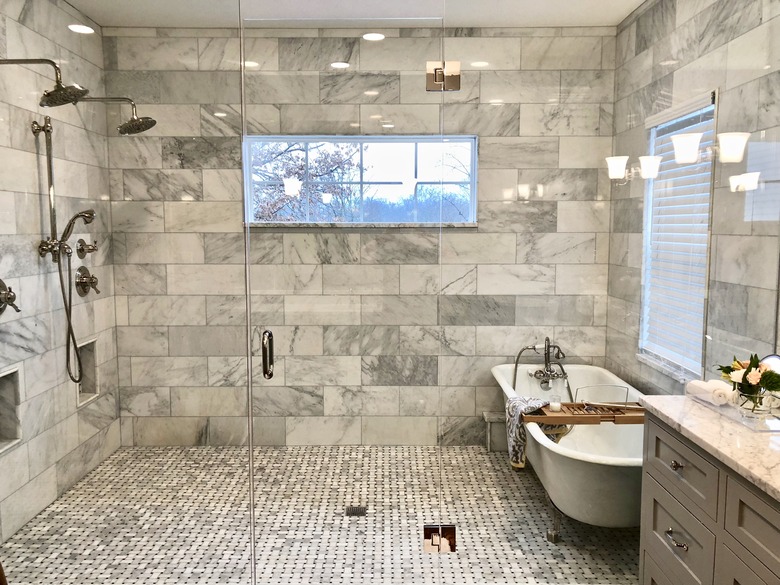
The process of stripping the tub down, fixing holes, resurfacing, and finishing took about five weeks. It came back a gleaming white and sat on the property until the new second story addition — the master suite — was ready for it.
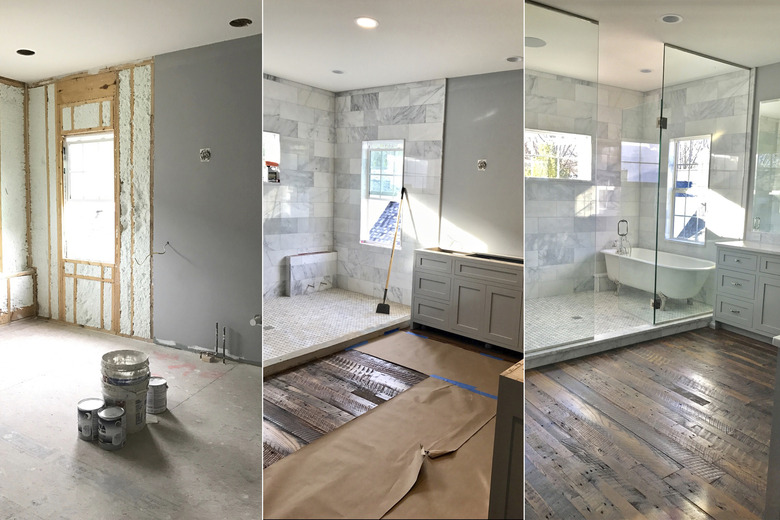
There, it became the focal point of her refreshing take on a traditional-modern bathroom. And it helped solve, in its own way, the room's awkward design challenges.
Although the addition was brand-new, the Harrisons couldn't enlarge the overall space, which left them with either a small shower, or awkward vanities. Ashley had seen a wet room concept on Pinterest — this was three and a half years ago, keep in mind — and loved it. Her husband thought the concept might hurt them in the end, should they go to sell the home. But she convinced him.
"Once I did, and he saw the tub in the space, the size of the shower, that we didn't have to compromise on vanity space, it became the right fit." And now it's one of the most popular posts on her site.
Like the rest of the house, the effort was about keeping the nostalgia, staying committed to the true spirit of restoration, and bringing in modern convenience.
How to Restore an Original Claw-foot Tub
How to Restore an Original Claw-foot Tub
Part of a successful restoration is knowing your own limits. Harrison knew the steps she would need to take to refinish the claw-foot tub, but didn't have the tools, workspace, or the specific experience to make it happen. "I can be ambitious, when it comes to DIY tasks," she says. "I knew I was not prepared to take on the task and did not want to risk permanent damage to this special piece."
For those who are inspired, restoring a claw-foot tub can be broken down into three major steps, she says.
Prepare the surface
Very similar to painting a wall, surface prep is essential for completing the project successfully. For the bathtub, this process would include removing oils, soap film, minerals, scratches, rust, chips, and other damaged areas.
Apply adhesive and bonding agents
This is also key to the process, as a proper bonding agent will allow the top coat to be applied, and properly attach to the surface, providing a durable and long-lasting finish.
Apply the top coat
The acrylic top coat finish is applied to the bonding agent. It is generally sprayed to the surface and can be matte or gloss.
In the end, while a restoration can be hard work, it's worth it. "It has been a wonderful addition, focal point and story for our master bath," Harrison says. "Far more intriguing and special than a claw-foot tub recreation."
