How To Drill Straight, Perpendicular Holes
Drilling precise holes is a piece of cake—if you have a drill press. That's exactly what the tool is designed to do. But how do you drill straight, perpendicular holes with a portable drill that wants to move all over the place? In simple terms, the way to drill straight holes is to hold the drill steady throughout the process. Drill bits are dead straight and want to stay on track once they get going. If you keep the drill motionless, it'll drill a straight hole. Making sure that straight hole is perfectly perpendicular—that is, at 90 degrees to the material's surface—is a bit more complicated, but there are a number of homemade and store-bought devices that can help. Some will even get you pretty darned close to the precision of a drill press.
Drill Level
Drill Level
Some portable drills have a built-in bubble level set into the butt end of the drill. If you have one of these and have wondered what it's for, now you know. To use the level, set the drill bit in place on the material you're drilling, then position the drill so the bubble in the level is exactly centered in the marked circle. Keep your eye on the bubble as you drill, especially at the beginning, when the bit is most prone to sideways movement. Some drills have bubbles at the top and at the back of the drill, to help you drill horizontally as well as vertically.
The one catch to this system is that its accuracy is relative to the position of the workpiece. Holding a drill so the bubble is centered will make a plumb (perfectly vertical) hole, but if the material you're drilling into isn't level (perfectly horizontal), the hole won't be perpendicular to the material. For accuracy, make sure your work surface or the workpiece is level by checking with a regular carpenter's level or torpedo level before drilling the hole.
Square or Square Block
Square or Square Block
A quick and easy way—if not the most accurate way—to make a perpendicular hole is to hold a square on the workpiece and position the top and/or side of the body of the drill up against the square while drilling. This works best with a speed square (rafter square) or a try square, both of which have a flat side or flange that helps the square stand straight up. If you don't have a square, you can also use a wood block with a square-cut end.
The drawback to this method is that not all drills are straight along the sides or top of their bodies, so if the body is flush to the square, the drill bit may, in fact, be at a slight angle. But most drill bodies are fairly straight and flat, or at least close enough that you can make slight adjustments to the drill's position as needed.
Marking the Line
Marking the Line
If you're drilling a hole near the end or edge of a workpiece, you can draw a straight, perpendicular line on the adjacent surface that represents the path of the hole. When you drill, you can visually align the drill bit with the marked line. This is a simple eyeballing technique but it can be particularly helpful in tricky situations, such as drilling a hole near the end of a round dowel.
Drill Stands
Drill Stands
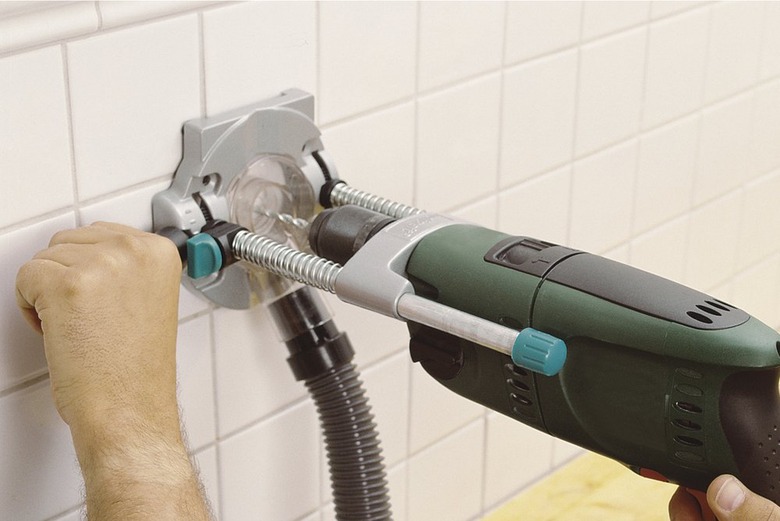
There are a number of handy accessories for improving the accuracy of portable drills. The most elaborate—and most versatile—is a drill stand. This consists of a flat metal base, two upright rods and a mounting device that holds the drill securely and slides up and down on the rods. Because the drill is fixed in the mounting device, a drill stand essentially turns a portable drill into a mini drill press. The best things about a drill stand are that you can use almost any size or type of bit, and you can drill at several different angles, from 90 degrees to 15 degrees. Most drill stands have V-shaped grooves on the top sides of their base for holding round dowels and small pipes.
A greatly simplified version of a drill stand is a small, round stand that you slip onto the shank of the drill bit before you chuck the bit in your drill. These are used primarily with Forstner bits and similar bits used to drill flat-bottom holes.
Drilling Block
Drilling Block
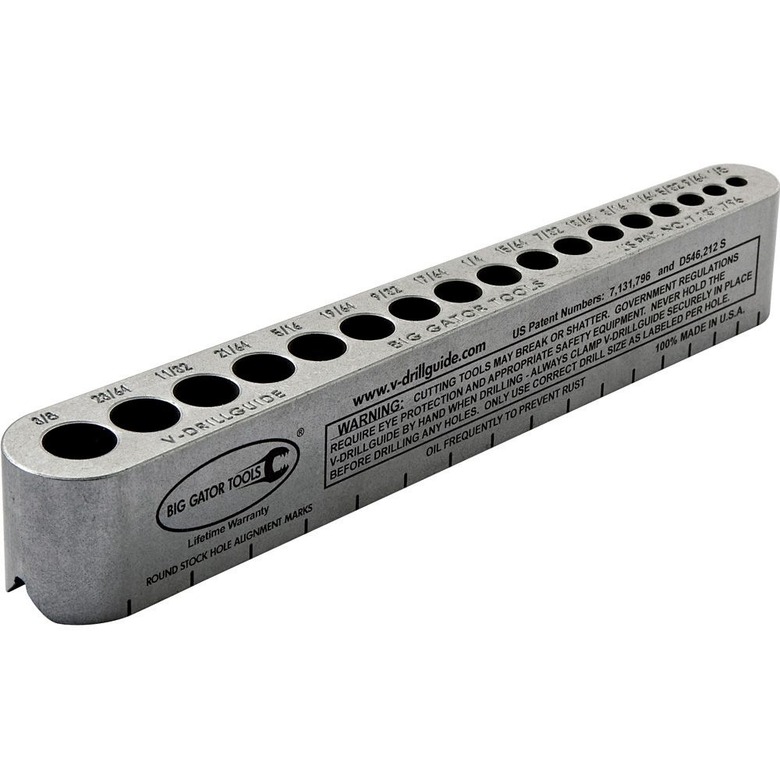
Another type of commercial drilling guide is a drilling block or drill block. This is a metal or plastic block with an assortment of holes for inserting drill bits of various sizes. You center the appropriate hole in the block over your hole mark, then clamp the block to the workpiece. To drill your hole, you slip the drill bit down through the block's hole and begin drilling. The hole in the block is precisely sized to standard (or metric) drill bit sizes so the bit can spin but can't lean over. Better blocks are made with hardened metal alloys to resist wear from the bits.
The drawback to blocks is that you need relatively long bits because the block stands between the drill and the material. They also can't drill angles other than 90 degrees, and they work only with conventional straight drill bits of limited diameter (up to about 3/8 inch). On the upside, blocks are simple and easy to use, and they fit into a tool pouch. Some also have V-shaped bases so you can clamp them to pipes or round dowels.
DIY Drilling Jigs
DIY Drilling Jigs
There are a few really simple drilling guides you can make at home (although one is best made if you have a drill press):
- Right-angle jig: Find or cut two blocks of wood with square edges. Join the pieces to form a right angle—an "L" that sits on its side, with a perfectly flat bottom. Hold or clamp the jig to your workpiece, and fit the drill's bit into the inside corner of the jig, then drill.
- Drilling block: Drill a series of holes through a strip or block of 1-inch-thick wood (preferably hardwood for durability), using a drill press or a drill stand. Include a dozen or more standard or metric hole sizes to accommodate a full set of bits. Use the jig just like a commercial drilling block.
- CD: Place an old compact disc or DVD label-side-down onto the workpiece with the CD's hole centered over your drilling mark. Set the drill bit on the mark and hold the drill so the bit and its reflection in the CD form a perfectly straight line, indicating the bit is vertical.


