How To Cut Porcelain Tile
Porcelain is a form of fired and glazed clay tile that is super hard and super smooth. These are two qualities that make porcelain tiles a great choice for bathroom and kitchen walls and floors. These glass-like tiles are brittle and chip easily, however. That presents a challenge when you have to cut them, which you will have to do for any DIY installation. Most jobs require at least three different types of cuts, including cutting off large sections, nipping off small parts and cutting curves to fit around sinks, bathtubs and other obstructions. In addition, if you're laying large tiles (12 x 12 or larger), you may find yourself making round or rectangular cutouts from the middle of tiles.
Porcelain is different than standard ceramic tile, although as a clay-based tile with a glazed surface, it still qualifies as a form of ceramic. Its working characteristics fall somewhere between standard ceramic tile and glass tile. Porcelain tile is made with a different kind of clay with finer particles than that used in ceramic tile, and it's fired at a higher temperature. However, the techniques you use for cutting ceramics will generally also work with porcelain. It's wise to observe a few extra precautions because porcelain is more brittle and chips and cracks easily. The key to getting perfect results is to work slowly, to use water to lubricate saw blades and drill bits to prevent overheating, and to make notches before you do any actual cutting.
Use a Wet Saw to Cut Porcelain Tile
Use a Wet Saw to Cut Porcelain Tile
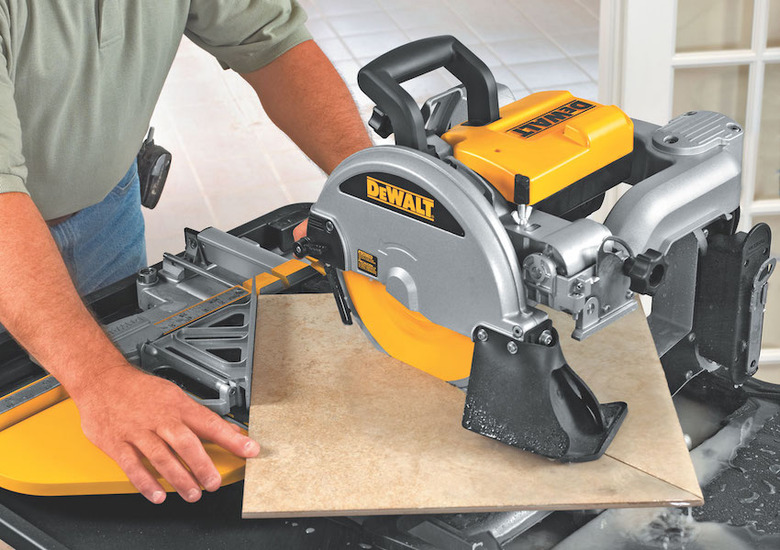
A wet saw, also known as a tile saw looks like a conventional table saw, but with a few key differences. It's usually smaller, it has a diamond cutting blade instead of a toothed one, and—the biggest difference—it has a water reservoir. As the blade spins, it passes through the reservoir to create a steady stream of water that keeps the blade cool. Overheating causes cracks in fragile materials like porcelain, and the water stream prevents this while producing a clean, smooth edge on the tile. It does tend to spray a messy water/clay mixture back in your face, though, so wearing goggles is a must.
You can cut straight lines with a wet saw, but not curves. It excels at slicing tiles into smaller pieces, and better saws come with a miter gauge that can be adjusted to accommodate a full tile so you can cut diagonally. Whether you use the miter gauge or the fence, or you cut freehand, it's important to mark the cut line clearly on the face of the tile. You can minimize chip-out by cutting the tile face up, so the teeth of the saw meet the tile as they are moving toward into it. If you want a really clean cut, you should turn the tile over first and make small 1/4-inch notches on either end of the cut line before turning the tile over again and finishing the cut.
Feed the tile slowly across the blade, and make sure you have a good source of light. It's easy to lose track of the cut line when the blade is spraying liquid clay onto the tile.
Cutting Porcelain Tile with a Tile Cutter
Cutting Porcelain Tile with a Tile Cutter
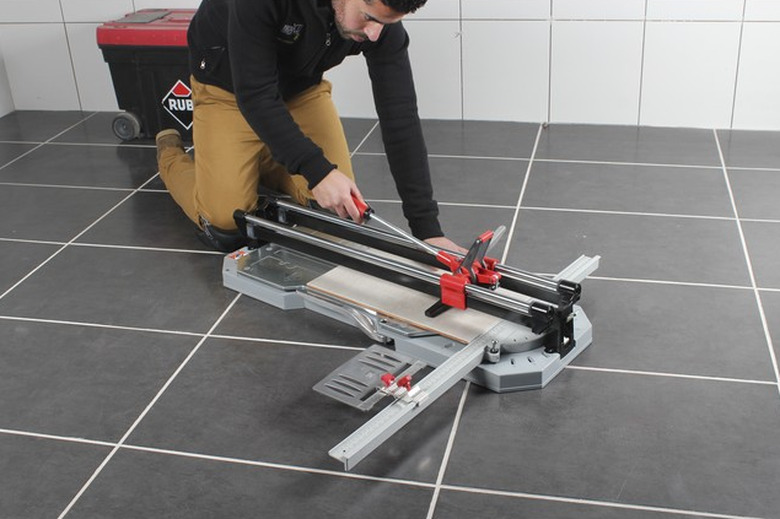
The concept of a tile cutter is similar to the one behind cutting glass, but a tile cutter usually has a base and a guide to help you do the job accurately. This is a tool frequently used to cut ceramic tile, but it can also be used with porcelain tiles. Because porcelain is harder and more brittle, a tile cutter can be somewhat more difficult to use on porcelain tile.
This is another tool that does only straight cuts. To use it, you mark the cut line on the face of the tile, set the tile on the base and align the cut line with the scoring wheel. Put moderate pressure on the wheel as you draw it along the line. You can't make a clean cut with a single score—it usually takes two or three. If you press too hard, the tile might crack. Once you've scored the line, break the tile by hanging the off-cut over the edge of the base and pressing on the lever gently but firmly.
A tile cutter is cheaper than a wet saw, it takes less space and it's not as messy, so it's probably the most popular tile-cutting tool out there. Its main limitation is that you can't use it to cut strips less than about 3/4 inches wide. For these, you need a wet saw, or you can use nippers.
Nipping Notches in Porcelain Tile
Nipping Notches in Porcelain Tile
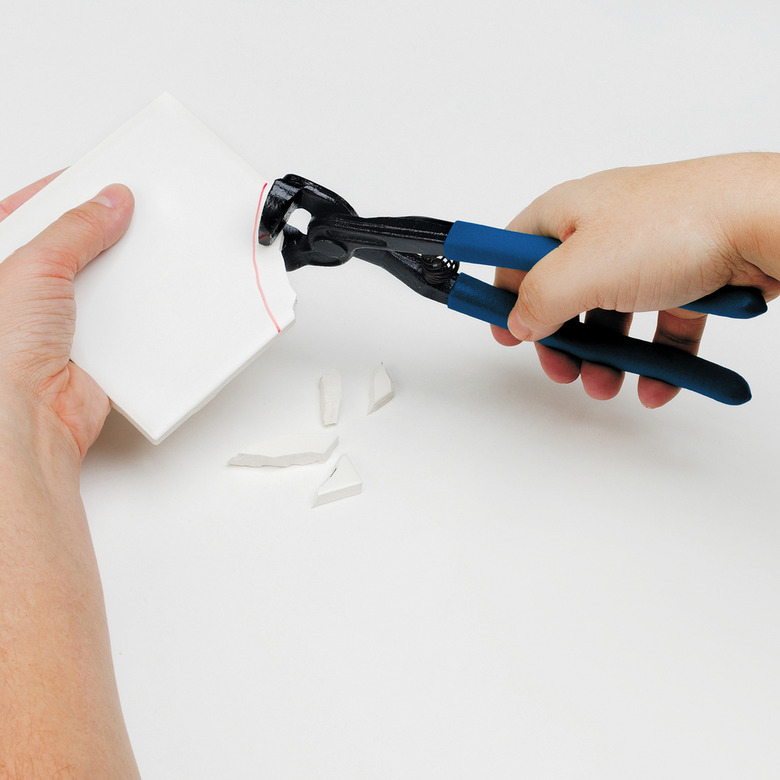
When you need to remove a small section of tile to fit it into a corner or next to a wall, you need a pair of tile nippers, which work like a set of pliers with cutting edges on the jaws. This seemingly destructive tool offers the best way to remove small amounts of material. It inevitably leaves a rough edge, but that probably won't matter if the edge will be hidden by a baseboard or other trim. Once you hone your nipping skills sufficiently, you may even be able to get a clean enough edge to mask with grout.
If you're nipping a lengthwise section of tile, scoring along a marked cut line can help you get a clean edge. Scoring can be done with an ordinary glass-cutting tool. Whether nipping a line or removing a corner, approach the task incrementally, taking small parts of the tile from underneath and working your way up and in. If you need a clean edge, rub the edge of the tile with a rubbing brick to smooth it after the nipping is complete.
Curved cutouts can often be completed with nippers if you score a cross-hatch pattern on the cutout area, then "nibble" away small sections of tile with the nippers.
Again, because porcelain is a harder form of tile, you can expect to work a little harder when using nippers than you do for standard ceramic tile.
Cutting Curves in Porcelain Tiles
Cutting Curves in Porcelain Tiles
Fit a 4-inch angle grinder with a diamond cutting wheel and you've got a tool that not only cuts curves, but also straight lines. Other tools may do the straight lines better and more accurately, but when it comes to curves, the angle grinder is the boss. You can even use it to cut out a section of the middle of a tile. Need to cut a very small section? Use a rotary tool with a grinding wheel attachment.
To get the cleanest possible cut with an angle grinder, you should make partial cuts from both sides of the tile. That isn't possible, of course, when you're cutting tiles in place, such as when installing a new toilet on a tile floor. However, if you can, turn the tile over and mark the cut line on both sides. Identify the off-cut with tape so you're able to keep the grinder on the waste side of the edge you're cutting.
Draw the grinder lightly over the cut edge to score a line, and then make another pass to cut a little deeper. If you can turn the tile over, proceed in this way until you reach the center of the tile thickness, then finish the cut by turning the tile over and make similar passes until the cut meets in the center. If you can't turn the tile over, then simply finish the cut from the top. Either way, be sure to cut slowly, using moderate pressure, to avoid overheating.
