Maple Flooring: A Homeowner's Guide

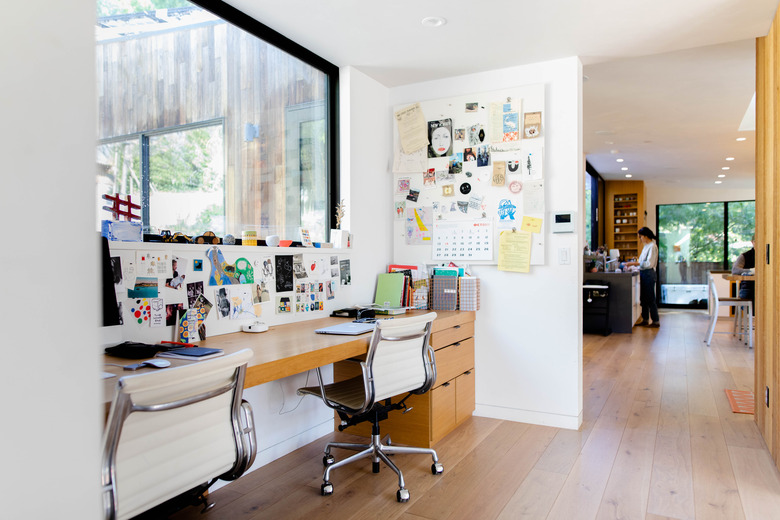
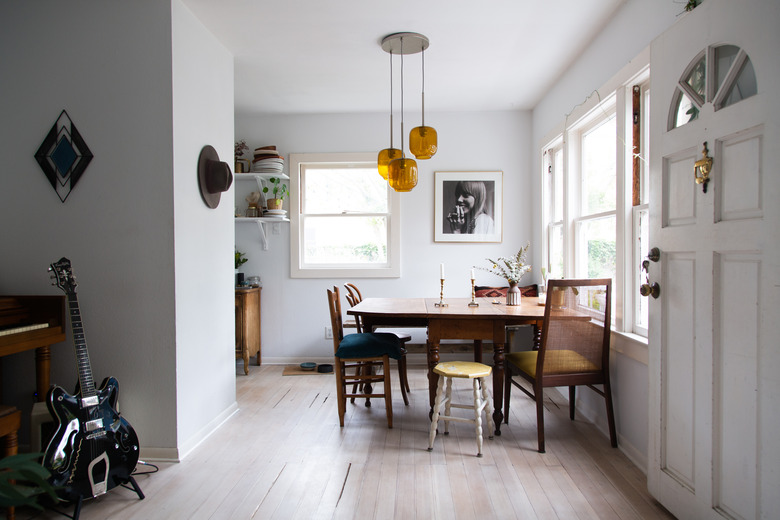
Maple wood is a favorite hardwood flooring option among homeowners for its delicate grains, soft tones and durability. It has become more desirable in recent years as contemporary Scandinavian and mid-century modern decor has grown in popularity. Maple works in just about any room in the home, from heavily trafficked foyers to formal dining rooms and cozy dens. It's also easy to install and maintain, which makes it the ideal choice for any living space.
The Many Variations of Maple Hardwood Flooring
The Many Variations of Maple Hardwood Flooring
According to the Wood Database, maple comes in hard and soft variations. Hard maple refers primarily to one maple species — Acer saccharum. Also known as sugar or rock maple, this is the tree from which we tap maple syrup. In the United States, black maple (Acer nigrum) and Florida maple (Acer floridanum) also fall under the hard maple category. Hard maple is popular in flooring and furniture products.
Soft maple doesn't refer to one particular species but a broad swath of the genus. You can find different species of soft maple depending on where you live. As an example, Oregon is home to bigleaf maple (Acer macrophyllum), while the eastern U.S. sees more red maple (Acer rubrum). Because maple trees that fall under this classification are not as hard, their wood is used mostly for crates, accents and some furniture.
Maple Flooring Options and Prices
Maple Flooring Options and Prices
As with most other hardwood flooring, maple materials come in different varieties:
- Solid hardwood planks are usually 3/4-inch thick, but they come in a variety of widths and lengths. You can choose from plank flooring that comes prefinished with a stain or sealant or maple that is unfinished. Solid hardwood can cost $3 to $10 per square foot depending on the grade and the manufacturer.
- Engineered maple flooring can be as little as 1/4-inch thick. It too comes in a variety of lengths and widths and has a much greater range of color than solid maple. Engineered hardwood costs a little less than solid wood at $2.50 to $9 per square foot.
- Laminate maple flooring is not a true hardwood material; it merely mimics the look of real maple. It is cheaper than engineered hardwood at $1 to $5 per square foot. Laminate flooring usually comes in 5-inch-wide planks.
There are three grade classifications for solid hardwood flooring that describe the look of the wood. A grade-1 wood is smoother and more expensive than those that are listed as grade 3.
- Grade 1: Wood is uniform in color with little to no visible knots.
- Grade 2: Wood has more knots and variations in color.
- Grade 3: Wood has a considerably more rustic, knotty look.
 Codi Ann Backman
Pros and Cons of Maple Hardwood Flooring
Pros and Cons of Maple Hardwood Flooring
Homeowners may choose natural maple over other woods for a variety of reasons, one of which is its availability. Maple is better for the environment than exotic woods, as it is local to its state. Maple has light tones and a fine grain that gives it a smooth, uniform look that complements both modern and vintage decor, and there is something to fit nearly everyone's budget.
With a rating of 1,450, maple ranks high on the Janka hardness scale, which means it's durable and not generally prone to dents. If it is properly installed and maintained, hard maple flooring can last decades and will add value to your home.
However, there are also cons to maple floors. They are prone to contraction or expansion with fluctuating humidity and temperature levels, which can cause them to swell, shift, crack or warp. Do not put maple in bathrooms, kitchens or basements for this reason. If you live in an area where high humidity is present, invest in a dehumidifier.
Maple will turn darker over time and is prone to scratches, but you can protect your floors with area rugs or a quality sealant. However, do not finish the floor with oil-based polyurethane, as it can turn yellow. Use a water-based sealant and keep sunlight off the floor to prevent discoloration. Staining maple is also sometimes tricky because it is prone to looking patchy. If you need help finishing or staining your floor, contact a professional.
Preparing Maple Hardwood
Preparing Maple Hardwood
If maple is your flooring choice, you'll need to do some research as to what fits your budget and how much you'll need. Once you've picked what you want, measure the room where you'll lay the floor. To do this, multiply the width by the length of the room. When purchasing wood, divide the number of square feet listed on the material's packaging into the room's measurements to calculate the amount you need. Make sure to add 10 percent more than the total for any emergencies during installation.
Once you get the wood home, remove it from its packaging and let it acclimate to the temperature and humidity of your home for 24 to 72 hours before installation, as it can expand or contract. Before installation, rack the wood on the floor to get an idea about how it will look. Place shorter pieces in areas where they will be less likely to be seen.
 Peter Schweitzer
Installing Maple Hardwood Flooring
Installing Maple Hardwood Flooring
After making sure the subfloor is level and clean of any rough spots, dirt or debris, place underlayment between it and the new floor. Remove baseboards from around the room before placing the subfloor and underlayment. Using a plank as your guide, make sure everything fits under the room's door casings. If not, trim the casings and check again.
Mark the center of each wall with a chalk line on the subfloor, extending the marks so they cross in the center. Leave an expansion gap of 1/4 to 1/2 inch around the perimeter of the room. Place spacers in the expansion gap and then place the first row of planks with the tongue side facing the interior of the room. Pre-drill holes 1/4 inch from the side of the plank closest to the wall every 6 inches. To prevent splitting face-nailed boards, drill 1/16-inch-diameter holes for the nails, 1 inch from the grooved edge. Space the holes so the nails hit a joist or as directed by the manufacturer.
Pneumatic nail guns can be challenging to use close to the wall, so face-nail the initial planks in place and then countersink them with a nail punch before filling the remaining holes with putty. Then, place nails through the tongue so they don't block the boards from connecting by countersinking them at a 45-degree angle. To place the remaining rows, lock the tongues and grooves of the boards and tap them in place with a mallet as you go. Stagger the ends 6 inches where the boards adjoin and cut as needed.
Face-nail the last rows by hand and fill the remaining holes with putty. Cut the final pieces to fit by measuring the distance from the wall to the board minus the expansion gap. If the last piece is less than an inch wide, place a little wood glue in its tongue and groove and insert it with a pry bar and scrap wood. Place transition pieces where needed, trim underlayment and reattach baseboards and moldings.