Laying Out Floor Tile: A How-To Guide

In a perfect world, every room in your home would be precisely square and every wall absolutely straight. In that world, you could simply lay tile by starting in one corner and working your way across the room. In the real world, however, things aren't quite that simple. You'll need to plan your tiling job around imperfect angles, inconveniently placed heating vents, door frames and other obstacles.
To do so, you'll need to lay out the tile before you glue it down. Doing so adds time to a tiling job, but it will also help you avoid potential disasters that are hard to fix once you've glued the tile into place.
Choosing the Right Tiling
Choosing the Right Tiling
Whether you've chosen vinyl, ceramic, linoleum or porcelain tiles, you likely thought about many practical considerations such as traffic level and water-resistance when making your choice. It's important to do the same when choosing the style of your new floor. Large tiles make a space feel expansive and are easier to lay. Smaller tiles are harder to install but add more coziness to the room.
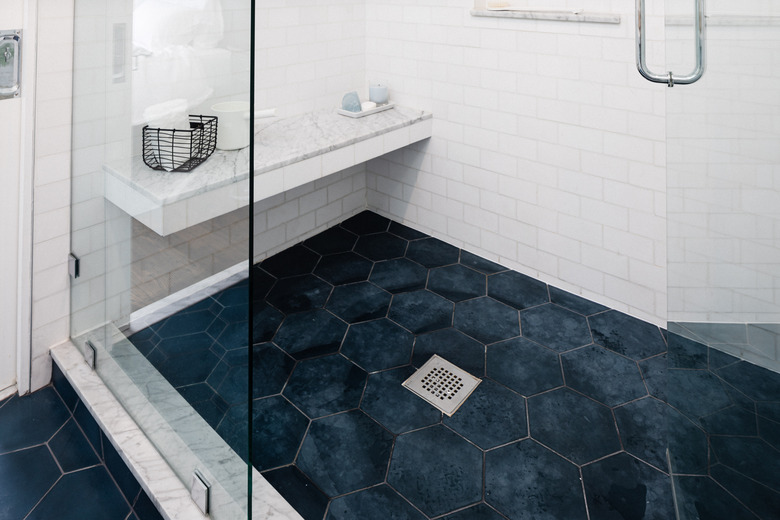
Color also affects the feel of the room. According to tile supplier European Heritage, darker tiles add warmth, but light colors make a room look larger. Busy, colorful tiles can add a touch of fun pizzazz to your room but may prove overwhelming when paired with bright paint colors or patterned wallpapers.
Remember to think about grout too. Wide grout lines are highly visible and unforgiving. People will notice if they're not straight, particularly if you go with a grout color that contrasts your tiles. Smaller tiles mean more grout. Although smaller grout lines make it harder to notice if your tiles aren't perfectly straight, they also mean more grout surface area to potentially attract dirt and stains.
 Stephen Paul for Hunker
Pattern Affects Layout
Pattern Affects Layout
The planning for your floor tile layout should begin before you purchase any tile since the tile you choose will affect your layout. Patterns provide a perfect example: If you purchase a tile with a complicated design, you'll want a simple layout, such as a brick pattern. If you choose plain tiles, however, you may want to spice things up with a more complicated herringbone or basketweave layout.
Some people simply lay a few tiles and then measure, essentially drawing a grid of layout lines on the floor to help them place their tiles correctly. You may want to take the time to physically lay out every tile, however, if you've purchased tile with a pattern. Tiles that mimic marble, for example, will have random veining patterns printed on them. However, a computer-generated print isn't quite as random as Mother Nature, and some of your tiles could be identical. Laying everything out ensures that you don't place identical tiles next to each other.
The 3-4-5 Rule
The 3-4-5 Rule
When you're ready to begin your tile layout, measure the longest outside wall in the room. Mark the halfway point on the wall with a pencil and then repeat the process on the opposite wall. When you've found the center of each wall, snap a chalk line between them. Do this again on the two remaining walls, snapping a chalk line again.
You should now have a giant plus sign on your floor. To make sure it's perfectly square, Armstrong Flooring suggests using the 3-4-5 method. Start by placing a yardstick or tape measure at the center of the room where your two chalk lines intersect. Measure out 4 feet along one of your lines and make a pencil mark. Do the same on the perpendicular line, this time measuring out 3 feet from the center point.
When you're done, measure the distance between your two pencil marks. If it measures 5 feet, your chalk lines are square, and you can begin laying out your tile. If it doesn't, you'll need to adjust your chalk lines and try again.
 Stephen Paul for Hunker
Laying Out the Tile
Laying Out the Tile
Once you have your center point and you know it's square, it's time to begin laying out your tile. Start at your center point, aligning the first tile so that your chalk line will sit underneath a grout line. Start laying tiles on the floor, working your way out from the first tile. Place two rows of tile in each direction, remembering to use tile spacers to allow for grout.
Look at the ends of the tile rows you've laid to see where the tiles fall at the edges of the room. If the tiles against your wall are half the width of a single tile or more, you can keep the current layout. But if you have less than half a tile against the walls, adjust the layout by moving the first tile so that it is centered over your center point. This will result in the two outside tiles being more than half width and will make for much easier tile cutting later.
Now that you have your first two courses of tile on the floor, finish laying out the rest of the tiles. When you're done, take a step back and carefully look over the floor, making sure you like the way the tiles are arranged. If you do, you can prepare thinset, grab a trowel and begin to permanently lay tile. If you're not happy, make adjustments until you are.
Deal With Cuts Last
Deal With Cuts Last
Lay out and install as many full tiles as you can. When you're done with that, it's time to deal with the cut tiles at the edges of your room. Measure to determine where you'll need to make each cut, working with one edge tile at a time. Because your walls aren't perfectly straight, you can't just cut a bunch of tiles the same width and lay them against the wall. Each tile on the edge of the room must get cut to fit its specific location.
If you are installing vinyl or linoleum tiles, cutting them is easy. Simply hold a straightedge on top of your tile and make the cut with a sharp box cutter or knife. If you've selected porcelain or ceramic tile, you can cut the tiles with a wet saw, snap tile cutter or tile nippers. Again, it's smart to cut your tiles and lay them in place before you start gluing them down.