How To Fix A Running Toilet
If your house has a flush toilet — and whose house doesn't? — then you're familiar with running toilet syndrome, which can manifest in more than one way. In a toilet with a severe case, the fill valve never shuts off, and the toilet runs continuously, wasting water and driving up your water bill, but in more mild cases, the fill valve may cycle on and off. Plumbers characterize this intermittent type of running toilet syndrome as "phantom flushing" because the fill valve cycles on at night when the house is quiet and gives the impression of someone flushing the toilet when no one is around. Spooky!
You don't have to bother calling a plumber to fix your running toilet because if you're like most homeowners, you'll probably be able to fix it yourself and save the service fee. This DIY job seldom requires any tool other than a screwdriver, and you might not even need that. You may need a plumber if you have a pressure-assisted toilet that keeps running after a flush because that indicates a leak in the pressure tank, and replacing the tank isn't as simple as repairing a conventional flush-and-fill mechanism.
Fix the Flush and Fill Valves
Fix the Flush and Fill Valves
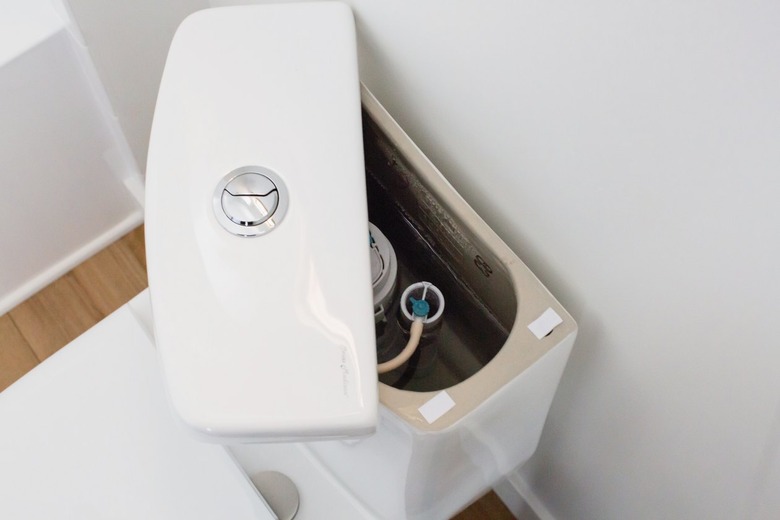
Every toilet needs a valve to fill the tank and another one to let water out of the tank and into the bowl, and either of these valves can cause running toilet syndrome. The fill valve is the one that is offset to one side of the tank and positioned above the water supply line, and the flush valve is the large orifice in the bottom center of the tank covered by a flapper or canister that is connected to the flush handle by a chain.
The most common cause of fill valve malfunctions is an improperly adjusted float, and you can probably correct this in less than a minute. When the flush valve malfunctions, more often than not the culprit is a worn flapper or canister seal, and that's also an easy fix, but it probably involves a trip to the hardware store. Sometimes, the leak is a result of corrosion around the flush valve orifice, and that's also fixable, but it takes a bit more effort and may involve disassembling the toilet tank.
Adjust the Floats
Adjust the Floats
The float on the fill valve regulates the water level. It can be a large, air-filled plastic ball on the end of a plastic or metal armature, or it can be a sealed plastic cup that goes up and down on the shaft of the fill valve. When the float isn't adjusted properly, the water level can rise above the mouth of the overflow pipe, which is part of the flush valve, and spill into the bowl.
You can adjust a ball float by screwing or unscrewing the float ball to change the length of the armature — make it longer to lower the tank water level and shorter to raise the water level. You can also lower the water level by rotating the float arm so that the bend in the middle is facing up. To adjust a cup-style float, turn the screw on its adjustment rod by hand or using a screwdriver. Turn the screw counterclockwise to lower the water level and clockwise to raise it. Some floats are adjusted with a metal clip that you squeeze and move up or down along a metal rod.
If the fill valve doesn't respond to adjustments of the float, you may have to adjust the valve sensitivity (for those that have this adjustment; many do not). Locate the screw on the top of the valve and turn it clockwise with a screwdriver to close it and make it more sensitive. This should make it turn off more quickly and should lower the water level. If the fill valve doesn't respond to this adjustment, it's time to install a new fill valve.
Replace the Toilet Fill Valve
Replace the Toilet Fill Valve
Warning
Before installing the fill valve, turn off the toilet water supply line, flush the toilet and empty the tank with a sponge so you don't get any water on the floor.
You can purchase a new fill valve for under $20, and if you have more than one option, choose a cup-style valve, also known as a Fluidmaster valve for the company that first marketed it. Instructions for installing the valve come with it, but basically, you will do the following:
- Unscrew the water supply line from the bottom of the toilet.
- Unscrew the locknut under the tank using pliers and remove the rubber washer.
- Set the length of the new fill valve to fit your tank by rotating the two halves of the valve shaft. The clearance between the top of the valve and the tank lid should be less than 1 inch when the valve is installed.
- Insert the threaded end of the valve through the hole in the tank, slip on the washer from underneath, screw on the locknut and tighten it with pliers.
- Reconnect the water supply, turn on the water, let the tank fill and observe the level when the water stops. Adjust the float to raise or lower the level as needed. It should be about 1 inch below the opening of the overflow tube near the center of the tank.
Replace the Flapper
Replace the Flapper
When water seeps under the flapper or canister and empties the tank, the fill valve keeps running in an attempt to get the water to the preset level, and if the leak is a slow one, the valve will cycle on intermittently, which is the not-so-mysterious cause of phantom flushing. The leak causes the water in the toilet bowl to ripple, although this agitation can be almost imperceptible if the leak is slow.
Fluidmaster recommends pushing down on the flapper to see if the rippling stops, but if the leak is too slow to cause rippling, a better test is to put food coloring in the tank at night and note whether or not the bowl water has assumed the color in the morning. If the water in the bowl is colored, the flapper or flush valve is leaking. Flappers are inexpensive and easy to replace as long as you purchase one that fits. Fluidmaster and Korky sell universal flappers that fit most toilets. Installing a new flapper is easy:
- Unhook the old flapper from the chain connecting it to the flush handle. You may need pliers to do this.
- Unhook the flapper from the overflow tube by pulling on the ears to disengage it.
- Hook the new flapper onto the ears on the overflow tube and connect the chain.
If your toilet has a canister instead of a flapper, you seldom have to replace the entire canister, just the seal on the bottom. There's usually a simple trick to removing the canister, which you can find by reading your owner's manual.
Other Problems With the Flush Valve
Other Problems With the Flush Valve
If a leaking flapper is the cause of a running toilet, it may simply be because the flapper chain is too short and prevents it from fully seating. Correct this by unhooking the chain, lengthening it by one or two links and reattaching it. Don't make the chain too long, though, or the flapper won't rise all the way when you push the flush lever, and the toilet won't flush properly.
When replacing the flapper and properly adjusting the flapper chain doesn't stop a leak, it's because the fitting around the flush valve orifice is loose or corroded. Some flush valves have a plastic adapter, and you may need to tighten this using pliers, but if the valve is brass and the metal is pitted, your best bet is to replace the flush valve. To do this, you have to remove the toilet tank from the bowl so you can access the locknut holding the flush valve to the tank.


