Building A Modern Concrete Paver Walkway

We may receive a commission on purchases made from links.
Adding a paver walkway can enhance curb appeal in the front of the house and create attractive yet practical stepping stones to get from one area of the side yard or backyard to another. There are many paver designs available, but simple concrete square or rectangular slabs seem to complement modern architectural style better than most other paver designs.
The modern architectural movement, which began in the 20th century, was essentially a designer backlash against some of the excesses of earlier periods such as Victorian or art deco—filled with ornamentation, cherubs and complex geometric patterns. Modern designers rely on simple, uncomplicated shapes, and they consider the outdoors an extension of interior spaces, so a concrete paver walkway or patio fits right in. Houses in the modern architectural style lack ornamentation, especially on the exterior surfaces, and they use simple materials to create interest and texture.
Concrete Paver Types
Concrete Paver Types
In addition to concrete, there are a number of different paver materials available, including brick pavers, porcelain, bluestone and other natural stone. Concrete has the advantage here because it can be formed on-site. While there are ready-made concrete paver products available, large format pavers are harder to come by. Most retailers do not stock anything larger than 18 x 18 inches.
The problem is that concrete is heavy. An 18 x 18 x 1.5 paver can weigh over 35 pounds. A specialty slab that is 32 inches long will weigh over 125 pounds. Having a contractor pour the slabs in place saves the heavy lifting, or this could turn into a challenging DIY project. You can design the slabs to be any size you wish.
Concrete stains can provide custom looks that go beyond the standard concrete color. An experienced pro can work the concrete to create a variety of possible finishes and textures.
 Naphat_Jorjee/iStock/GettyImages
Paver Walkway Design
Paver Walkway Design
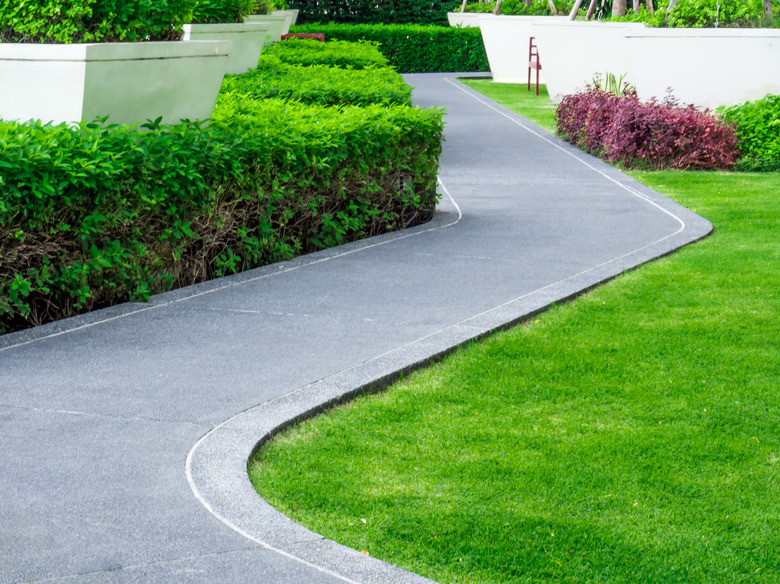
Landscape designers take cues from the style of the house and the materials used when constructing an outdoor space. The large squares and rectangles of a slab-style paver walkway is one of the reasons the style fits so well with midcentury modern design—homes that were built between the 1930s and the 1960s. Most walkways are straight, such as a front yard walk that runs from the street to the front door, but gentle curves are possible, such as those you might find on a path that winds through a garden.
For two people to walk comfortably side by side, the walkway should be about 48 inches wide. There are a few ways to meet that requirement. One way is to build a number of wide, rectangular paver slabs. Another is to construct square slabs and place them in pairs side by side.
Paver walkways can lead to patios constructed of larger concrete slabs. This arrangement creates visual interest because of the different sizes of the slabs. For a concrete walkway, stagger the placement of the slabs so that their edges form a zigzag pattern adds interest to a straight run.
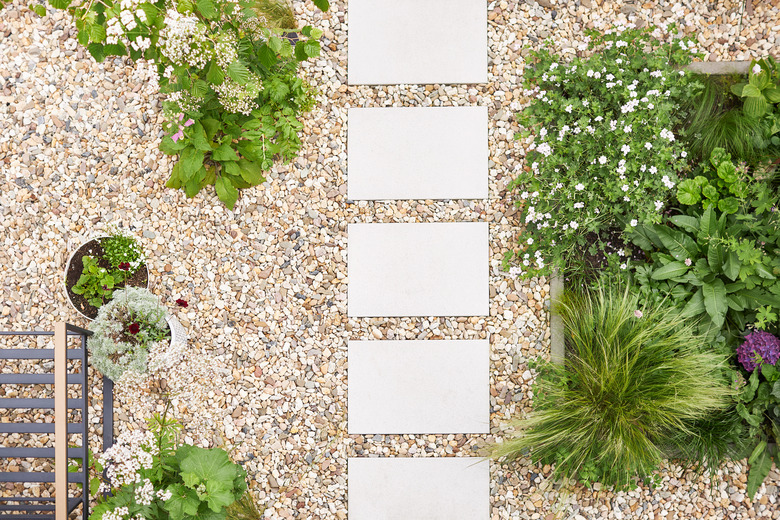
A modern concrete paver walkway often combines the concrete slab with other materials. Some slabs are simply set into a lawn so that grass can grow between the segmented pavers. Other designs rely on materials like crushed stone, mulch or round river stones as edging and to fill in the spaces between the pavers.
Paver installations require some excavation, so it is best to call 811 before you start the project—the national "call before you dig" number that alerts your local utilities to visit your property and mark the approximate location of buried electrical, gas and water lines.
Paver Walkway Layouts
Paver Walkway Layouts
It is a good idea to sketch your walkway design on paper. The design should include the location of the walkway as well as the size of the pavers. It should also include spaces between the slabs and the edging material.
To build a concrete paver walkway, construct forms made of standard 2x4 lumber to hold the concrete. Cut the wood to the dimensions in your plan and screw the sides together using deck screws. The inside dimensions of the forms should match the size of the slabs you plan on installing. Use screws rather than nails because they will be easier to remove when it is time to remove the forms from the cured concrete.
Build all of the forms at once. That way, you can lay them out on the ground and make any necessary adjustments to the design. Lay out string lines to mark the edges of the walkway. This will help you put the forms back into their proper position when you move them to dig.
 Kai und Kristin Fotografie/iStock/GettyImages
Paver Walkway Concrete
Paver Walkway Concrete
For this type of job, use bags of premixed concrete. It is sold in packages, and all you need to do is add water. You can estimate the number of bags you will need using the Quikrete calculator by multiplying the length times the width of your slabs (to find the square feet of each slab) and then multiplying that by the total number of slabs. Use the number of bags indicated for a 4-inch-thick slab in the calculator.
You can mix the concrete by hand in a wheelbarrow using a shovel or use a portable concrete mixer to make the job easier and quicker. This tool can usually be rented.
The other option is to order ready-mix concrete from a local supplier who will deliver the wet concrete by truck. When you order concrete this way, you order by the cubic yard. This requires having all of the slab forms ready to be filled when the truck arrives. It's also a good idea to have several helpers so you get everything done before the concrete sets.
There are a number of different types of concrete. If you opt for crack-resistant concrete mix, you won't need to install rebar or metal mesh to strengthen the concrete because the mix contains fibers that resist cracking.
Pouring the Paver Concrete
Pouring the Paver Concrete
Remove enough sod or dirt to a depth of about 8 inches. If you are going to place a material as edging and between the slabs, dig out those areas as well. Use a hand tamper to tamp the soil. Then, apply about 4 inches of gravel in the area where you will set the forms and tamp again.
Line up the forms with the string lines, making sure the forms are level. Pouring concrete into the forms can make the forms move, so stake them in place to secure them. Drive the stakes below the top edge of the forms. Apply a form release agent to the inside of the forms. This will make removal of the forms easier later.
Wet the base material lightly but don't leave standing puddles. Mix the concrete per package directions and pour it into the form about halfway up the side of the form. Tap the outside of the forms with a hammer or mallet to release any air bubbles in the concrete.
Add more concrete until it is about an inch above the top of the form. Again, tap the forms using a hammer. Use a 2x4 that can span the width of the form to screed (level) the concrete. Move the screed across the top of the form in a sawing motion (it helps to work with a helper for this). The screeding will smooth the surface and remove excess concrete.
Smooth the surface using a trowel but don't overwork the surface at this point. Run an edging tool around the perimeter of the slab. This separates the slab from the form, and it rounds off the edges of the concrete. Rounded edges are less likely to chip and crack than sharp edges.
When the concrete has set up slightly and the water on the surface has evaporated, smooth the surface with a trowel. Pulling a standard push broom across the surface can supply traction to the slab. Follow the package directions for curing time. Usually, you can remove the forms in 24 to 48 hours.
If you are planning on pairing the slabs with a filler or edging material, put down landscape fabric that acts as a weed barrier. Finally, add the edging and filler material.
References
- The Home Depot Blog: Poured Concrete Pavers Create a Stylish Patio
- Landscaping Network: Modern Concrete Pavers
- Quikrete: Concrete Calculator – How Much Do I Need?
- YR Architecture Design: 5 Characteristics of Modern Minimalist House Designs
- YouTube: HomeMadeModern: How to Make Concrete Patio Pavers and a Solid Cedar Deck