How To Use Mulch For Weed Control
We may receive a commission on purchases made from links.
One of the worst parts of gardening is spending hours and hours of your life pulling up weeds. Rather than turning to weed-killer sprays that contain harmful chemicals like glyphosate, consider using mulch as a natural form of weed control. Garden mulches work by adding a thick layer of material to the soil's surface, which keeps new seeds from being able to reach the soil and prevents weed seeds already in the soil from germinating by stopping the sun from hitting them. On top of that, many organic mulches can even provide shelter to crickets, carabid beetles, and other insects that eat weed seeds.
Choosing Mulch for Weed Control
Choosing Mulch for Weed Control
There are quite a few types of mulch from which to choose, ranging from commercial mulches made of rubber all the way to grass clippings from mowing your own yard. Overall, most will work perfectly fine as weed control, but not all mulch materials are suitable for all purposes. It's important to do some research for the best mulch for your purposes before trying to use just any material to control weed growth in your garden.
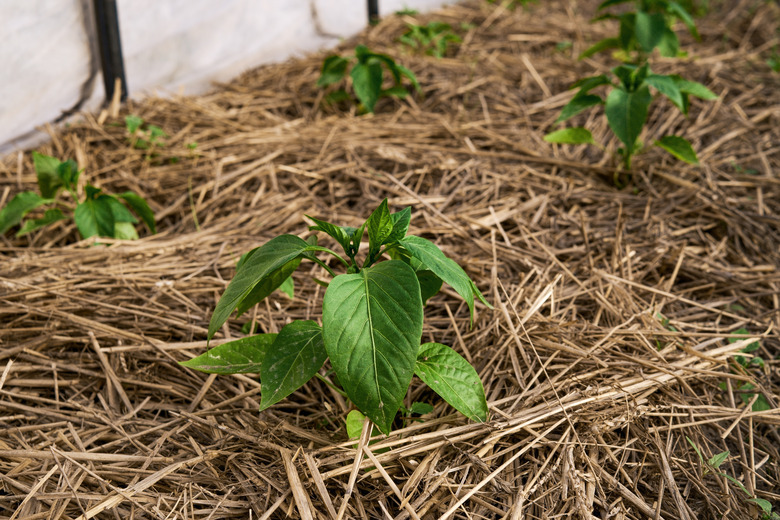
If you have no aesthetic considerations to keep in mind, you might want to consider inexpensive options that are made from the mulching and scraps of other organic matter around your home, such as wood chips, sawdust, grass clippings, pine needles, leaves, compost, etc. These types of organic mulches are particularly useful as mulch for flower and vegetable gardens since they amend the soil and add nutrients as they decompose.
If you're concerned about using pine needles because you've heard they change the pH of the soil, be aware that while the needles are acidic, this cannot change your soil pH. Be sure to avoid using yard waste or straw that has been treated with herbicide, as these won't just kill weeds but could also kill the plants you want to grow. Also, you should know that some types of mulch, such as grass and hay, may contain weed seeds that eventually make their way down to the soil as the material decomposes. With a continually sufficient level of mulch, however, this shouldn't be a problem.
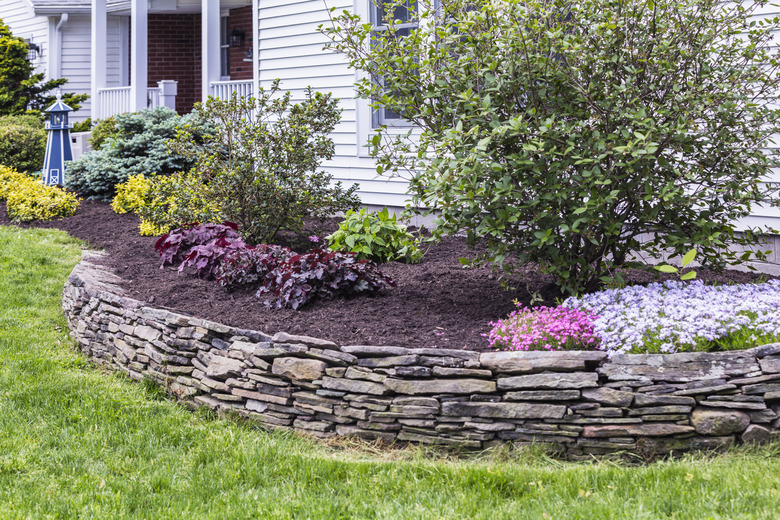
Some homeowners may not like the way some of these natural mulches look, especially in their otherwise-beautiful flower beds, and in fact, some homeowners' associations may prohibit the use of "ugly" mulches like grass clippings. In these cases, you may consider shredded or chipped bark mulch or rubber mulch. Bark mulch tends to last longer than other natural mulches because it doesn't break down as quickly as grass or compost, but at the same time, this means it adds less nutritional value, so you may need to fertilize more often.
Rubber mulch comes in a wide array of colors, which can add aesthetic appeal to your garden. The advantage of rubber mulch is that it never decomposes, so you don't have to refill your layer of mulch every year. This also means you should expect to add fertilizer because the rubber will not add nutritional value to your soil. A few natural alternatives with many of the same properties are gravel and tumbled-glass chips.
Best Mulches for Vegetable Gardens
Best Mulches for Vegetable Gardens
Organic yard waste and compost are some of the most effective options for garden mulch because they are inexpensive and benefit the soil. If you don't have these on hand, be wary of using commercial mulches for vegetable gardens, as they often contain dyes and fungicides that are not good for plants you intend to eat. If you are using store-bought mulches, only buy those specifically labeled for use in vegetable gardens.
Two other weed-barrier alternatives useful for ornamental and vegetable gardens include black plastic and landscape fabric, which lay above the soil and suppress weeds. Black plastic can also benefit plants by trapping heat in the soil at night and moisture during the day. That being said, black plastic prevents water and nutrients from entering the soil, so you must ensure plants are manually watered and fertilized enough.
Landscape fabric is best used with a secondary mulch on top to protect the fabric from sun damage. Unlike black plastic, it allows nutrients and water to enter the soil. Avoid using this with plants that have shallow roots, as they may grow up through the fabric.
Weeding Before You Mulch
Weeding Before You Mulch
Before you lay down your first layer of mulch, weed the area well. Pull out any weeds you can and cut any others below the soil surface using a hoe. Be aware that laying down your mulch will not be the end of your weeding days.
The first season after you use mulch will require a vigilant weeding schedule, which is why it's sometimes best to start with a small, manageable area and then expand the area covered in garden mulch each season so you aren't overwhelmed by too many weeds. Once the stubborn seeds that have already germinated or established roots die off, you won't have to work so hard to keep the area weeded in subsequent years.
After you add mulch, the best time to pull weeds is when the soil is wet, but if it's too dry, you can still cut the weeds down below the soil line, making sure to cover them well with mulch to prevent regrowth. A garden fork can help grab the tendrils of chickweed or vetch, and a fishtail weeder can help pry up deep taproots like those of dandelion or dock. Place the weeds you pull up on a blanket or in a bag so the seeds don't have a chance to fall back down into the mulch or soil.
To dispose of the weeds you've pulled, throw them in your trash or green waste or throw them in the compost pile. To properly compost weeds, your compost must reach a very hot temperature to kill off the seeds so they can't spread. If your compost pile is a bit cool, try putting your weeds and some compost in a Crock-Pot for three hours on the low setting, which should kill the weed seeds. Reprocess the cooked compost before using it so it can redevelop the microscopic life forms that make it so beneficial.
Alternatively, you can try to block weeds from coming up the first season by using a layer of landscape fabric, cardboard, or newspaper on the soil before laying down the mulch. When going this route, always maintain your layer of garden mulch, as it can decompose into a new bed of soil in which weeds can grow.
Adding the Mulch
Adding the Mulch
After you've determined which type of mulch is best for your garden or your flowerbed and it's time to spread the mulch around, always try to keep your mulch level around 3 inches deep. Making it shallower will let sunlight through the mulch to reach the soil, allowing weeds to grow, but making it thicker can deprive the soil of oxygen and can suffocate your garden.
Putting the mulch right up to the base of the plant can cause rot, so leave at least 1 to 2 inches of space between the mulch and plant stems, and leave around 6 inches between tree trunks and mulch. For bulbs and seeds that haven't yet sprouted, leave a gap in the mulch 4 inches wide for the plant to grow out of the soil. You'll always have to keep an eye out and pull weeds in these mulch-free spaces around your plants.
You may want to install soaker or drip hoses before laying down mulch so you can target water just to the plants you want to grow, helping to further stunt the growth of weeds by denying them water. If this isn't an option, attempt to water only around your plants and not the spaces between.
Once you've laid down the mulch, always keep it approximately 3 inches deep and fill in any holes from planting to discourage weed growth. Only dig in soil when you need to and always cover holes well with mulch when you're finished. When using organic mulch, refill to 3 inches at least once a year to account for decomposition. Once a year or more, you need to be sure to pull back the mulch from your plants and trees since it will slowly invade this area as time goes on.


