How To Grow Microgreens
We may receive a commission on purchases made from links.
Microgreens are not a specific type of vegetable. Rather, the catchall term refers to the very young, green, edible leaves of any of a variety of vegetables — greens that are harvested just after the first leaves have developed. While lettuce (Lactuca sativa) is the poster child of the microgreen movement, many other veggie leaves can be used, including any of the leafy greens typically grown in the garden, like kale (Brassica oleracea [Acephala group]), chard (Beta vulgaris subsp. vulgaris), watercress (Tropaeolum majus), endive (Cichorium endivia), and arugula (Eruca vesicaria subsp. sativa). The first young leaves from vegetables like beets (Beta vulgaris) and cabbage (Brassica oleracea [Capitata group]) are also possible candidates.
Microgreens are popular today for use as nutrition supplements or to enhance the appearance or flavor of food. This type of crop grows for such a brief period before harvest that it can easily be planted in containers indoors or outdoors as well as in garden beds. The plants are eaten so young and small that many refer to them as "vegetable confetti."
Best Uses for Microgreens
Best Uses for Microgreens
Microgreens are not a singular type of vegetable but rather the youngest, most-tender sprouts of various lettuces and greens. The term "microgreen" refers to the early sprouts of various lettuces as well as a variety of other vegetables. Microgreens share one trait: They are harvested very early.
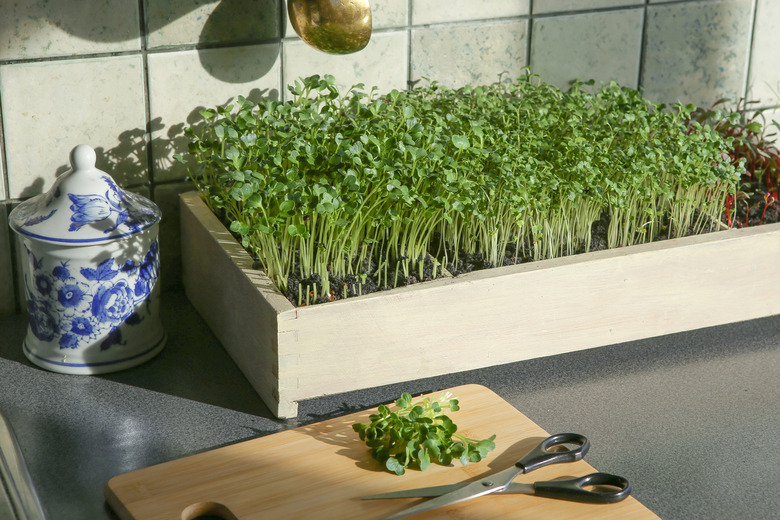
This is currently a popular foodie trend, and you'll see microgreens listed on the menu in many upscale restaurants. Health-conscious diners say that microgreens contain good-for-you things like phytonutrients and plant metabolites. You can sprinkle them in soups, salads, and smoothies as a flavor accent or to add a nutritional punch to a sandwich or meal. Given that the veggies will be harvested so quickly after planting, they can be planted in containers on a sunny windowsill, in containers outdoors, or in a garden bed.
Microgreens are often confused with sprouts, but they are slightly different. When you eat sprouts, you eat the sprouted seeds of various plants. With microgreens, the seeds are allowed to germinate and root, and only the new, young leaves are consumed. Fans claim that they have more nutritional value than spouts.
How to Grow Microgreens
How to Grow Microgreens
Starting Microgreens From Seed
Starting Microgreens From Seed
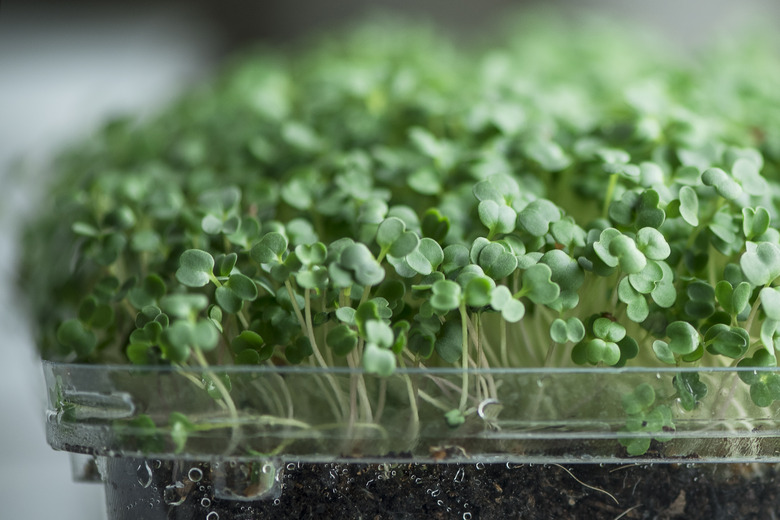
While you can grow microgreens outdoors in the garden bed, many people prefer planting seeds in a container, whether indoors or outdoors. The temperature should be at least 60 degrees Fahrenheit for seed germination, and the container should be placed in a spot with bright, indirect light.
A very shallow container or even a shallow tray is perfectly sufficient as long as it has drainage holes. Fill it with potting soil with a little perlite blended in. For lettuce microgreens, scatter the tiny lettuce seeds generously on the soil surface. They only need a light cover of fine soil sifted over them. Other types of microgreen seeds will be heavier and should be pressed into the soil about 1/8 to 1/4 inch. No fertilizer is necessary, but the soil must be kept consistently moist.
Many seed companies also sell one-size-fits-all growing kits. These are quite convenient and include everything you need to get started. However, growing kits are expensive and take the gardening aspect out of growing microgreens.
Starting Microgreens From Seedlings
Starting Microgreens From Seedlings
Some people prefer to germinate the seeds used for microgreens before those sprouted seeds are planted. One way of doing this is to press seeds into moist paper towels and keep the towels moist until you see some sprouting. Once the seeds germinate and grow for a day or two, they can be transplanted into a container or garden bed.
Don't worry about spacing the vegetable seedlings as the seed package recommends since these spacing guidelines are meant for mature plants. When vegetables are grown as microgreens, they are not permitted to achieve full size. Rather, they are harvested very young while each plant only has a few small leaves. That means that it is perfectly fine to transplant seedlings quite close to one another.
While it is easy and rewarding to germinate vegetable seeds in damp paper towels since you can see their progress every day, this method of growing microgreens has a serious issue. It is very difficult to transplant the shoots without breaking them from the seeds. Be sure you go into the process with lots of time and patience.
In What Zone Do Microgreens Grow Best?
In What Zone Do Microgreens Grow Best?
While U.S. Department of Agriculture plant hardiness zones are extremely helpful in selecting trees and perennials for your garden, they are not useful for microgreens. Knowing about the hardiness zones of plants helps a gardener determine which plants will survive the winters in that region.
This doesn't apply to microgreens. They are planted and harvested in a very short period of time and are never left outside for the winter. In fact, most vegetables in the garden are grown as annuals, which means that they are planted and harvested in one growing season. That means that zones are not an important issue for annual veggies.
When Should You Plant Microgreens?
When Should You Plant Microgreens?
If you are growing microgreens inside, they can be seeded at any time and grown on a windowsill. If you intend to grow them in containers or beds outside, you'll want to avoid temperature extremes.
Vegetables like lettuce, spinach, endive, and other leafy greens are cool-season crops, best grown in spring or fall rather than the hot days of summer. While microgreens are not allowed to mature beyond the very young stage, they won't like summer heat or winter chill.
Soil, Sunlight, and Water Recommendations for Microgreens
Soil, Sunlight, and Water Recommendations for Microgreens
The soil you use for microgreens must drain freely and offer some nutrients, but not much more is required of it. With this type of cropping, the plants don't grow more than a week or two and do not need to pull a lot of sustenance from the soil. If you are using potting soil, add a little perlite or other material to increase drainage.
These are tiny plants even when they are harvested, and most of them are cool-weather crops. For that reason, direct afternoon sun or hot sun at any time is not a friend. Microgreens grow best in bright, indirect sun. Put the container on a windowsill or on the patio if growing in pots. If you are planting them in the garden, do so in spring or fall or else plant them in a bed that gets shade in the afternoon.
Microgreens are very young seedlings, and they will not survive without moist soil. Water containers regularly with a spray bottle to keep up the moisture content. Outdoors, spray once or twice a day.
How to Harvest Microgreens
How to Harvest
Microgreens
Microgreens should be between 1 and 3 inches tall when you pick them. Remember that these are not to be eaten as sprouted seeds, so you want to cut each tiny plant just above the rooted seed. It is easiest to pluck out the whole plants, roots and all, and then trim them. Some top chefs use only the tiny new leaves, but it is perfectly appropriate and just as nutritious to snip off the roots.
The best time for harvest depends on the type and species of veggie. It is best to taste as you grow so that you can figure out the tastiest stage of growth for every species. Try one when the small plants are 1 inch tall, then 2 inches, and then finally 3 inches. One more inch and sometimes one more day in the soil can make a big difference in sweetness.
Common Pests and Other Problems for Microgreens
Common Pests and Other Problems for Microgreens
Microgreens are so small that it is rare for even the hungriest of garden pests to attack them. If you find snails or slugs rushing over to chow down, the old beer trap trick is worth trying. Just set out a bowl of beer and watch the pests climb into it. You can also hand-pick them and drop them off elsewhere if you like.
Any type of crop can be invaded by aphids, so keep your eye out for these small bugs that suck out plant fluids. In many cases, a blast of water from the garden hose will take care of a small infestation.
If you plant in the garden, mice, other rodents, and birds may also discover your microgreens and indulge. Rabbits are also particularly fond of young sprouted seedlings. You can protect your crop by covering up the young plants at night with plant fabric. It's even more effective to grow them in a greenhouse or in containers you can move indoors at night.
The worst threat to microgreens may be the behavior of the gardener. Tossing too much fertilizer or an extremely strong fertilizer on your greens can kill the young seedlings. Likewise, too little water and too much hot sun are certain to leave you with dying plants. Be sure you have the time and focus necessary before you start planting. A regular vegetable garden is much more forgiving.
Common Diseases for Microgreens
Common Diseases for Microgreens
The short growing period of microgreens usually protects them from most common diseases. The most serious threat to microgreens is said to be pythium, which is the fungal agent that causes damping off.
You can usually avoid damping off with microgreens, however, with good cultural practices. Although it is possible to grow microgreens from very densely seeded flats, this can be one of the causes of damping off. Another can be lack of air circulation. Even if you are growing microgreens indoors, open the window from time to time or give the container a vacation on the back patio or fire escape.
Another way to avoid damping off is to grow microgreens without using soil. If hydroponic growing appeals to you, you might want to try it with microgreens.
Some types of vegetable seeds are more prone than others to damping off. Any kind of lettuce (and most other leafy greens) grown as microgreens usually doesn't fall victim to either pests or diseases. Other plants are much more susceptible, including watercress, basil and mint.


