How To Grow Endive
We may receive a commission on purchases made from links.
If you walk into your local garden center and ask for endive (Cichorium endivia), you may come home with a different plant than you expect. There are two significant varieties of endive, and each looks and tastes a bit different.
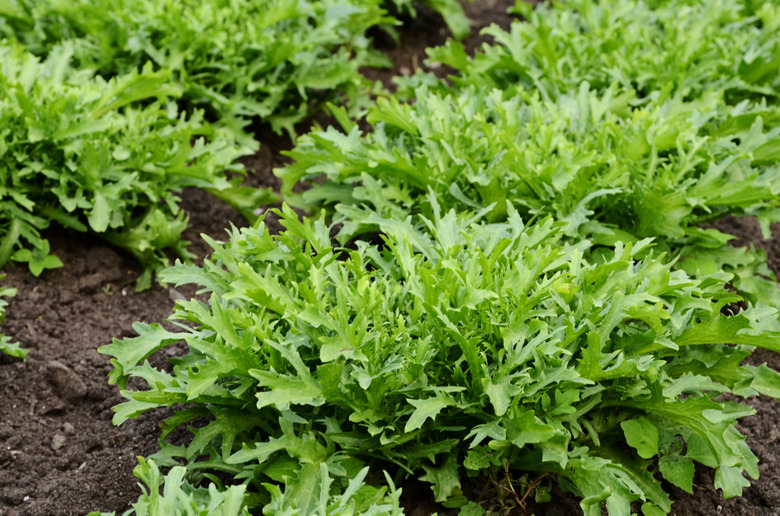
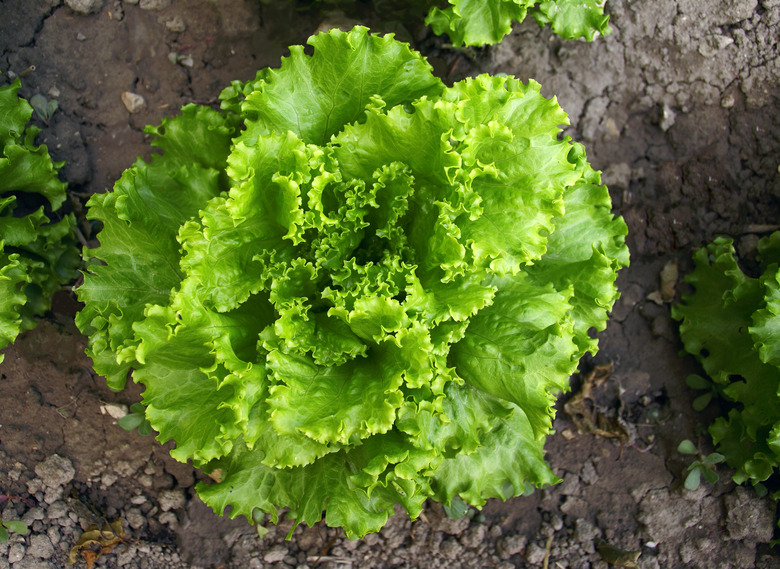
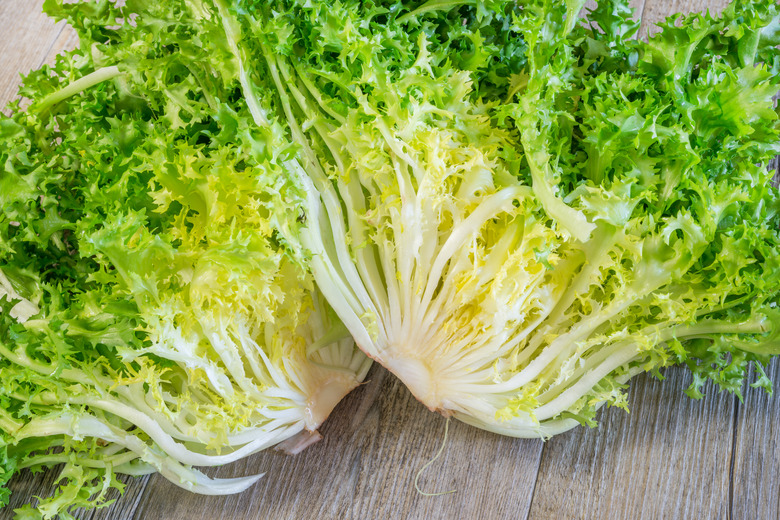
Known as frisee (Cichorium endivia var. crispum), curly endive resembles a fluffy head of lettuce. Frisee has a very strong flavor, and you only need a little bit of it to flavor soups, salads and other dishes. Far milder in flavor is escarole (Cichorium endivia var. latifolia). Sometimes called broadleaf endive, escarole has a milder flavor than frisee. It also looks a bit different, resembling leaf lettuce.
Both require the same growing conditions, so choosing one is a matter of personal taste. Generally, those new to cooking with endive should opt for the milder flavor of escarole. Although anyone can try their hand at growing endive, the plant tends to bolt (go to seed) whenever it's unhappy with its growing conditions. Don't let endive frustrate you if you're new to gardening, as this can be a difficult plant to grow. If yours bolts, try to figure out what went wrong and try again the next growing season.
Best Uses for Endive
Best Uses for Endive
Chefs use endive to spice up soups and salads. Endive is such a popular ingredient in Italian wedding soup that many consider it blasphemy to use any other greens. You can also saute, braise or grill the vegetable. To make sure you have enough to go around, plant two or three endive plants per person.
How to Grow Endive
How to Grow Endive
How to Start Endive From Seed
How to Start Endive From Seed
- You can sow endive seeds in the garden or start them indoors.
- Work some compost into your soil to prepare it for plants.
- Sow your endive seeds about 1/4 inch deep, spacing plants 9 inches apart. If you're concerned that not all of your seeds will germinate, sow them closer together and thin the seedlings later if necessary. Endive plants grown too close together tend to bolt rather than producing, so space them carefully.
- Replace the soil over your seeds, and water them gently immediately after sowing.
- If you started your seeds indoors and are now working with seedlings, work some compost into your garden bed to add nutrients and loosen the soil. Young plants do best when the soil is loose and easy to push roots through. Compacted soil holds too much water and makes it difficult for new plants to establish themselves.
- Plant endive seedlings 9 inches apart at the same depth as in their original pots or seed trays.
- Water your seedlings after planting.
In What Zone Does Endive Grow Best?
In What Zone Does Endive Grow Best?
Although it is a biennial plant, endive is grown as an annual plant in USDA hardiness zones 4 through 9. Endive is a cool-season vegetable, and you may need to adjust your planting times a bit based on your USDA hardiness zone. Gardeners in cooler zone 4 can plant endive from May to August. In warmer areas like zone 9, gardeners can start a bit earlier and plant endive in March.
When Should You Plant Endive?
When Should You Plant Endive?
Endive prefers spring and fall temperatures to the heat of summer. If you want to sow your endive seeds directly outdoors, do so four to six weeks before the last expected spring frost in your area.
You can also get a jump start on the growing season by starting your endive seeds indoors eight to 10 weeks before the last spring frost, but be mindful of their needs. Endive seeds won't germinate at soil temperatures of 80 degrees or more, so you'll need to keep seeds cool if you start them inside. Don't go too cool, however. Seeds exposed to temperatures below 40 degrees for too long may not germinate.
Sow early in the spring for a summer crop and again in late summer for a fall crop. The optimal growing temperature for endive is between 50 and 75 degrees, so plan your plantings accordingly.
Soil, Sunlight and Water Recommendations for Endive
Soil, Sunlight and Water Recommendations for Endive
Endive isn't particularly fussy about its soil and will grow just about anywhere. It accepts a soil pH that is anywhere from 4.5 to 8.3, although 5.5 to 7.5 is ideal. The soil needs to drain well but stay moist between waterings. Soil that dries out can cause bolting or an overly bitter taste at harvest time.
Make sure that you and Mother Nature provide your endive plants with about an inch of water per week during the growing season. You clearly can't change the way it rains, but always aim the water at your plants' roots rather than their leaves when watering.
Endive likes full sun but will tolerate light shade if necessary. These plants generally don't need fertilizer. If you wish, however, you can side dress them with aged compost about halfway through the growing season.
Mulch around your plants and weed diligently so your endive doesn't have to compete with weeds for water and nutrients. You don't need to get fancy — a layer of straw or grass clippings will do the trick.
How to Winterize Endive
How to Winterize Endive
Endive is a cool-season crop, which means gardeners in the South may have to grow it over the winter. Although tolerant of frost, endive won't survive a hard freeze. If your winter temperatures stay above 45 degrees and your summer temperatures exceed 75 degrees, you should grow your endive as a winter crop. In this case, no winterization is necessary.
If you grow endive in a colder climate, harvest your fall endive crop before the ground freezes. There isn't a way for you to carry your endive through the winter, and doing so would prove pointless anyway. As a biennial, endive spends its second season producing seeds rather than leaves, so you won't get an endive crop during the plant's second year even if it does survive the winter.
How to Harvest Endive
How to Harvest Endive
You can harvest your endive in one of two ways. When it is young, you can harvest the tender outer leaves of your endive plant using a cut-and-come-again approach beginning when the plant is about 40 to 50 days old. This type of harvest lets you take only a few leaves at a time so the rest of the plant can keep growing and producing. Young leaves are milder than mature ones, which is what makes a young harvest appealing.
Depending on the variety you plant, full endive heads will come ready for harvest between 60 and 100 days after planting. When they do, you'll cut the entire head of endive off the plant with a sharp knife, and its leaf production will stop.
Common Pests and Other Problems for Endive
Common Pests and Other Problems for Endive
Like all leafy greens, endive can attract slugs, snails, leafhoppers and aphids. You can pick the larger of these pests off the plants by hand or hit them with insecticidal soap. Aphids are easily removed with a jet of water from your garden hose. Remove aphids in the morning so the plants have time to dry before rot and mildew set in.
Cutworms can also cause problems for endive. "Cutworm" is a generic name for the larvae of several moth species, and these caterpillar-like creatures can do some serious damage to your plants. The best remedy is to prevent them before they start feasting on your plants.
To do so, examine the soil around seedlings to make sure it's free of the worms. If it isn't, pull out any worms. Once the soil is clear, wrap a cylinder of waxed cardboard (or make a cylinder from an old yogurt container) around the seedling, pushing it into the soil a bit. The cutworms can't climb the smooth surface and won't be able to reach your plants.
Remove the collar before it restricts the growth of your endive plants. By that time, your plants will be large enough to fend off cutworms and suffer only minimal damage.
Common Diseases for Endive
Common Diseases for Endive
If you properly space your endive plants to promote good air circulation, avoid working with them when they're wet, and rotate your crops each year, you can usually avoid endive diseases. It's also helpful to direct water at the base of your plants rather than wetting the leaves when irrigating. Most of the fungi and bacteria that cause endive diseases don't survive in gardens that utilize good hygiene practices.
Bacterial leaf spot is an exception, however. This disease thrives in the cooler temperatures that endive prefers and can affect your plants even if you follow all the garden hygiene rules. Bacterial leaf spot appears as brown, wet spots on the leaves of endive, eventually turning the entire leaf yellow. If you see bacterial leaf spot on a plant, remove and destroy it before it can affect your other plants.


