How To Troubleshoot And Repair Bare Spots In Your Lawn
For the homeowner who values a lush, green lawn, few things are as frustrating as finding bare spots. Many homeowners take pride in their outstanding lawn care, but even the healthiest lawns can develop bare spots, and there are many causes that have nothing to do with shoddy lawn care or neglect.
It's important to discover the cause of the bare spots in your lawn. Bald patches in an otherwise healthy lawn can be repaired without knowing the reason they developed in the first place, but this will not eliminate the problem. In fact, you may find yourself busy doing lawn repair again in the future because the bare spots are likely to return. The correct way to get rid of bare spots for good is to take some time to investigate, find what is causing the problem and take the correct steps to solve the problem.
Troubleshooting Lawn Bare Spots
Troubleshooting Lawn Bare Spots
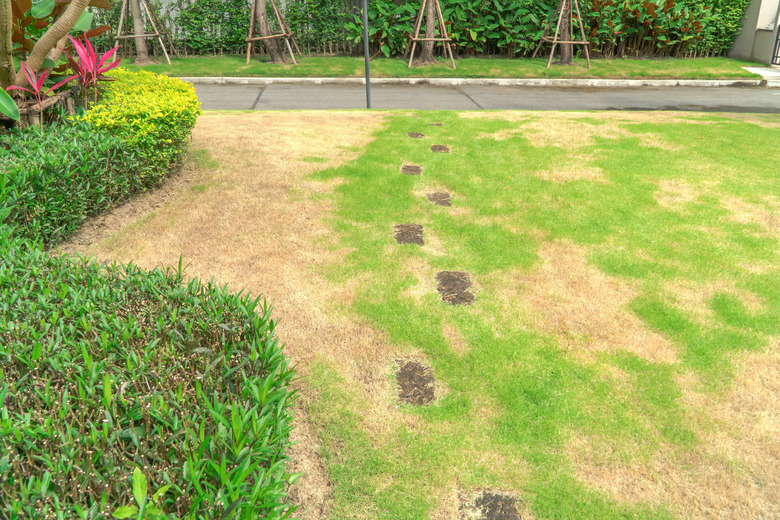
There can be a number of reasons a lawn develops bare spots, and some are more obvious than others. For example, heavy foot traffic is not difficult to diagnose and can cause a great deal of damage to your lawn. You can put down new grass seed in the damaged area, but as long as people walk on it, you will continue to have problems. Rerouting foot traffic or installing a walkway will protect that area of your lawn and allow your lawn care repairs to last.
Animal urine is another common cause of bare spots. If your pet — or worse, a neighbor's pet — regularly uses an area of your lawn to do its business, any repairs you make will be short lasting until you solve this problem. Another common and obvious cause of dead grass or bare spots is salt, which is often used for deicing roads, driveways and walkways and can be washed onto your lawn by melting snow and rain. Mowing your grass too short can result in dead spots, and a lack of water during a drought will also result in dead grass and bare spots in your lawn.
There can be other less obvious reasons for bare spots in your lawn. Some of these include underground rocks or roots, poor soil conditions, the type of grass seed used, weed or insect infestation and disease. Finding the exact cause of the damage to your lawn is not always easy, and sometimes, the best course of action is to just repair and reseed and hope for the best. If the bare spot returns, investigate and repair again. Chances are that you'll eventually figure it out.
How To Repair Bare Spots in Your Lawn
How To Repair Bare Spots in Your Lawn
1. Loosen Up the Soil
Remove any dead grass in the area of the bare spot. Much of this can be done with a rake, but you'll probably also have to get down and dirty on your hands and knees to pull out any grass and weeds that are too stubborn for the rake. Then, use the rake or a shovel to loosen and break up the soil in the bare patch, which will allow the grass seeds and their eventual roots to settle quickly into the soil. If the soil in the area is too hard for the rake to work, you can use a garden cultivator for this task.
2. Add a Layer of Compost to the Lawn
Add a 2- to 3-inch layer of compost on top of the bare spot to help loosen the soil and add nutrients, both of which will help your seeds germinate and the resulting grass to grow faster and healthier. Loamy soil will also work. Use a rake to mix it with the cultivated soil. Once mixed, turn over the rake and use the top to make the soil level and smooth.
3. Distribute Grass Seed
Spread grass seed evenly by sprinkling it over the area. When seeding, spread a thin, but thorough layer across the surface of the entire area, and overlapping slightly into the surrounding area will help the patch blend into the surrounding grass. If needed, you can gently rake the seeds to help spread them evenly. If you don't know what type of grass you have, you can take a sample to your local garden center or cooperative extension service and find a seed that will work best for your area.
4. Cover the Grass Seed With Straw
Using straw to cover your newly spread grass seed isn't technically necessary, but birds love grass seed, and covering the seed with straw can prevent your expensive seed from being used as a free gourmet meal. Just a thin, loose layer of straw over the seed is all that is needed for protection from those hungry birds. As soon as the new grass begins to appear, remove the straw to prevent weakening the budding plants.
5. Begin Watering the Lawn
Lightly water the area so that it becomes moist but not so much that it puddles and causes the seeds to move and wash away. Use a nozzle with a light spray setting to gently soak the area, keeping the pressure low and spraying from a safe distance away. A stationary sprinkler will work for this as well. The area should be kept consistently moist but not overly wet or soggy to allow the seeds to properly germinate and establish roots.
Water the area at least twice a day or as needed (you may need three waterings in dry areas). Once the new grass fills in, you can change the routine and begin watering it the same as the rest of your lawn.
6. Fertilize and Wait Before Mowing the New Lawn
Before you know it, the seedlings will begin to fill in, and your bare spot will no longer be so bare. After the seedlings are established and have been growing for a few weeks, you can apply fertilizer according to soil test results to add nutrients and help the grass grow fast and healthy.
You may be tempted to mow the repaired area at this point, but wait until the area of new grass is approximately 1/3 taller than the rest of your lawn before mowing to prevent damage to the new seedlings. This could take six to eight weeks, so it may require a bit of patience. When mowing, make sure to remove only 1/3 or less of the total grass-blade length.
7. Maintain Your New Lawn
Continue with your regular lawn care maintenance schedule, but keep an eye out for any sign of dead grass or bare spots in the repaired area. A recurring bare spot could be a sign of insect infestation or another underlying problem. If the problem returns and you cannot determine the cause, it may be time to contact a lawn care professional to have a look at the area.


