How To Replace A Broken Sprinkler Head: A DIY Guide
We may receive a commission on purchases made from links.
If you have a sprinkler system and you notice a brown area on the lawn, the problem could well be a broken sprinkler head, and fortunately for you, replacing it is a DIY project that probably won't take long at all. Before assuming the sprinkler head is broken, you'll want to put a little time and effort into readjusting it because that often does the trick. There's not much of a point in it, however, if you see water gushing from the ground around the sprinkler head because only a broken head — or a broken pipe — would do that.
If the only experience you have servicing your sprinkler system is adjusting the watering program, you should probably learn a bit about how the sprinkler heads are connected to the water supply pipes and how the sprinkler valves control water flow. Don't worry — there's nothing complicated here, and you don't have to become an expert on sprinkler systems to be able to make repairs. Considering that sprinkler repair pros can charge as much as $75 per hour, you're setting yourself up for some big savings the next time problems occur, as they inevitably will.
How and Why Sprinkler Heads Break
How and Why Sprinkler Heads Break
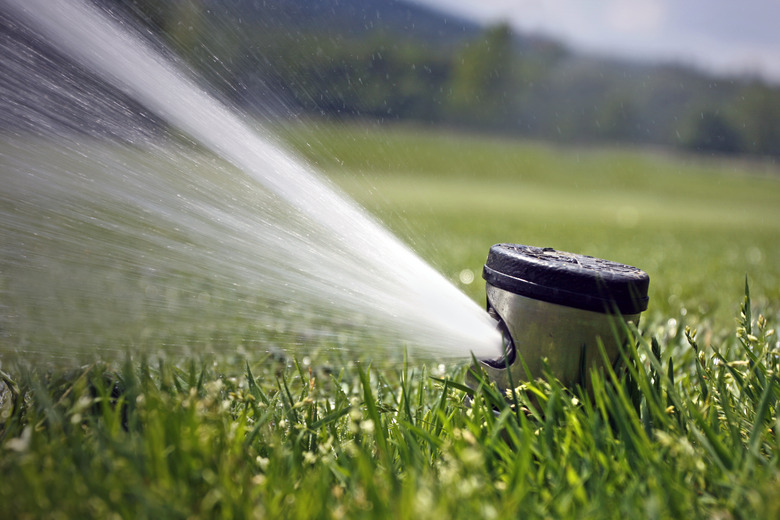
Your first indication that a sprinkler head isn't working as it should might be a patch of brown grass around the damaged head, but usually it's more obvious. The head my be spraying erratically, it may be bubbling instead of spraying or it may have stopped spraying altogether. Sometimes the problem is caused by dirt blocking the nozzle or getting stuck in the sprinkler housing. Suspect this if the head fails to pop-up or retract, the rotor doesn't turn through the preset arc or the spray pattern is irregular. You can often fix this by manually clearing the dirt or flushing the nozzle.
Replacement becomes necessary when part of the head is physically damaged, which can occur if the sprinkler has been set too high or the ground around it has eroded and someone kicks it or it gets struck by a lawnmower. Sometimes animals can damage sprinkler heads when trying to get a drink during an especially dry summer. When a sprinkler head is set too high, you can even damage it by hooking a hose around it while watering another part of the garden and pulling on the hose.
Sprinkler heads can also just wear out. The seal between the housing and the riser (which is essentially the "bridge" that connects your sprinkler head to the actual irrigation system) can deteriorate, and when this happens, water will spray from the base of the riser when the head is operating, or you may see an unusual amount of blow-by when the water comes on and the sprinkler head pops up. Seals can technically be replaced, but it probably isn't worth the effort to do so, because replacement sprinkler heads aren't expensive, and replacement is 100 percent reliable, whereas repair may not be.
How Sprinkler Heads Connect to the Water Supply
How Sprinkler Heads Connect to the Water Supply
The water line feeding your sprinkler heads is likely made of white polyvinylchloride (PVC) or black polyethylene (PE or poly), and while this makes a difference when it comes to installing tie-in fittings, it isn't something you have to worry about when doing a DIY repair to a sprinkler head. All you have to know is that the sprinkler head is screwed onto a plastic riser or swing joint, which is in turn connected to an underground fitting that ties into the supply pipe. Rigid risers come in various lengths, and you may have to change the existing one if a pop-up sprinkler was broken by a lawn mower because it was set too high.
Instead of replacing a rigid riser, you may want to consider replacing it it with a swing joint, although this may take a little extra digging. Poly swing joints are inexpensive and less likely to break than PVC risers, and switching over gives you more flexibility for fine-tuning the position of the sprinkler head.
 ftwitty/E+/GettyImages
Identifying Your Sprinkler Head
Identifying Your Sprinkler Head
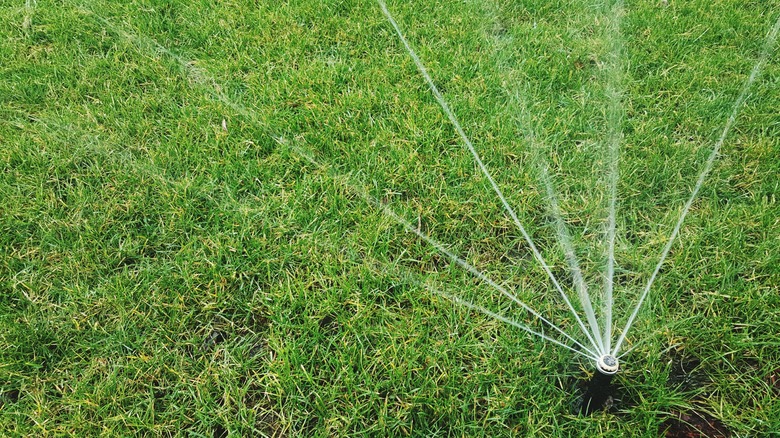
In a finely tuned system, all the sprinkler heads are matched so that each delivers optimal flow to water the zone evenly given the available water pressure. If your replacement sprinkler head is different from the existing one, the calibration is upset, and the zone may be overwatered or underwatered. Each sprinkler head has a characteristic flow rate and throwing distance, and it's important that the new sprinkler head has the same characteristics as the old one.
An easy way to assure this is to use a replacement head that is the same make and model as the one you're replacing. You can often identify the sprinkler head brand (Rain Bird, Toro, etc.) and model number by digging down to uncover the label, which is often still legible even after several years. Having that information makes it possible to purchase a replacement sprinkler head online. Failing that, you may be able to find the flow rate, throwing distance and spray pattern marked on the nozzle or the top of the spray head. If all else fails, take the broken spray head to a garden center and ask for help.
Replacement May Not Be Necessary
Replacement May Not Be Necessary
When water is gushing from a spray head, it's obvious that it needs to be replaced, but in some other instances, you may just need to make an adjustment or replace the spray nozzle. A pop-up rotor sprinkler usually has two adjustment screws that control arc length and radius, and an adjustable spray head has a single screw for arc length. You can usually adjust these with a flathead screwdriver, although the water has to be on while you do this. The actual procedure varies from brand to brand, and you can usually find specific instructions by visiting the manufacturer's website.
If water isn't flowing from a spray head with a removable nozzle, such as an MP rotator, you can simply unscrew and replace the nozzle. You may even be able to salvage the existing nozzle by using the familiar DIY trick of soaking it in vinegar to dissolve mineral deposits that may be blocking the orifices. The nozzles for most pop-up spray heads are also replaceable.
How to Replace a Sprinkler Head
1. Uncover the Broken Head
Cut an 8- to 10-inch circle around the damaged spray head using a spade. Be gentle because you don't want to damage the underground poly or PVC pipe feeding the sprinkler head. If you're replacing a lawn sprinkler, use the spade to cut through the turf and remove the turf carefully so you can replace it when you're done. After cutting with the spade, use a trowel to dig out the dirt to uncover the sprinkler head all the way down to the point at which the riser connects to the water supply line.
It's important to leave as wide a space as possible around the fitting to prevent dirt from falling in.
2. Unscrew and Remove the Head
Grasp the housing of the sprinkler head and turn it counterclockwise. The head may unscrew from the riser, or the riser may unscrew from the line fitting, and either is OK. If the riser remains screwed to the fitting and the damaged sprinkler head was at the right height, you can simply screw the replacement head onto it. If the head is stuck on the riser and you have to unscrew the riser, that's OK. Just unscrew the riser from the damaged spray head, gripping it with adjustable joint pliers if necessary.
If the spray head was damaged because it was set too high, you'll have to replace the riser with a shorter one, which means you have to unscrew it from the fitting anyway. Once the riser is out, the fitting is an open receptacle for mud and dirt, so it's a good idea to cover it with a rag until you're ready to screw in the new riser.
3. Prepare a New Riser
Purchase a shorter riser or if you can't find one, purchase a cut-off riser and cut it to the proper length using a hacksaw. Test fit the sprinkler head with the new riser; the top of the head should be at ground level, not at the level of the grass. If you set it too high, you'll probably hit it with the lawn mower, and you'll have to do the replacement procedure all over again.
 Ryan Petersen / EyeEm/EyeEm/GettyImages
4. Flush the Water Line (Optional)
No matter how hard you try, it's easy to let dirt fall into the open fitting, and if you don't remove it, it will clog the sprinkler. To flush the line, construct a simple tool with PVC pipe. The tool consists of a 1/2 x 3/4-inch male threaded adapter, two lengths of 3/4-inch PVC pipe and a 3/4-inch 90-degree elbow.
Glue a pipe to each port of the elbow to create an "L" shape with PVC cement. Glue the adapter onto the end of one pipe and then screw the adapter into the sprinkler fitting so the "L" is upside down and the horizontal pipe points away from your work area. Turn on the zone for the sprinkler head, let the water run for about 30 seconds and then turn it off. The tool sprays the water off to the side and away from the hole.
5. Install the Riser and Sprinkler Head
Unscrew the flush-out tool (if you used one) and immediately screw in the riser before dirt has a chance to fall into the fitting. Tighten the riser with pliers and then screw on the sprinkler head and tighten it by hand by turning it clockwise.
6. Backfill the Hole
Fill the hole with the dirt you removed, tamping it down as you go until it's flush with the sprinkler head. If you removed turf, don't forget to leave enough room to replace it.
Tip
If the broken sprinkler head is at the end of the main line and you need to set it lower, you should be able to do this without changing the riser by digging out the dirt underneath it. Once you've set the sprinkler head flush with the ground, don't forget to backfill underneath the main line fitting so the head doesn't sink any deeper.
7. Test and Adjust the Sprinkler Head
Turn on the water and check the operation of the sprinkler head. It will probably need some adjustments, which have to be done with the water on, and you can usually do them with a flathead screwdriver and a quick look at the manufacturer's instructions.
References
- Irrigation Tutorials: How to Pick the Best Sprinkler Head or Bubbler for Your Irrigation System
- Clark's Landscape: Simple Sprinkler Repair Guide
- Family Handyman: Replacing Broken Lawn Sprinkler Heads
- LawnStarter: How to Adjust, Repair Lawn Sprinkler Heads
- YouTube: How To With Doc – Replace Sprinkler Head – RainBird and Hunter
- Sprinkler Warehouse: How To Replace A Pop Up Irrigation Spray Head
- Smart Earth Sprinklers: Common Reasons to Replace Your Sprinkler Heads