How To Grow Salvia
We may receive a commission on purchases made from links.
Salvia (Salvia spp.), a member of the mint family (Lamiaceae), is easy to grow, but you'll have to pay special attention to what kind you get. These tender perennials are often grown as annuals, although some will grow as perennials if planted in the right place and in the proper USDA plant hardiness zone range. With more than 1,000 types to choose from, there's no doubt you'll be able to find perennial salvias that grow well in your area.
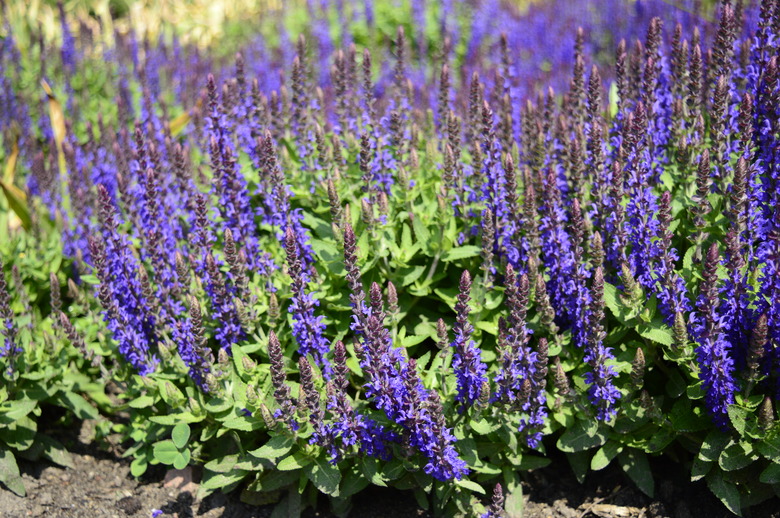
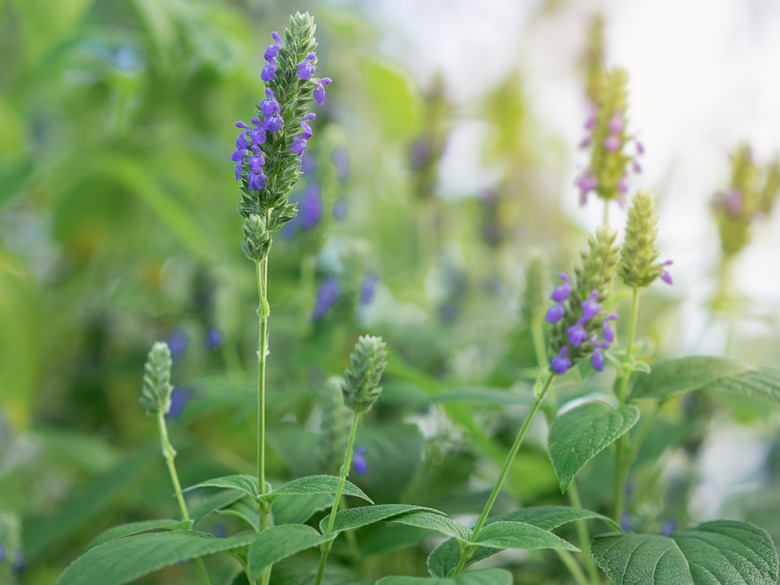
Blooming in blue, red, pink, purple, white, and yellow, salvia forms its blossoms along tall, square flowering stems. The flowers look like spikes and are actually a group of tiny flowers rather than one big bloom. Depending on the variety you choose, your plants will stand 18 inches to 5 feet tall, but they'll only get about 10 to 12 inches wide.
Best Uses for Salvia
Best Uses for Salvia
Salvias work well as border plants and look absolutely charming when planted along white picket fences. You can plant a single plant or several, but salvia looks best when planted in groupings of three to five. You can also grow salvia plants in containers, where their height makes them an excellent centerpiece.
No matter where you decide to plant your salvia, expect the plant to attract bees, butterflies, and hummingbirds. These pollinators are fun to watch and will help pollinate other plants in your garden that can't pollinate themselves.
How to Grow Salvia
How to Grow Salvia
Starting Salvia From Seed
Starting Salvia From Seed
You can start salvia from seed if you like, and it's easy to do so. After the last frost has passed in your area, work some compost into the top 6 to 8 inches of soil. After working the soil, use a garden rake to smooth it. Drop your salvia seeds onto the ground and then barely cover them with soil.
Water after planting and keep the seeds moist but not soggy until they germinate in 15 to 21 days. When they do, thin them so the young plants are about 12 to 18 inches apart. Mulch around your young plants to help retain water and prevent weeds.
If you're antsy to get back outside and start playing in the dirt, you can start your salvia seeds inside six to eight weeks before the last expected frost.
Starting Salvia From a Seedling
Starting Salvia From a Seedling
Salvia is easy to start from seeds, but planting young nursery plants isn't complicated either. If the potted plants from your local nursery are large enough, choosing live plants that have flowered will let you see exactly what color you're going to get.
To plant, dig planting holes that are large enough to comfortably accommodate the entire root ball of your young plants. Tip the seedlings out of their pots, loosen the roots a bit, and then place the plants in their new homes. Backfill the planting hole and tamp the soil down gently but firmly. Space the plants 12 to 18 inches apart. Water your new plants and apply mulch around them.
In What Zone Does Salvia Grow Best?
In What Zone Does Salvia Grow Best?
With so many species and cultivars to choose from, you can easily find a salvia that will grow anywhere in zones 3 through 11. Scarlet sage, also called Texas sage (Salvia coccinea), for example, grows as a perennial in zones 8 through 10. You can still grow this species in colder areas, but treat it as an annual plant if you do. The lovely May Night salvia cultivar (Salvia x sylvestris 'Mainacht' MAY NIGHT) will survive as a perennial in zones 4 through 8, making it a good choice for Northern gardeners.
If you want a perennial plant but aren't sure which salvias work best in your area, visit your local garden center or call the Cooperative Extension Service office that serves your area rather than ordering plants or seeds online. A local nursery will also know what type of salvia grows best in your area and isn't likely to carry plants that perform poorly in your region.
When Should You Plant Salvia?
When Should You Plant Salvia?
Salvia is best planted in the spring after the danger of frost has passed. Getting salvia in the ground quickly gives it ample time to establish itself before cold weather sets in again. If you've selected a salvia plant to grow as an annual, you can plant at any time in the spring or summer. Just make sure to keep a close eye on your salvia's water intake if you plant during the summer heat. Your plants may need a little more water than they would if they were planted in the spring.
Soil, Sunlight, and Water Recommendations for Salvia
Soil, Sunlight, and Water Recommendations for Salvia
Salvias prefer neutral to slightly acidic soil but aren't that particular. Some types will tolerate a bit of shade, but most prefer full sun and do quite well in the heat, needing only about an inch of water a week.
Salvias are light feeders and often require no fertilization at all. If you feel your plants are underperforming, however, use a balanced fertilizer once during the spring just after new growth appears. Keep granular fertilizers away from the stem and crown of the plant to avoid chemical burns.
Regularly deadheading spent blossoms will encourage your salvia to produce more blooms. If you like, however, you can leave the spent flowers on the plant in the fall so you can collect seeds or allow birds to feed on them during the winter months. The seeds from hybrid salvias likely won't come true to the parent plant from which you collected the seed, but you can grow heirloom salvia plants and collect seeds from year to year to produce plants and flowers identical to the parent plant.
If you're not leaving the seeds for the birds, cut back your salvia plant to 1 or 2 inches above the soil after the frost kills them. You can also prune away any woody stems you find whenever you notice them.
How to Propagate Salvia
How to Propagate Salvia
After flowering, the blossoms on the salvia plant drop seeds to resow themselves. Instead of letting the seeds fall where they like, you can collect and save them from heirloom plants. Each tiny, trumpet-shaped flower holds a seed within it, so you'll need to pluck them from the plant and roll them between your thumb and forefinger to remove the chaff and claim the seed. Keep your seeds in a cool, dry place until planting season comes around again, and you can sow them.
You can also propagate salvia via cuttings or division. Cut nonflowering side stems off the plants that are about 4 inches long. Do this in late fall so you can root and overwinter your cuttings inside to have strong plants next spring.
Trim all the leaves from your cuttings except the top two. After trimming your cuttings, fill a small pot with potting soil. With a knife to assist you, gently slide down the end of each cutting between the potting soil and the side of the pot. (For some reason, salvia cuttings tend to do better when placed there rather than in the center of the potting soil.) You can place several cuttings in the same pot.
Water your cuttings and place them where they will get lots of indirect light but no direct sun. Keep them moist. A mist from a spray bottle a few times a day is perfect. After about three weeks, you can transfer your cuttings to their own pots and keep them going until spring.
Once your salvia plants are a few years old, you can dig them up and divide them if you want more plants. Do so in the early spring before the plant blooms. Simply make sure that each division has adequate roots and stems.
Common Pests and Other Problems for Salvia
Common Pests and Other Problems for Salvia
Salvia has no particular pests of its own, but you may encounter the usual suspects: spider mites, thrips, aphids, snails, and slugs. Snails and slugs are easy to pick off the plants by hand when you see them. You can knock insect pests off the plant with a hose or apply neem oil or insecticidal soap to keep them at bay.
Although not caused by pests, flop is another problem sometimes encountered by salvia growers. Salvia plants should sprout strong, upright stems that are capable of supporting themselves and their flowers. Plants sometimes become floppy and top-heavy, however, and lie down on the job. Usually this happens when the plants have too much water, too much fertilizer, or too little sun.
In the short term, you can stake floppy plants to keep them upright. Then you should cut back on water and/or fertilizer to see if you can restore the plant's own turgor and vigor.
Common Diseases for Salvia
Common Diseases for Salvia
Salvia can suffer from Alternaria leaf spot and Botrytis. Alternaria leaf spot appears as brown leaf spots with gray centers, while Botrytis looks as though gray mold is growing on the plant. The best treatment for both is to pull affected plants and destroy them as soon as you notice a problem; never compost diseased plants. Provide your plants with plenty of air circulation and don't play in the garden when your plants are wet.
Proper air circulation and gardening techniques can help prevent powdery mildew as well. Affected plants look as though they've been sprinkled with flour, but you may be able to save afflicted plants with a fungicide application.
Root rot can become a problem as well and indicates that your soil isn't draining quickly enough or that you're simply watering too much. Remove the rotted plants, amend your soil with peat moss or sand, and try again with new plants.

