How To Test For Lead Paint In Your Home
We may receive a commission on purchases made from links.
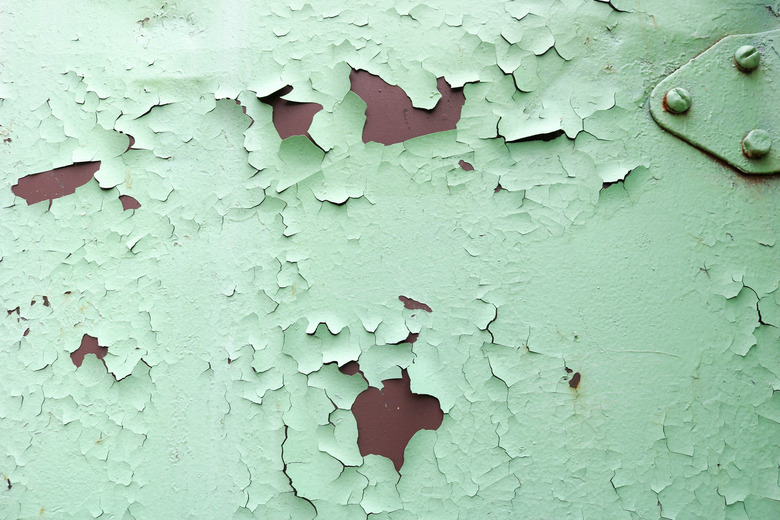
Older homes have a lot going for them, including charm that newly built homes just can't compete with, but they are also likely to have lead paint on the walls and woodwork. According to data from the Environmental Protection Agency (EPA), there is a 24 percent chance that a house built between 1960 and 1978 — the year lead-based paint was banned — has lead paint, and the chances go up with age. It's 69 percent in houses built between 1940 and 1959 and a whopping 87 percent in houses built before 1940. These are numbers with serious repercussions for you and your family, especially children, who are more susceptible to lead poisoning than adults.
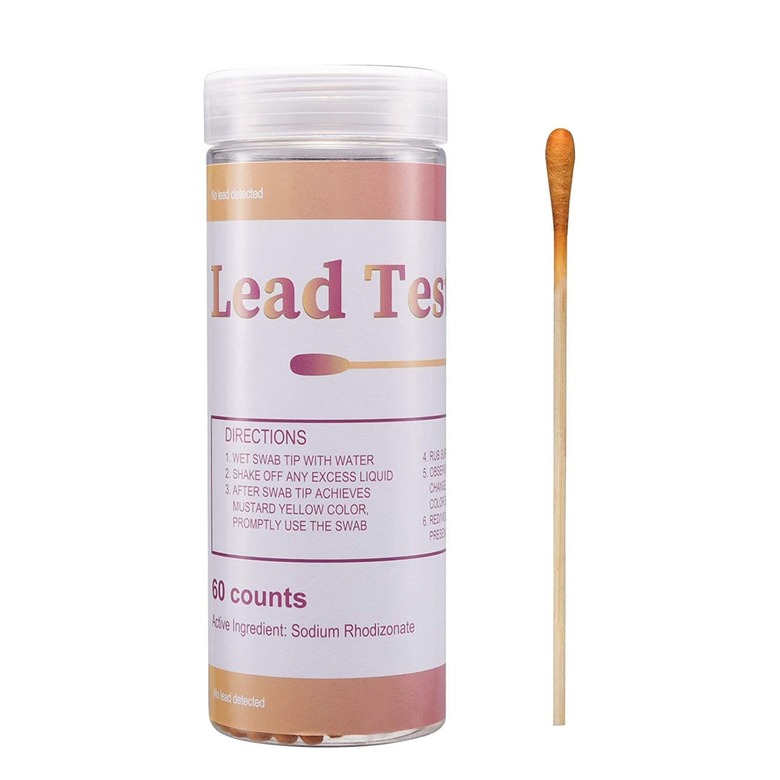
You can deal with lead paint in more than one way. You can encapsulate it as you do asbestos by covering it with a material that won't allow the lead to escape, or you can remove the lead paint altogether. First, though, you have to know it's there, and you can do that with a DIY store-bought lead test kit. Most kits give reliable results quickly as long as you use them correctly and in accordance with the manufacturer's instructions.
What's So Bad About Lead?
What's So Bad About Lead?
People have been using the soft, malleable metal known as lead (atomic symbol Pb, atomic number 82) for millennia, and although there have been glimmers of recognition of the harm it does in the human body, most have been blissfully unaware because it wasn't until the mid-20th century that the danger came to be fully appreciated. Ancient civilizations used lead-based cookware, preferring it to iron because of lead's ability to resist corrosion and because of the slightly sweet taste of litharge, the oxide that forms on lead surfaces. The Romans made their water pipes from lead, and scholars believe it may have been the infertility caused by lead ingestion that was responsible for the fall of the Roman empire.
What our forebears didn't know was that lead, which has no useful purpose in the human body and doesn't form compounds that allow it to be expelled, collects in organs, such as the stomach, kidneys and brain. It causes a variety of diseases, including colic — a combination of abdominal distress, nausea and fever — and brain disorders, such as forgetfulness, depression and irritability. Prolonged lead exposure can cause high blood pressure, heart disease, kidney disease and infertility. These effects can be magnified in children, who may develop ailments of the central nervous system and suffer such symptoms as clumsiness, agitation and drowsiness, which progress to vomiting, stupor and convulsions as lead concentrations increase.
Because lead exposure in children can lead to learning disabilities as well as sickness, the Centers for Disease Control and Prevention (CDC) warns that there is no safe lower limit for lead accumulation. Although the CDC defines acceptable levels as those below 5 micrograms per decaliter, the underlying message is clear: Children should never ingest lead in any quantity ... period.
The Danger Posed by Lead Paint
The Danger Posed by Lead Paint
Prior to 1978, it was common practice to add lead to paint for color and durability and to accelerate drying. Lead found its way into paint primarily as a pigment, either as lead (II) antimonate (Naples yellow), lead tetroxide (red lead), lead II carbonate (white lead — formerly used as "white face" cosmetic), lead chromate (yellow — still used for road markings) and lead molybdate (orange-red). Lead pigments tend to be very bright, which is why they have been so popular.
Lead paint is safe as long as it stays on the painted surface, and no one comes in contact with it, but as any type of paint ages, it tends to dry out and flake off, and the resulting lead dust can accumulate on the floor or, when flaking off exterior surfaces, in the soil, and that's where it poses even more danger. The dust can become airborne, but even if it doesn't, curious toddlers playing indoors or outdoors can ingest it. Toddlers can also pull the odd paint chip off peeling surfaces and put it in their mouth, and they can also mouth windowsills, interior woodwork and toys that have been painted with lead paint.
Although it's possible to encapsulate lead paint with an appropriate primer, conventional paints and primers are unsuitable and allow the lead to leach to the surface. For this reason, older homes that have several coats of paint with only the bottom one containing lead are still hazardous, and they become more so when the paint ages and begins chipping. This is why it's so important to test for lead paint and to take remedial measures if you find it.
Choosing a Lead Paint Test Kit
Choosing a Lead Paint Test Kit
While virtually every test kit you can buy online or at a hardware store can give almost instant results, some are prone to false positives for certain types of paint, so which kit you choose matters. After conducting its own tests, the EPA recommends just three of the many products available, and one of these is available only to residents of Massachusetts. The two widely available EPA-recommended kits are D-Lead and 3M LeadCheck, and they are different. LeadCheck is rhodizonate-based and turns red when it detects lead, so it can yield a false positive on red and pink paint, whereas D-Lead is sulfide-based and turns dark, so it can yield a false positive with dark-colored paints.
You can get reliable results using tests from other manufacturers, but to be on the safe side, you should test with both a rhodizonate- and sulfide-based kit. There are other testing methods, such as using X-ray fluorescence, but they must be undertaken by qualified technicians.
How to Use D-Lead
How to Use LeadCheck Swabs
How to Test for Lead Paint
It's important to read the directions on the test kit and follow them exactly. The method for using a product such as LeadCheck, which uses swabs for testing, is different than that for using one such as D-Lead, which requires you to mix a solution that includes a sample of the paint to be tested. When testing a surface with multiple layers of paint, you'll want a sample that includes all the coats, including — and especially — the one on the bottom, which is the one most likely to contain lead.
How to Use LeadCheck Swabs
1. Prepare the Surface for Testing
Choose the thickest part of the surface to be tested because that's usually the one with the most intact layers of paint. Clean up the area with a cloth moistened with alcohol. Draw a line through the paint with a clean utility knife that extends all the way to the wood or drywall to expose all the paint layers.
2. Mix the Swab Contents
Remove one of the LeadCheck swabs from the package and note that it has two barrels, each containing a different liquid. Crush the barrels at the points marked "A" and "B" to mix the liquids. Hold the barrels with the swab tip facing down and keep squeezing until the liquid flows to the swab at the end.
3. Test the Paint
Rub the swab over the test area for about 30 seconds while continuing to squeeze. If the swab or the painted area turns red or pink, the test is positive.
4. Confirm the Test
If the test is negative, squeeze a few drops of the liquid on the confirmation card that comes with the test kit. If the card turns red, the liquids were properly mixed, and the test is reliable. If you see no color change, repeat the test with a new swab.
1. Prepare the Test Kit
Everything you need to conduct a test is supplied with the D-Lead kit. Before conducting the test, remove solution 2 from the package and put a few drops on the test strip that is also supplied. If the test strip turns black, the solution is working. If not, the kit sat too long on the shelf, and you need a fresh kit.
2. Clean the Sample Area
Use the D-wipe supplied in the package to clean the painted surface and the tools you will use, which is primarily the scoring tool that comes in the package.
3. Score a Sample Area
Use the scoring tool, which is a small cylinder with a sharpened edge, to scribe a circle in the paint. It's important to dig the tool through all the layers of paint down to the substrate, so if you can't do this by pushing, tap the tool with a hammer.
4. Drop a Sample Into Solution
Dig out all the paint inside the scribed area using the razor blade supplied in the kit and deposit it on one of the trays, which are also supplied. Drop the sample into the bottle marked "solution 1." Cap the bottle and shake it for 10 seconds and then set it aside for two minutes to allow the paint to dissolve.
5. Add the Testing Solution and Check the Color
Put five drops of solution 2 into the bottle, cap the bottle and shake again. Hold the bottle against a white surface and compare the color of the solution to the reference color on the bottle. If it's the same color or darker, that confirms the presence of lead. There is no lead if the solution remains clear. If it doesn't turn as dark as the reference color, lead may be present but in a small concentration that may be considered safe, although it's prudent to confirm this with more tests or a professional inspection.
What to Do if the Test Is Positive
What to Do if the Test Is Positive
If a test confirms lead on painted surfaces in your home, lead may also be present elsewhere, including in the soil or the drinking water, so it's prudent to call a professional lead risk assessor to evaluate the hazard. The assessor will recommend an abatement strategy, which may include encapsulation or even a remodel to remove and replace all lead-painted surfaces. Since no amount of lead is safe for young children, it's important for each child to have a blood test so that a lead remediation strategy, such as chelation therapy, can be undertaken for children with high blood levels.
References
- Biological Diversity: History of Lead Poisoning in the World
- U.S. Environmental Protection Agency: Protect Your Family from Sources of Lead
- Centers for Disease Control and Prevention: Blood Lead Levels in Children
- Consumer Reports: How to Test Paint With a DIY Lead Test Kit
- Eurofins: How to Use LeadCheck Swabs
- YouTube: Esca Tech, Inc. – Test for Lead Paint with the D-Lead Paint Test Kit

