How To Test And Replace A Water Heater Thermostat
We may receive a commission on purchases made from links.
If you have an electric water heater and you can't get enough hot water to take a shower or a bath, it's possible that the water heater thermostat or the heating element is defective. If you have a dual-element water heater — meaning it has an upper and a lower heating element — either of these elements or the thermostats controlling them could be defective.
Before you suspect a malfunctioning heating element, you should first test the thermostat. An electric water heater thermostat is basically a temperature-sensitive switch that controls power to the element, and if it turns out to be bad, it's fairly easy to replace whether you have a Rheem, A.O. Smith, or some other brand of hot water heater.
Homeowners can conduct a DIY test by using a multimeter to check for continuity across the thermostat terminals. A continuity test is one in which you test the resistance between the terminals, and to get an accurate result, the thermostat must be completely isolated from power. This means you need to turn off the water heater and disconnect the wires from the thermostat before conducting the test.
How a Water Heater Thermostat Works
How a Water Heater Thermostat Works
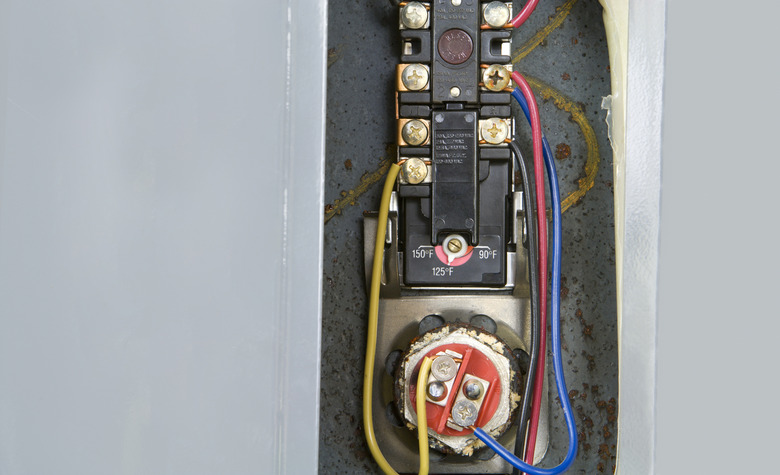
A water heater thermostat is a flat, rectangular box mounted on the side of the tank in such a way that it can sense the temperature of the tank liner. Inside is a bimetal disk that distorts or bends in response to temperature. When the water in the tank is cool, this disk lays flat against the incoming power terminal and the outgoing terminal to the heating element, allowing power to flow, but when the water is hot, it lifts off these terminals and cuts power to the heating element.
A dual-element water heater has a thermostat to control each of the upper and lower heating elements, and they are a little different. The upper thermostat has a separate terminal that sends power to the lower heating element. The thermostat for the lower element doesn't have this extra terminal.
Power feeds to the upper thermostat through a high limit switch that trips a red reset button when the water temperature reaches a dangerously high temperature (usually around 160 degrees Fahrenheit). This is a safety mechanism that prevents the tank from overheating and exploding.
Signs of a Bad Thermostat
Signs of a Bad Thermostat
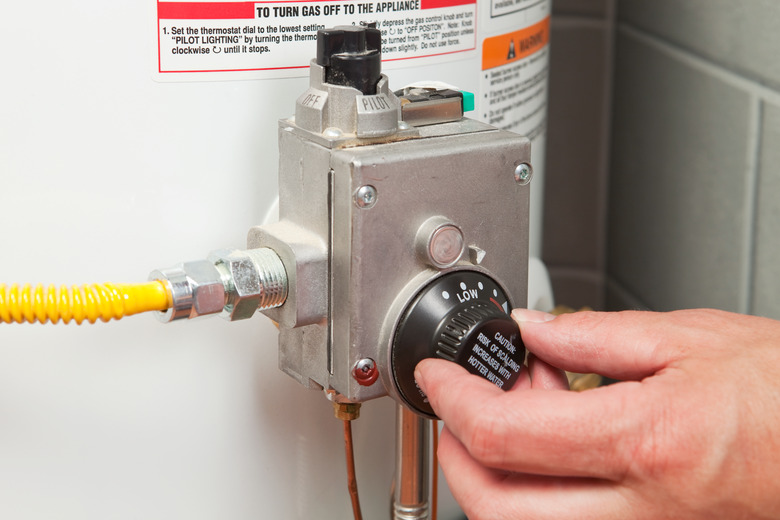
You'll find a thermostat on a gas water heater as well as an electric one, and in both cases, its function is to sense the water temperature and turn on the burner or the heating element when the temperature falls below a preset, adjustable threshold. In both cases, the first indication a water heater thermostat isn't working is that the water coming from your faucet is either too cold or too hot.
Of course, there are other reasons for that to happen, including heating element failure in the case of an electric water heater or burner failure in the case of a gas one. If you have an electric water heater, it's also possible that the circuit breaker for the water heater has tripped, so you should check that before performing any other tests. Another thing to check is the temperature adjustment control; it may be set too low or too high.
The thermostat on an electric water heater may function erratically before failing altogether. In that case, the water in the tank may get warm but not hot, or it may get hot one day but not the next day, and on the day after, it may get hot again. A malfunctioning heating element can produce similar results, but before you suspect that, you need to eliminate the thermostat as a possible cause.
Things Needed
Testing an Electric Water Heater Thermostat
Testing an Electric Water Heater Thermostat
You should test the upper thermostat before testing the lower thermostat because the upper one controls current to the lower one. Remember that the water heater circuit operates at 240 volts and can give you quite a jolt, so you need to observe safety precautions.
1. Turn Off the Power
Locate the circuit breaker for the water heater in the main panel and switch it off. Unlike a 120-volt circuit, a 240-volt water heater circuit is controlled by two breakers bonded together. They will go off simultaneously. If yours is a small, single-element water heater that serves one faucet, it may run on 120-volt power, in which case there will be only one breaker to turn off.
2. Access and Check the Upper Thermostat
Unscrew and remove the access cover for the upper thermostat, fold the insulation up and tape it to the tank with electrical tape. You'll see red and black hot wires connected to the high limit switch. Set a multimeter to test AC voltage in the 500-volt range, touch one of the meter probes to the black terminal and the other to the red one, and make sure the voltage reads zero. If you get a voltage reading, you turned off the wrong breaker, so try again and don't proceed until you get a zero reading.
3. Isolate the Thermostat
Unscrew the terminal nuts on the thermostat and remove all the wires from the thermostat and high limit switch. You'll want to put all the wires back in the same places, so take a picture with your phone to help you remember where they go. If the red reset switch has tripped, push it back in and make sure it stays in.
4. Calibrate the Meter
Turn the dial on your multimeter to measure resistance in ohms, touch the leads together, and make sure you get a reading of zero.
5. Test the Upper Thermostat Terminals
Touch one probe to the upper left-hand terminal and the other probe to the one directly below it. You should get a reading of zero. Now, test the two right-hand terminals in the same way. If either reading shows nonzero resistance, the thermostat is bad and needs to be replaced.
6. Test the Lower Thermostat Terminals
Touch one probe to the common terminal, which is on the left side next to the temperature setting, and touch the other probe to the upper heating element terminal, which is just below it. There should be zero resistance between these terminals if the water in the tank is cool (below the target temperature).
Move the probe from the upper heating element terminal to the lower heating element terminal, which is right across from it. If the water in the tank is cool, there should be no continuity, and the meter should show nonzero resistance.
If the water in the tank is hot (at or above the target temperature), you should get the opposite results. In other words, there should be continuity between the common and lower heating element terminals and no continuity between the common and upper thermostat terminals.
7. Test the Lower Thermostat
If the upper thermostat checks out, replace all the wires and the access cover, remove the access panel for the lower thermostat, pull out the insulation, and disconnect both wires. Touch the probe to the terminals (there are only two). If the water in the tank is cool, the meter should read zero or close to it. If the water in the tank is hot, there should be no continuity, and the meter should display a nonzero value for resistance.
Replacing a Bad Thermostat
Replacing a Bad Thermostat
Removing and replacing a thermostat you determine to be faulty is easy considering you've already disconnected the wires. Some may be held by a single screw, while others are secured by a plastic tab that you can release with your fingers.
You can determine the model and part number for the new thermostat by consulting the website for the water heater manufacturer. Once you know that, you can usually find a replacement at a big-box store or from a third-party online parts supplier, such as Repair Clinic or eReplacementParts.com. You don't necessarily need a genuine part from the manufacturer. Suppliers like Camco sell generic parts that fit most water heaters.

