Achieve Perfectly Crisp Paint Lines On Textured Walls With This Easy Trick
When you see a painter freehand a perfectly straight, clean line without using painter's tape, it's fair to assume she has entered into some kind of unholy pact in exchange for such tapeless trim-painting talent, though it's probably just the result of lots of practice and a good brush. For those of us with less practice (some might say the less, the better), to say nothing of a terrible brush or a worse roller, "crisp lines" are just two words combined into nonsense. Can't be done.
Except that it can, and it's not all that difficult — even on textured walls — to get a sharp paint line where two colors meet. The trick is to seal your painter's tape with the wall's base coat color. That probably doesn't make sense, but it will in a second.
For non-textured or very slightly textured walls, you can often get clean lines by simply painting your second color up to and onto the painter's tape. Wall textures present a whole other problem, since the second color has a habit of migrating under the painter's tape and leaving a rough edge to your work. This is a problem for any texture, but is especially daunting when working with plaster, as plaster finishes tend to be more deeply textured than paint textures added to drywall. As you probably know, it can also be a challenge to get clean paint lines where ceilings and walls meet. That's where the tape-sealing trick comes in, and the only catch is that you need two colors of paint: the base color of your wall, and the new, contrasting color you're adding.
How the tape-sealing trick works
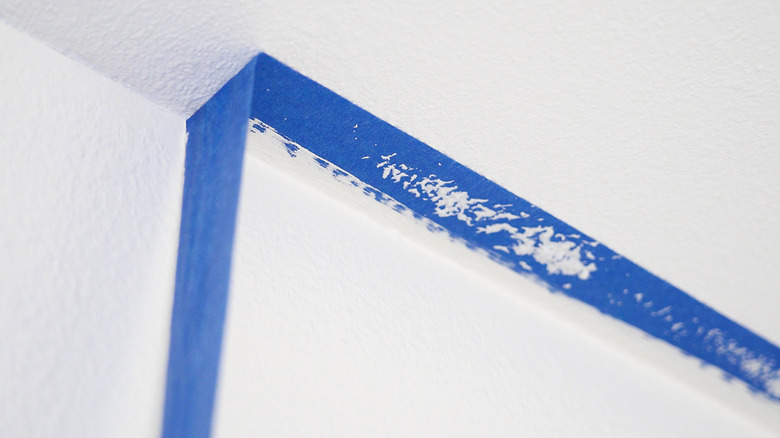
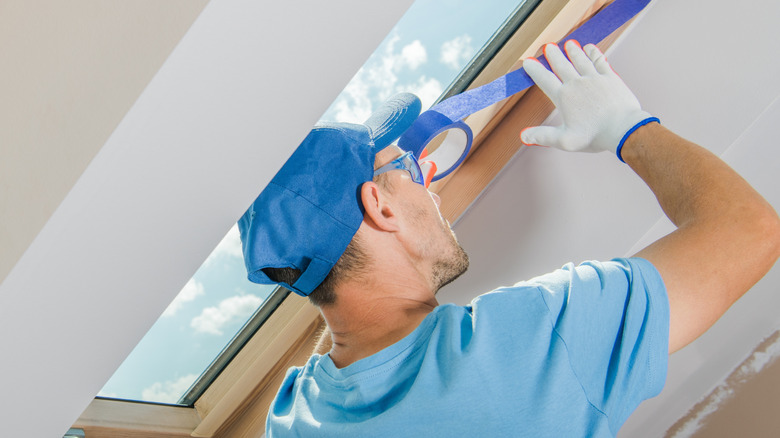
It works like this: Apply your painter's tape just as you would normally, covering the base color area you don't want the new color to bleed onto. Press it firmly against your wall by pulling a putty knife across the edge you want to seal. Then comes the magic: Paint your base color over both the tape and the wall where the new color will meet the tape. Allow that to dry, then paint your new color over the base paint you just applied. Allow the new color to dry, then remove your tape. The base paint seals the tape so that the second color can't bleed underneath. When you pull the tape away, all you should see is the new color painted right up to a clean line next to the old. A similarly genius paint hack trick uses caulk rather than the base paint to get the clean lines you're looking for.
It can get a little trickier with plaster, though it's completely manageable. Plaster isn't just more textured, but it's also more fragile, so the key is to use the right tape so that it can be cleanly removed. The best includes tapes like Frog Tape Yellow Delicate Surface painter's tape and PPM's 5025 Painter's Ultra Delicate Masking Tape, while steering clear of some tapes (like Scotch 2060 Rough Surface painter's tape) that are designed for rough surfaces that aren't easily damaged. Then simply use the same trick described above for a crisp paint line. Voila!