5 Fun Dollar Tree DIYs For Showstopping Christmas Decor On A Budget
Christmas décor is a huge part of the holiday season, but the cost of decking your halls can quickly get overwhelming. Unfortunately, decorations aren't cheap, and prices only continue to rise. To keep your costs under wraps, consider some DIY Christmas décor that will showcase your holiday spirit without breaking the bank.
For those of us with budgets in mind, Dollar Tree hits it out of the park. It has tons of inexpensive materials for DIY Christmas decorations and is the perfect one-stop-shop. With only $1.25 per item, you can create so many holiday crafts from Dollar Tree, from lanterns to wreaths to ornaments.
These five favorite Dollar Tree Christmas decoration DIYs are fantastic, and you can get started on them now. You can follow them to the letter or put your own spin on the projects. Either way, you'll find yourself with some showstopping Christmas décor while staying on a budget!
Frosted glass Christmas jars to add holiday ambiance
This Christmas DIY decoration idea comes from Dollar Tree's own website and is a simple, yet stunning, piece of homemade Christmas décor. This frosted glass jar uses salt to give it a unique texture that appears like real snow. For this project, grab the following Dollar Tree items: two types of salt (Epsom and kosher suggested), canning jars or glass vases, twine, floral sprigs, Mod Podge, and a sponge paintbrush.
Select a jar or vase that fits your home's typical décor. A Mason jar is a fitting choice for a rustic farmhouse vibe, while a sleek vase better suits a more modern style. Next, paint your jar with Mod Podge almost to the top, leaving space for your twine. Once done, pour some of both types of salt on a plate and roll your jar or vase in the salt until it is nicely covered. You can hand sprinkle salt to cover up any missed spots. Let the jar dry, then gently dab on another coat of Mod Podge to keep your salt in place.
After you've frosted, add hot glue on the empty space at the top before carefully wrapping your twine. Next, glue on a sprig of your Christmas floral for a nice pop of color and then knot the twine around it. Lastly, place a tea light in your jar. You can repeat this quick and easy process to make multiple jars of different heights to create a dynamic Christmas set.
Simple Christmas farmhouse lantern to make spirits bright
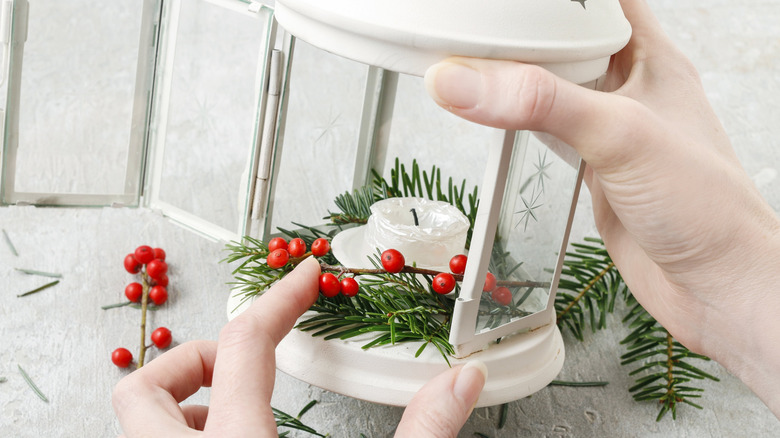
A simple Christmas farmhouse lantern is the perfect DIY project for anyone who prefers understated holiday décor. A flickering light will instantly create an atmosphere of holiday magic, while the distressed lantern and greenery add rustic charm. To get started, head to your local Dollar Tree and grab these items: metal lantern, white paint, sanding sponge, reindeer moss (or your choice of greenery), and a flameless candle. You'll also need your own hot glue gun and glue.
First, paint your lantern all white. Once dry, use your sanding sponge to distress the paint to create an antique look. After that, glue some reindeer moss to the bottom of the lantern. Lastly, nestle your flameless candle in the moss. If you'd like to add a more noticeable nod to Christmas you can add sprigs of holly, a mini bow on the outside. For a more dramatic look, consider a green or red colored candle. Ultimately, how you decorate your lantern is up to you!
Hanging ornament garland for a touch of elegance
For a unique and fun Christmas decoration you can make this easy, festive holiday ornament garland. It can be used as wall décor or as a perfect backdrop for photos at your next holiday party. Head to your local Dollar Tree store and grab some twine, a piece of garland, scissors, decorative mini bows, ornaments, and tape.
First, cut your twine into however many pieces you want and to whatever lengths you wish. Then, attach the twine pieces to the garland with double-sided tape. Next, take the wire tie from a mini bow, thread it through an ornament, and then twist the wire around the twine. You can repeat this process for as many ornaments as you wish. Lastly, secure your hanging ornament garland to your desired location.
This project is one of many cute Christmas crafts you can do with your kids and is easily customizable. You can use a stick instead of the garland for a simpler, more rustic appearance. You can also switch out ornaments for snowflakes or any other item or add string lights to the twine for an extra Christmas twinkle. Your display can be hung from a mantel, a shelf, or even a door, and then stored to use again next year!
Giant Christmas lollipops for whimsical outdoor decorations
These giant lollipops are a perfect Christmas yard decoration and will certainly draw the eye of any passersby with their giant size and bright pops of color. To make your lollipops, swing by the Dollar Tree and grab some brightly colored party trays and/or bowls (two of each to form each lollipop), two window installation kits (or cellophane if it's available), a large wood dowel, one pack of zip ties, two rolls of ribbon, and two rolls of decorative tape. You'll also need a nail and a lighter to create holes for your zip ties.
Carefully use the heated nail to puncture holes in your party trays or bowls, then thread your zip ties through but leave them loose! Use your decorative tape around your large stick to create your lollipop stand. Then, place your bowl or tray over the top of the stand and pull your zip ties tight. Next, drape the plastic from your window installation kit or your cellophane over the lollipop and gather with ribbon at the bottom. Voila! Your giant lollipops are ready to line your driveway or decorate your front porch and really bring the Christmas spirit to life.
Christmas berry wreath for a versatile option
Christmas wreaths are one of the most popular holiday decorations and that popularity shows no signs of slowing down. One of the reasons wreaths are so well-loved? Their versatility. They can be made with a large variety of different materials to suit your tastes and aesthetics. Wreaths made from greenery and garlands are some of the most popular, but this Dollar Tree DIY is made from red berries making it a real eye-catcher. All you'll need for this project are berry stems, floral tape, and a medium-sized metal wreath, plus your own glue gun. If you'd like to add extra color, grab a few white and burgundy berry stems as well. The mix of colors will give your berry wreath a nice splash of contrast.
Begin by wrapping your embroidery hoop in your floral tape to give it a nice green Christmas color. Next, cut or pull the berries off their stem. You can choose to either keep or discard the leaves. Then, wrap your berries on your hoop using your floral tape. After doing that you can fill in any gaps by hot gluing more berries on to finish off your Christmas wreath!
