Elevate Your DIY Woodworking Game With Handheld Routers
We may receive a commission on purchases made from links.
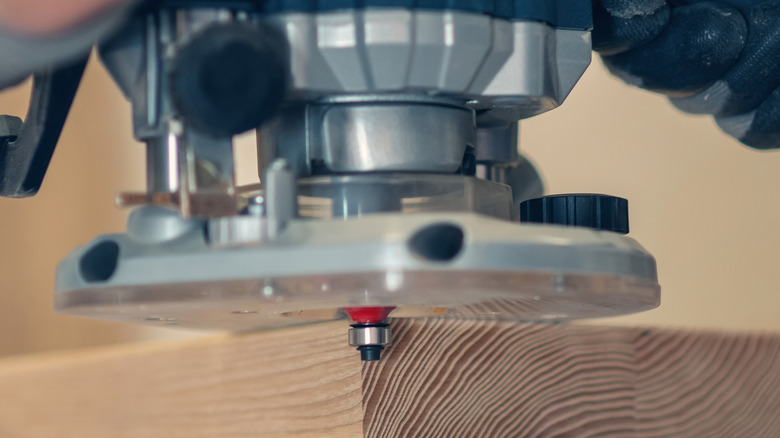
Handheld routers are versatile power tools and are a key to taking your DIY work to the next level. Why? Because they bring a whole new set of options to your game for trimming, shaping edges, and making grooves. As an expert woodworker, I would feel tremendously limited without my routers. (And yes, I have several.) Routers are simple in concept; at the heart of the tool there is a motor that spins a shaft or spindle at high speeds. The end of the shaft is threaded and made in such a way that you can secure router bits to the motor and spindle. The motor is held in a base that allows you to set the cutting height of the router bit. The base often has handles that let you control where you guide the router, and hence, the cut of the router bit.
Because routers are designed to cut things, there are safety basics to know before getting started. Routers spin their bits at thousands of RPM (revolutions per minute) and the bits are very sharp. It doesn't take much imagination to figure out what would happen to a finger that got caught in a spinning router bit. When operating a handheld router, wear eye and ear protection. No uncontrolled long hair or loose clothing, especially long sleeves. Curiously, routers can also pose a threat to your project. An ill-advised or uncontrolled movement can allow the bit to harm the edge or surface of your project. Care and planning will protect both you and your work.
The kind of router that is practical for a beginner

Because handheld routers are so popular, there are scores of them to choose from. They're rated by horsepower. You can find routers with slightly less than 1 horsepower up to 3 horsepower monsters. For a beginner, I have a recommendation: the Bosch PR20EVS 1 horsepower router. It's called a palm router because it's small enough for some people to control with one hand. It's perfect for people just starting out, because it can do so many things and yet it's affordable — often on sale for $100 or less. It takes ¼-inch shank router bits, which are the least expensive. It's manageable and easier to use than larger routers, even though it has limited power.
While you need a router to get started, you also need router bits. But first you need to know about collets, they mount the bits using a two-piece system where you slide the shank of the router bit into a matching hole in the collet, and then the outer nut of the two pieces threads onto the spindle, holding the bit securely.
Next, I recommend getting a beginner set of router bits. Your set should include at least two straight bits with ¼- and ¾-inch diameters, along with a bearing-guided round over bit, a bearing-guided chamfer bit, a bearing-guided flush trim bit, and a variety of edge-shaping bits with bearings. The bearings guide the router's cut by riding along the edge of the surface, keeping the bit from cutting too deep. There are kits available for sale with all of those bits and more for between 20 and 30 dollars.
Getting started on your project with a handheld router
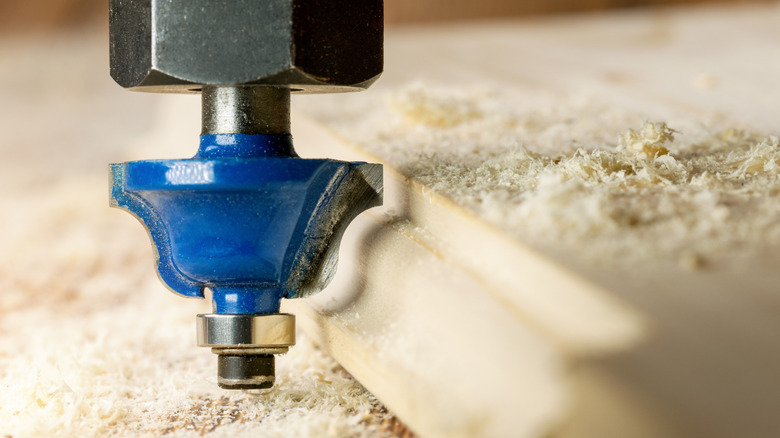
Assuming that you have no or little experience with handheld routers, here are some tips for getting started. For your first cuts, I recommend shaping an edge. A tabletop looks great with a flat surface and squared-up edge. But it can look even better with an edge treatment. Small round-overs look clean and classic, as do edge chamfers. (A chamfer is a small 45-degree shape on the edge of a flat surface.) They look help the edge hold up under use. If the tabletop is very thick, say 1 ½ inches, a large round-over is a great option.
There are many options for edge treatments, including bearing-guided ogee bits. That odd name describes a bit profile that has an S-shape or two curves that form and shape the edge. Many antiques have this. To use an ogee or other bit that removes a lot of material, use several passes to achieve the final shape. Adjust the depth of the bit's cut to remove only a small amount of material with the first cut, then set the next cut about an ⅛ inch deeper. Repeat the process as needed.
Straight bits can do many things for you. One is cutting (or plowing) grooves into the surface of some wood. Grooves can be decorative or functional. A ¾-inch wide groove that is say, a ⅜-inch deep will mate with a ¾-inch board ... think of a shelf mounted into the sides of a bookcase. If you need to use a router to trim edges or to follow a shaped template, use straight bits that have guide bearings on them.
Embracing unlimited possibilities from your handheld router as you master the tool

As stated, a router has a base, usually with handles, that allows you to control where you are cutting. There are two basic types of router bases: a fixed base and a plunge base. With the fixed base, you set the depth of cut and carefully tilt the bit into your work using one edge of the base as a fulcrum. Plunge bases allow you to place the router on your work and then plunge the bit into the wood, pushing down in a controlled manner until the base stops at a preset depth. Both types are highly functional, although the added plunging mechanism adds cost to your router. Some routers have interchangeable plunge and fix bases for the best of both worlds.
Beginners will likely use their routers for edge treatments and other decorative tasks. But as you become more comfortable with the tool, you can do more, like making cabinet doors. (I believe the difference between a rookie woodworker and a moderately skilled woodworker is one completed project.) You can do joinery — everything from basic joints to dovetails. Routers can help you to do both basic or intricate inlay work.
As with any tool, gaining skill takes some time and practice. There are myriad wonderful books that can teach you new techniques. But there are also unlimited online videos teaching both the basics and more advanced techniques. Using a handheld router will add so many options to your DIY work, that after a while, you will not be able to think of doing jobs without one.