How To Easily Make A Wooden Cutting Board (And Why It's Better Than Plastic)
We may receive a commission on purchases made from links.
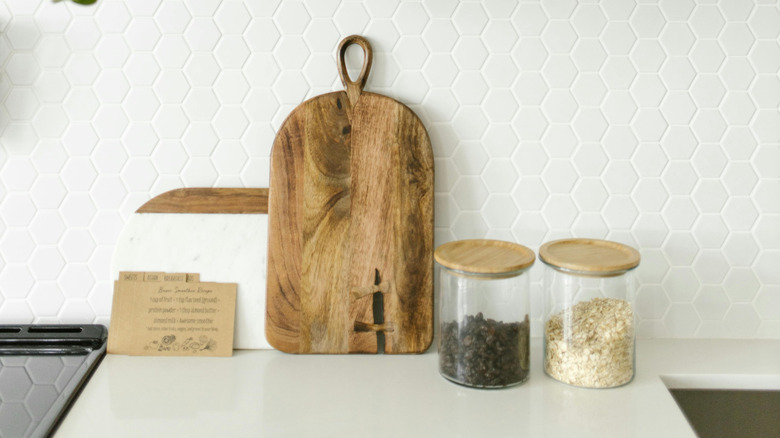
Wooden cutting boards are becoming more popular, and there are good reasons for that. They're attractive and come in a variety of shapes and sizes. The grain patterns are always one of a kind. As an expert woodworker who has been in the shop for decades, I'm always surprised when I gift folks a cutting board, they really love them. And why not? They're a practical gift that provides a service nearly every day in the kitchen.
There has been a recent trend among advance woodworkers to make super complicated cutting boards. But that's not required. Most cutting boards are much more utilitarian, an everyday Handy Andy in the kitchen. And for that, a simple DIY cutting board is perfect. With just a few simple steps, you can have a cutting board that looks good and does the job. For the type of wood, most will do just fine: maple, pine, birch, and even cherry and mahogany. Stay away from woods like oak and ash. They have what's called an "open grain," which means they have relatively large pores that could collect food particles like potato starch, carrot skin, and apple pulp residue. That won't happen with "closed-grain" wood.
And just a word about wooden cutting boards versus plastic — the one advantage plastic boards have is that they can go in the dishwasher. Other than that, they are ugly, will dull your knife edge more quickly than wood and here is the kicker: despite popular belief, according to studies, plastic grows bacteria much more quickly than wood. In my mind, wood cutting boards are the very best option.
Building a basic cutting board
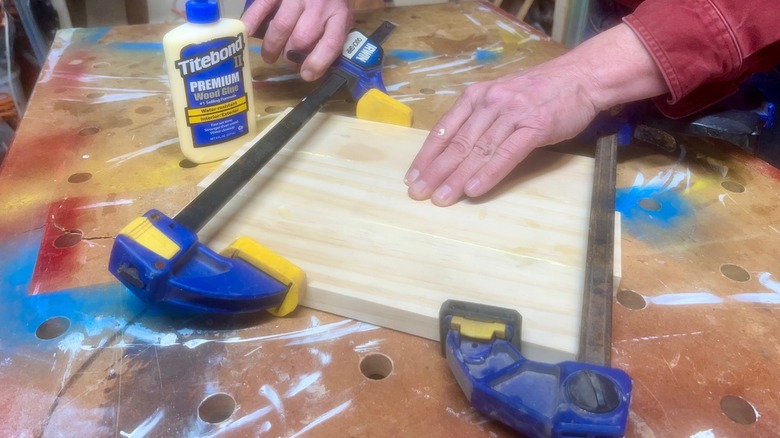
I used a quality pine 1 x 4 to make this board. I got the best from my local big box store and cut three pieces to about 14 inches in length. Put the pieces edge to edge and check they meet together along their entire length. If not, put a piece of 80-grit sandpaper on a flat surface, hold all three pieces face to face, and sand their edges straight. Gluing three boards together creates what's called a balanced panel. Once the edges that will be glued together fit without gaps, you need to get ready for gluing them together.
Keep the edges of the boards perfectly aligned. I use a water-resistant glue for this task. Put a smooth, thin coat of glue on the edges of the boards. Place them edge to edge and gently rub the glued pieces back and forth. Now clamp them together, keeping an eye on how they meet across the glue-up. To get a solid glue joint, you'll need to be able to apply pressure across the width of the boards.
Now, as a professional woodworker, I have so many clamps it's embarrassing. If you don't have any and don't want to invest in something like an Irwin Quick-Grip bar clamp, you may be able to hold the boards together with rubber bands large enough to go around them after they're glued to pull them together. Elastic cord or stretchy tape can work too. You are aiming for a flat panel with no misalignment. Let the glue cure for at least an hour. When the glue squeeze-out turns rubbery, scrape it off.
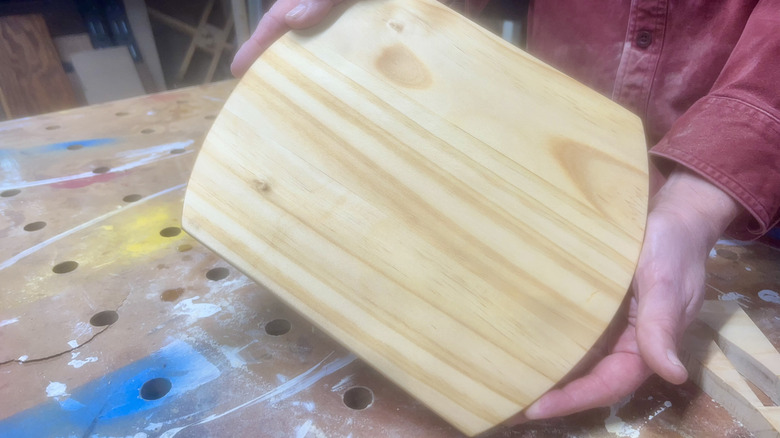
Shaping and smoothing the board
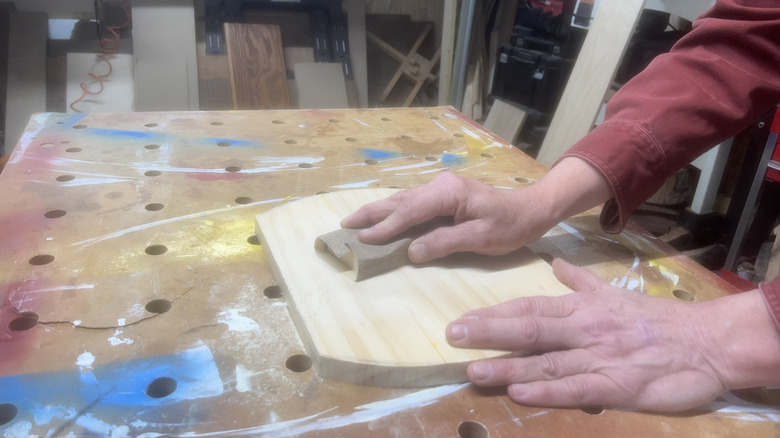
With the glue cured, those pieces of wood will never come apart. The next steps are cutting the board to its final shape and then smoothing it down by sanding it. You could simply square the ends of the panel for a rectangular shape and be done with it, but I thought it would look better with slightly curved ends. This is a custom-made board, after all! I used a handheld jigsaw to form the arcs. I did this before sanding the surface, as you'll also need to sand the end of the cutting board too — so you might as well do both at the same time. I drew the arcs with a pencil and cut right on the line to shape the ends.
You can use a power sander if you own one, but if you don't, you can do it by hand in a surprisingly short amount of time. But do it properly. Wrap a piece of 60-grit paper around a sanding block. Then sand directly across the panel and not with the grain. When you've leveled both faces and smoothed the ends with the 60-grit, replace it with 80-grit and sand diagonally across the board's faces. When you've removed all the sanding scratches from the 60-grit, switch to 100-grit and sand in the opposite diagonal. Remove the 80-grit scratches. Follow with 120-grit and then 150-grit, sanding with the grain, removing the scratches from the previous grit each time. You've now got a perfectly sanded board.
What kind of finish is right for a wood cutting board?
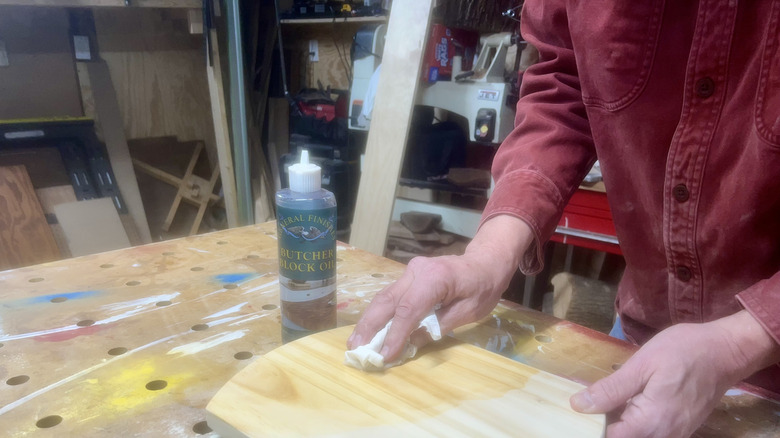
Now that the board is sanded, you're almost done. You just need to make a few decisions about what happens next. For hundreds of years, most cutting boards did not have any type of finish applied. People would just start chopping away on the raw wood, clean the cutting boards, and set them aside. Over time, the natural oils from the food would build up a patina on the surface. Washing the boards with soap and water would also leave the soap residue as a finish, as soap was made from rendered fat. Leaving your board unfinished is a perfectly acceptable choice. But most people today would prefer to add some sort of finish or sealant, if just for the fact that it makes the wood look nicer.
My preference is mineral oil. It is a highly refined petroleum product, so pure you could consume it — but don't. It doesn't dry, but seals the wood, and makes it easier to clean. Refresh the finish fairly regularly, as it'll be removed with use and washing. You can also use vegetable or nut oils: walnut oil, tung oil, canola oil, or even olive oil. They seal the wood nicely, but because they are organic, they can go rancid on you. That's why I choose the mineral oil. I apply a couple of coats of the oil using a paper towel, extra on the end grain. Let the board sit for half an hour, and then wipe off any excess.
Use and maintenance after the wooden cutting board is complete
You'll need to apply additional coats of oil from time to time. Simply flood it on and wipe it off. You'll need to do so with any finish you choose. At the beginning of this article, I noted my choice of pine lumber. It's a great wood for a cutting board. But it is a softwood and as such, it will show cutting marks in its surface as it's used. This is normal and expected, but some folks may find it unpleasant to look at.
Since the board has two sides, you may want to only use one surface for cutting and chopping, leaving the other unmarked. Use the other side for things like cooling cookies. Pine's relatively soft nature has the benefit of keeping your kitchen knives sharp longer. The softer wood fibers being easier on the cutting edges If the surface becomes too chopped up, just go through the sanding steps to sand it smooth and you can have a brand-new surface.
Wooden cutting boards are not only useful, but hygienic and they make great gifts. If you master making your own cutting board from pine, you may think about moving on to a more visually interesting species of wood like walnut, cherry, or maple. You can make a food prep board from one type of wood, or combine them. Imagine a walnut board as the center and two cherry boards on either side. Once sanded smooth and finished with mineral oil, it would make a practical and lovely cutting board — and so much better than an ugly plastic one.