How To Fix Misaligned Cabinet Doors In A Few Simple Steps
We may receive a commission on purchases made from links.
Kitchen cabinet doors get a lot of use (and abuse). Have you ever thought about how many times a cabinet door gets opened and closed in its lifetime? As a professional woodworker, I have, and I'll tell you — that's a lot to admire about their durability. But it's not uncommon that cabinet doors become misaligned, which can make a homeowner question their purchases, even if they chose the most timeless cabinet style. How does this happen? And can that misalignment be corrected or are you out of luck?
If you have newer cabinets that feature cup hinges, often called Euro hinges, the answer is yes — you can fix it. Almost always. That said, do note that my recommendations here are specific to these cup hinges, which are very commonplace, but if you have a different type of hinge, my tips will not apply.
With that in mind, to get an overall sense of the problems your cabinet doors are facing, it's good to understand that they can be misaligned in a few different ways. First off, is the back of the cabinet door planar to the cabinet box? Is it same small distance from the box all around the perimeter of the door? Second, are the doors all adjusted to the same height? Do they align across the tops of the doors? And third, is there an even reveal — that is, the intentional space between edges — between the doors? Whichever one of these alignment issues you are facing, they can all be corrected using the adjustments built into the cup hinges.
What is a cup or Euro hinge, and do you have one?

Sometime after WWII, while Europe was rebuilding their industrial base, the 32mm cabinetry system came to be — with rows of pre-bored 32mm holes on the front and back edge of the panels. The system created standard box sizes, uniform hardware styles and mounting systems. It made cabinet making much more systematic and efficient. The 32mm system does a lot of things, but one of them was that it made frameless cabinets: That is, cabinets boxes without the traditional face frame. The challenge it brought with it was that traditional barrel or leaf-type hinges (the ones that mounted to the face frame) could not be used, so cup hinges (aka Euro hinges) were developed.
These cup hinges were a radical change from the prior status quo. Cup hinges consist of the hinge cup, the hinge, the hinge arm and the mounting plate. The hinge cup gets set into door by boring a 35mm hole (sometimes 26mm) and then securing it with two screws. The hinge plate is mounted to the cabinet box. Its mounting holes are 32mm apart to match the pre-bored panel holes.
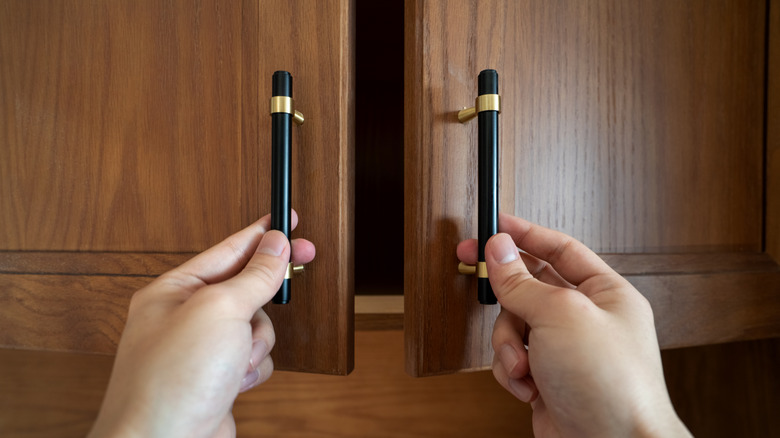
While designed to accommodate the 32mm system, cup hinges soon became a common feature on frameless cabinets in the US. They have a very distinctive look that's hard to misplace, so if your hinges match the picture above, then cup hinges are what you're dealing with. Their adjustability was a huge factor in their surging popularity, and these once-rare hinges grew to become the predominant type of hinge in modern cabinetry.
Here's how you adjust cup hinges on your cabinets
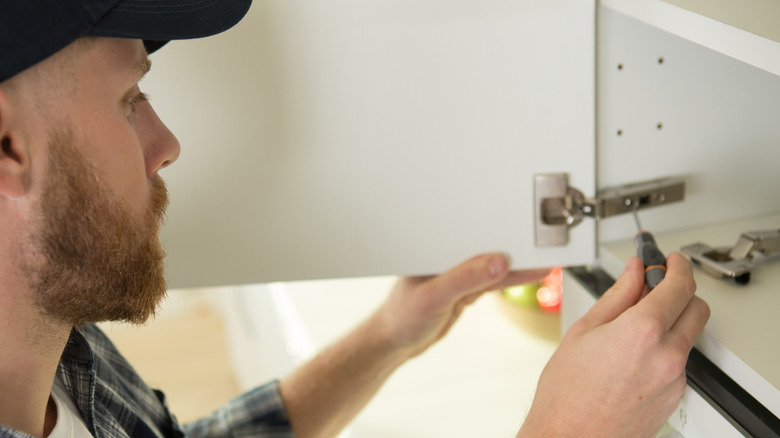
So, you've confirmed you have cup hinges. What's next? Let's look again at the adjustment options offered by cup hinges: Up and down, its relationship to the front edges of the door box, planar adjustment, and side to side (which will also correct if the door becomes out of square, with the top or the bottom tipped left or right). All of these adjustments are done by using a screwdriver. Now, I'll start by explaining the "up and down" adjustment, which is done on the mounting plate. To do this, back off the two screws that hold the plate to the drawer box, about a half a turn. Do this on all the hinges mounted to the door. When they are loose, you'll notice that you can lift the door up or let it down several millimeters. Push the door into the proper position, and then tighten all the screws.
To change the planar relationship, you'll go to the screw that is at the back of the hinge arm, closest to the back of the cabinet. Turn this screw and you'll observe the door moving forward and back in relationship to the cabinet box. Again, you'll need to adjust all of the hinges on the door. If there are only two, it is an easy task. If there are more, adjust each hinge a small amount at a time.
Lastly, to adjust the reveal between the doors, or how the outside edge of the door aligns with the edge of the cabinet (with full overlay doors), you'll turn the screw at the front of the hinge arm. And that's it! Pretty cool, right? That's the magic of cup hinges.
Before we wrap up, there are a few additional details about cup hinges you should know

I can almost hear some of you saying: "There are no stinking screws on the hinge arm." Not true! In fact, because you are adjusting existing cabinets, the hinge arms probably have a decorative clip snapped over the hinge arm to hide the screws. Pop it off and you can get busy.
There are a few things to consider as you are working on the hinges. If the adjustment screws turn, but nothing happens, you will likely need to replace that hinge. Find a matching hinge and simply swap it out. It can be a bit tricky to get a matching hinge sometimes, but woodworking specialty stores or websites are your best bet. The good news is that it is exceedingly rare for a hinge to fail.
A couple more points. There is a new generation of cup hinges that sport cool new features like soft close or even self-closing. With just a bit of research to match the old hinges, it would be possible to swap out your existing hinges with the fancier new ones (self-closing doors are handy for homes with teenagers, for instance). And meanwhile, if you don't have cup hinges but have made it this far wondering if there's a way to swap out your less-useful barrel or leaf hinges for nicely adjustable cup hinges ... yes, but it's no small job. Some cabinet door styles will need to be outright replaced, as well. In my mind, though, it's a change worth the hassle.