How To DIY Soundproof Your Home Studio With Fabric Walls
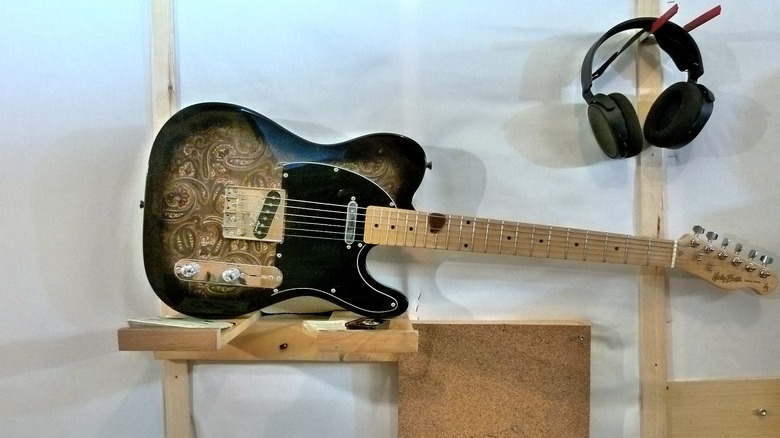
If you've been around amateur recording for more than an afternoon, you've seen some sketchy vocal booths. My amateur recording setup is no different. In one corner, a couple of moving blankets hang from IKEA DIGNITET curtain wire to dampen sound on two sides. But on the other two sides — and, indeed, on all the other interior walls — something truly odd is going on. They're just walls, but the walls are made of cloth. If you push on them a little, you discover that there's padding beneath the fabric. If you push a little more firmly, I'll start yelling, and you can see what the fabric and padding are for: Sound absorption.
Rooms in a typical house (to say nothing of a converted utility shed like I'm using) are not great for recording. Sound bounces off hard surfaces at varying distances and creates unwanted, unmanageable reverberations that color your recordings in ways you can't fix digitally. Sometimes it's not a big deal, and sometimes it's truly terrible. In my already drastically overcrowded space, I didn't want to struggle with acoustic panels or bass traps, and decided to handle it a little differently — that is, I turned the walls themselves into acoustic panels.
Sound-absorbing panels are the foundation of acoustic room treatment, and DIYers can easily make them with wood frames covered by acoustically transparent fabric and filled with something like mineral wool insulation. This is, essentially, what I did, only I turned the walls themselves into the wooden frames. Let me walk you through my process so you can replicate it, if your needs and space are similar to mine — or, on the other hand, know why your needs might not match this particular project.
What I aimed to accomplish with my fabric walled home studio
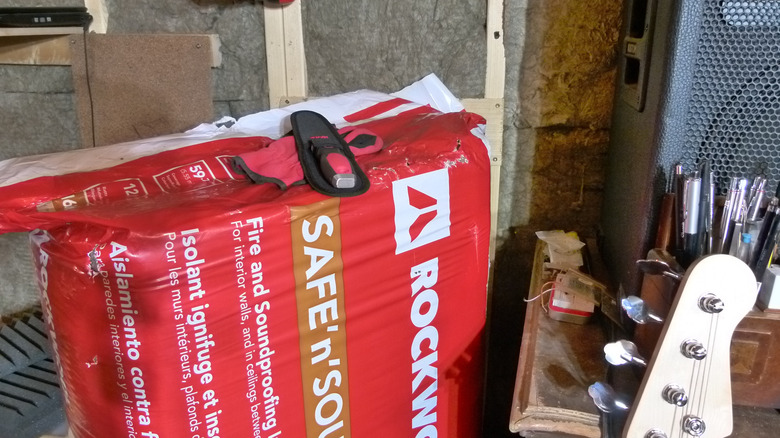
Fabric walls covering sound-dampening material are pretty common in theaters and recording studio setups. Sound treatment is often a process of stopping or diffusing sound reflections, a cause into which I was drafting entire walls. My walls of choice were those of a prefab 8x12 storage building, which I'd been outfitting as a home recording studio in my free time for about two years. That outfitting consists of running a couple of electric circuits and a shocking amount of audio cabling for balanced three-pin XLR and unbalanced TRS jacks installed throughout the building in a failed attempt to keep mic and guitar cables off the floor. My insulation of choice was Rockwool Safe 'n' Sound fire and soundproof insulation, a common choice for soundproofing walls.
My cloth wallcovering of choice tells a story about my initial ignorance of the whole topic. My original plan was to use landscaping fabric (which is also, it turns out, not an original idea of mine) because it's fairly acoustically transparent. What does that mean? Well, it means that sound moves freely through it and into the insulation, which should absorb a good bit of it. And that would have been a decent plan... except that it's also okay to use sound-absorbing fabrics, and it turns out that I have many natural cotton fabrics that absorb sound nicely, at least in the higher frequencies.
On the theory that cotton walls would look better and probably hold up better than landscaping cloth walls, I went with a bolt of near-white lightweight cotton canvas.
Installing acoustically absorbent insulation in your DIY home studio
There's a lot going on in the 16-inches-on-center stud bays in this little building, which naturally made installing insulation an adventure.Remember the part about all the cable in the walls? It's all somewhat organized, but there's a lot of it, and it typically terminates in these modular junction boxes of my own devising that can contain several combinations of balanced and unbalanced audio connectors. These junction boxes are quite large, occupying 11x4.5-inch four-gang commercial steel wall boxes, and are covered with ¼-inch plywood that would look a lot less seventies if I could find the time to paint it.
Rockwood Safe 'n' Sound, a mineral wool batt insulation, is a bit more pleasant to work with than fiberglass, except that it's fairly dusty and a bit fragile. For all that, the installation procedure is essentially the same as for any other batt insulation; Cut the batts to length, secure them in the stud bays with wire insulation supports if necessary, and move on to the next bay. Because there's so much cable, I often split the insulation into two layers, sandwiching the audio cable. (Electrical cable, on the other hand, stays on one side or the other of the insulation batt, since burying electrical cables in thermal insulation isn't a great idea). When arriving at the various electrical and audio termination boxes, I simply cut bits of the Rockwool to fit around the boxes, mostly held in place by friction.
Securing the fabric walls for your DIY home studio
The building is framed with standard 16-inches-on-center stud spacing, so four-foot-wide bolts of cloth (or landscaping fabric, for that matter) perfectly span three stud bays from the center of a stud to the center of the third one to either side (just as a sheet of plywood or 4x8 sheet of drywall does if installed vertically). It looks best to stretch the fabric taut across the studs and from the top to bottom plates, but I couldn't get it quite perfect in a few places. How you go about it depends on whether you're planning to cover the seams (and therefore the staples) with any sort of trim.
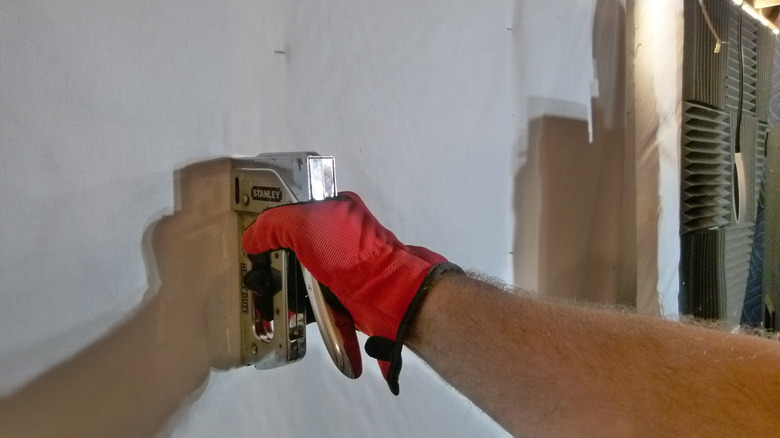
I opted for the trim — also called "battens" — to keep things looking neat, so I stapled without the batten tape. I mostly used a heavy-duty manual stapler, but a hammer tacker or pneumatic stapler would save your from squeezing a heavy-duty staple gun hundreds of times. Tack the fabric along one side starting at the top, making sure to get it as straight as possible. Then tack along the top starting from the same point, pulling it taut as you go. Stretch the fabric to the opposite corner from where you started and make sure everything looks lined up and tight, then drive a few staples in that corner. Finally, fill in the staples along the remaining side and along the bottom plate, while pulling the fabric tight.
Cutting around electrical boxes for your soundproof walls

I've looked at a bunch of ways to trim fabric out around electrical boxes and the like. Professional fabric panel systems like FabricMate instruct you to stretch the fabric over the area, then cut out your switches and receptacles as close as possible, often with fabric overlapping electrical boxes. Sure, this works, but...
Personally? I'm deeply uncomfortable with anything combustible that's not supposed to be in an electrical box getting between the cover plate and the box, and I have only found one reliable way to keep tension on the fabric while keeping the material away from the electrical boxes: Frame out each outlet with wood, on all four sides if possible. It doesn't have to be done with dimensional lumber like 2x4s (which would often be impossible anyway in a 2x4 stud wall because wires will need to enter the junction box from at least one direction).
Your solution depends on your circumstance, perhaps for each box. I occasionally put nailers (or, I suppose, "staplers" in this case) around each box by adding one above and one below the box, secured to the two nearest studs. The electrical box should already be attached to a stud on one side, so then you must just add a second side between the two horizontal nailers you just put in place. Where I couldn't use a 2x4 cutoff, I bridged the studs as best I could with 1x3 furring strips. I brad-nailed them into place, but glue would work fine. These additional bits aren't structural; they only serve to give you something to attach your fabric to.
Dressing your DIY soundproofed center

When it comes time to cover your staples, you can expect to use battens of roughly 1.5-inch width... the same as the thickness of wall studs. It's possible to use something thinner if you've been extraordinarily careful with your fabric alignment, cutting, and stapling, but acoustically, it's not worth the trouble.
You'll need trim, furring, or some other material to cover the studs, the bottom plate, and the top plate's row of staples, depending on how your room and how its ceiling are framed. Normally, your battens should double nicely as trim. I simply cut strips about a quarter of an inch thick from 2x4s, and first installed them on the bottom and top. I then cut the vertical battens to length and secured them with brads. I just covered the seams between pieces of fabric, but I'll probably go back and add battens to cover the staples on the other studs as well. You can fill the brad holes and finish or paint as you see fit; I didn't bother. Believe me, my son's energetic drumming is going to make all the impression on the neighbors that I care to think about, even with sound absorption.
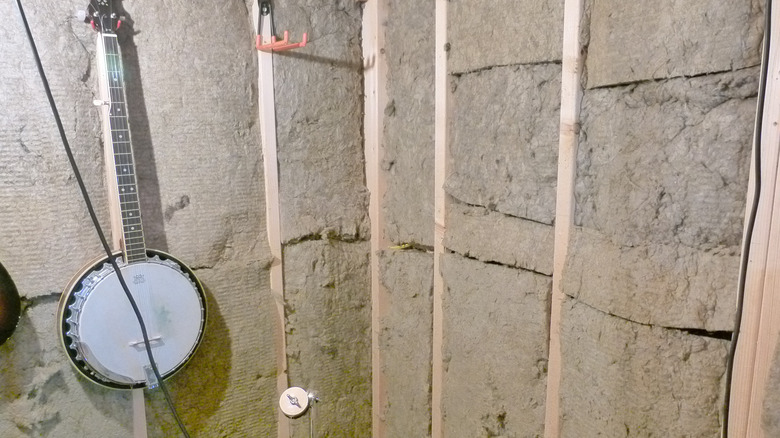
In some cases, fabric walls themselves be sufficiently dressed up, as when you hang fabric to hide unfinished basement walls. That said, fabric alone won't do much for sound abatement. Decoration, in this case, is just decoration.
Will this approach work for your DIY home studio?

For what it's worth, this project involves — most likely — making a new addition to your house, or using a shed, as opposed to modifying an existing room of the house. That's because this approach requires replacing drywall with cloth, and not everyone's keen on destroying perfectly good walls. However, a very small room like my studio (and perhaps yours) has some characteristics that make the fabric walls approach attractive. Because this is a recording and mixing room rather than a listening room, dead sound isn't a problem for me, so there's no real need to preserve reverb or play around with sound diffusion. From my perspective, damping as much sound reflection as possible is the best outcome.
If you want to follow my path, you should also carefully consider the costs and benefits. Your results are likely to be sonically unpredictable (more on that in a bit). If any dimension your space is approaching the absolute minimum of around 6 feet, acoustic insulation and fabric-covered walls might be worth a shot.
Living with fabric walls is probably strange. You must not lean things, including yourself, against walls. And when you hang things, such as instruments or any of the many other things every music lover needs in their home, you must hang them from studs. I also don't look forward to cleaning sticky handprints off of the cloth.
Understand your specific soundproofing needs before you embark on your DIY studio project
I attempted to get a read on the acoustics of the studio with software called Room EQ Wizard (REW) and a Behringer ECM8000 measurement microphone, which I ordered to get an accurate read on sound in the room before and after my sound-absorbent wall installation. The result was so chaotic that I dug into it more and discovered that measurement really isn't practical in such a small space. Small rooms are prone to standing waves (and wave cancellation) in the bass frequencies, and they often don't have the required two feet or so around the room for effective acoustic treatment, in which case your best bet is attempting to achieve frequency balance by manipulating speaker placement and listening position.
And therein lies a lesson about home studio sound treatments, especially for very small rooms. Whatever you do will have an effect... whether it's the traditional moving blanket vocal booth or weird fabric-covered, sound-absorbing walls. Every little bit helps, and the sound is certainly deader in my little studio room than before.
Your mileage may vary. If you have the room, you might be able to accomplish everything you want with traditional acoustical treatments like diffusers, bass traps, and sound-absorbing panels that attach to your walls. Due to my preexisting setup, I didn't have to remove drywall or get a building permit or contend with an unenthusiastic spouse. And therein lies the other lesson about this project: If you want to do things like tear down walls and glue oddly shaped diffusers all over the place, marry a singer.